Home >System Tutorial >Windows Series >How to roll back win10 version files in detail
How to roll back win10 version files in detail
- WBOYWBOYWBOYWBOYWBOYWBOYWBOYWBOYWBOYWBOYWBOYWBOYWBforward
- 2024-01-04 08:07:081110browse
When we use the win10 system, some users do not like it or are not used to the operation after updating the version, so they want to return to the previous version. So today I will tell you how to roll back to the previous version.
How to roll back files in win10 version:
ps: To roll back files in win10 version, you need to turn on the file history in advance. If it is not turned on, the file cannot be rolled back.
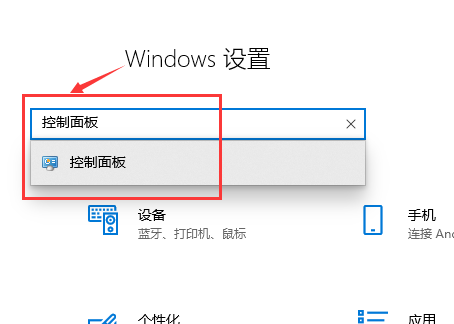
1. Use the shortcut "win i" to open settings, find "Control Panel" in the search box and click to enter.
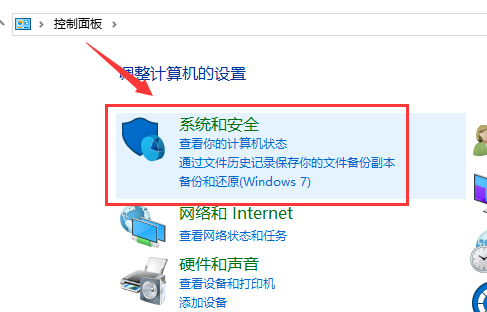
2. In the "Control Panel", find "System and Security" and click to enter.
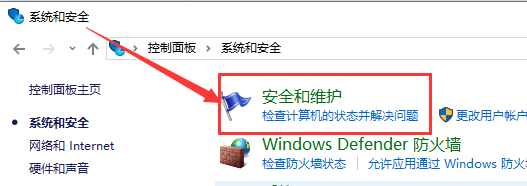
3. Enter "System and Security" and click "Security and Maintenance".
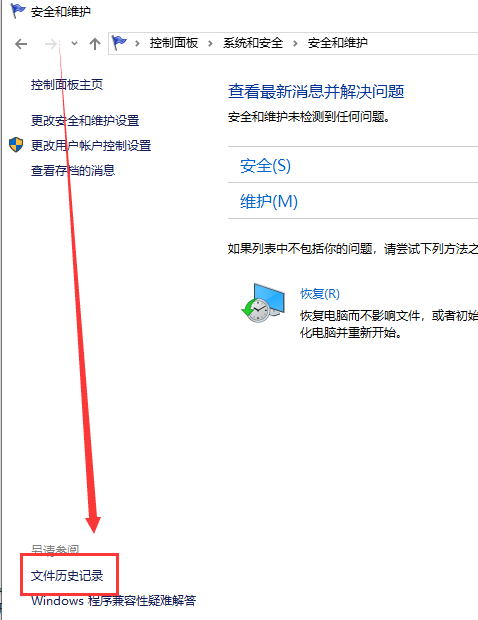
4. In "Security and Maintenance", find "File History" and click to enter.
5. The function of retaining file history is turned off by default. It needs to be turned on. Click to enable it.
ps: The U disk must be inserted in advance. After connecting, click Open again, and the system files will be automatically saved to the USB flash drive or mobile device.
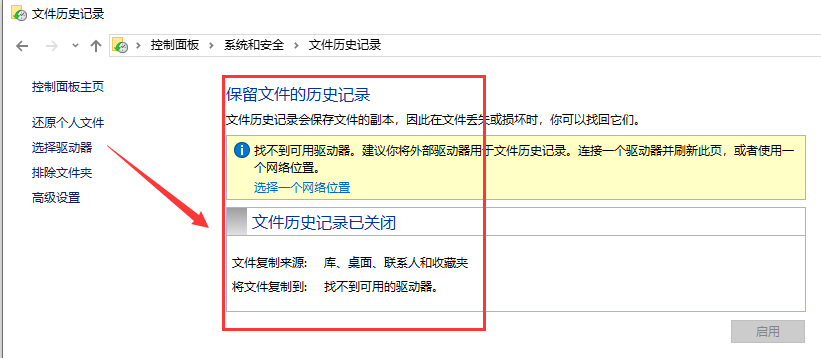
The file backup function can automatically back up "library, desktop, favorites, contacts" and other contents, so you can place important files in the above folders.
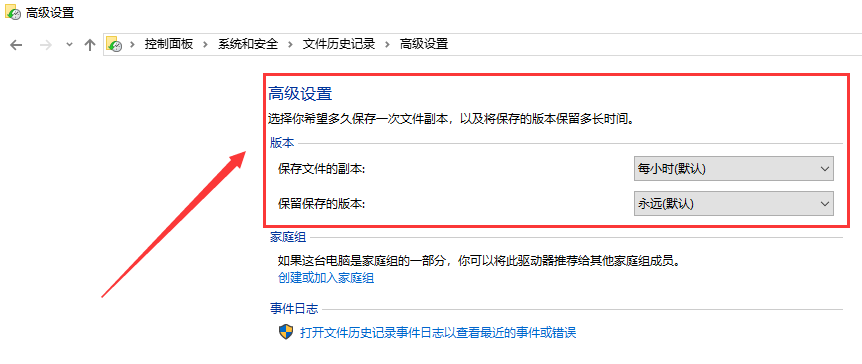
In addition, you can also set the "save frequency" or "save file interval" in the advanced settings on the left. You can choose according to your personal situation.
The above is the detailed content of How to roll back win10 version files in detail. For more information, please follow other related articles on the PHP Chinese website!
Related articles
See more- How to cancel icon pinning in Windows 11_How to cancel icon pinning in Windows 11
- How to enable quick startup in win10 How to enable fast startup in win10
- How to delete old password information in win11 How to delete old password information in win11
- How to solve the problem of plugging in headphones and still playing music in win10?
- What should I do if the win11 controller is successfully connected but cannot control the game?

