Home > Article > System Tutorial > How to set up win7 file sharing in LAN
When we use the win7 system, sometimes we may encounter the need to share folders in the LAN. So for the question of how to set up win7 file LAN sharing, I think we can find the option to change the advanced sharing settings in the system's network, and then make the relevant settings in the page that opens. Let’s take a look at how the editor did it for detailed steps~
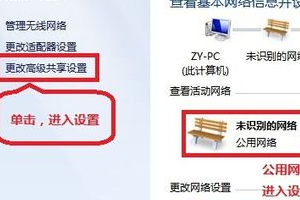
##How to set up win7 file LAN sharing1. Right-click the desktop network----Properties----Change advanced sharing settings(Note: View the current network such as: home network, public network, etc.!) "This is a public network"
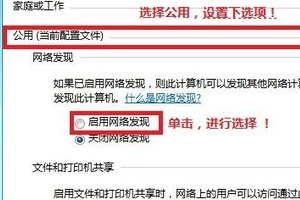
2. Select the public network---select the following options: Start network discovery------Start file and printer sharing-----Enable sharing so that users with network access can read and write files in the public folder (can be left unchecked)----Turn off password-protected sharing (Note: Other options are fine by default!)
3. Select the folder to be shared (for example: DY), right-click - Properties
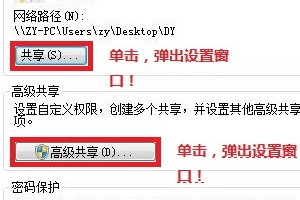
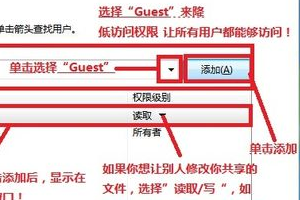
4. Sharing----Select Sharing(S)...---Pop up dialog box---Add "Guest" (Note: Selecting "Guest" is to reduce permissions so that all users can Can access!) ---Share
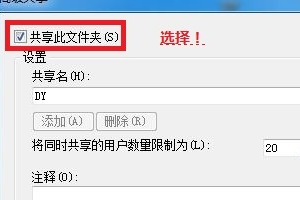
5. Select Advanced Sharing... ----Select to share this file----OK!
6. Other users can access your shared files through Start---Run---\\IP (shortcut key WIN R)\\IP!
More win7 system related information: >>>Quick understanding of win7 system version##> >>Is it free to upgrade win7 to win10 in 2020
>>>Which website’s win7 system is more stable
>>>Which company makes win7 system easy to use
>>>U disk download win7 system
The above is the detailed content of How to set up win7 file sharing in LAN. For more information, please follow other related articles on the PHP Chinese website!