Home >System Tutorial >LINUX >Preparing to install Linux configuration
Preparing to install Linux configuration
- PHPzforward
- 2024-01-03 18:19:58647browse
| Introduction | I have been using Linux for some years. I've been lucky enough to watch open source evolve over the years. The installation efforts of various distributions are also a unique part of it. Previously, installing Linux was a task best left to a skilled person. Now, as long as you can install software, you can install Linux. It’s simple and, not to brag, extremely effective at attracting new users. In fact, installing the entire Linux operating system seems to be faster than installing an update for Windows users. |
Every time I try a new operating system, I always look forward to discovering something different that will allow me to experience a new feeling. And NixOS is really different in this regard. To be honest, at first I just thought of it as a Linux distribution offering standard features and a KDE Plasma 5 interface.
There doesn’t seem to be anything wrong.
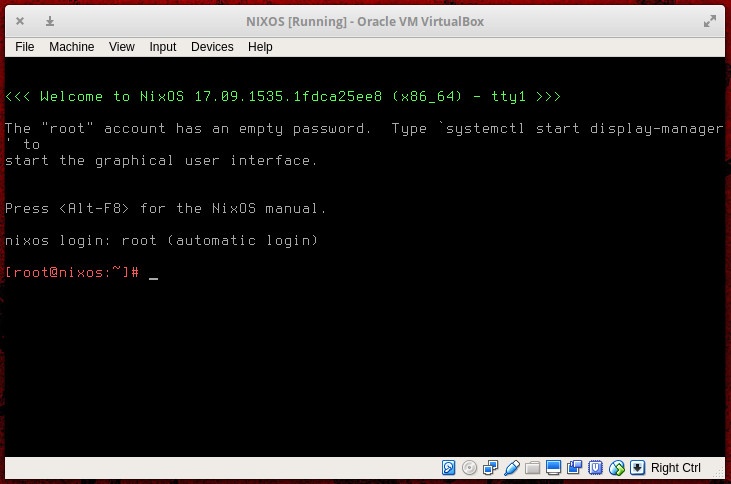
After downloading the ISO image, I started VirtualBox and created a new virtual machine using the downloaded image. After the VM started, the Bash login interface came out. The interface guided me to log in to the root account with a blank password and how to start the GUI display manager (Figure 1).

Figure 1: The first contact with NixOS may not be too harmonious.
"Okay" I thought, "open it and take a look!"
When the GUI is up and running (KDE Plasma 5), I don't find the "Install" button that I love to see. It turns out that NixOS is a distribution that requires you to configure it before installation, which is really interesting. So let’s see how it’s done!
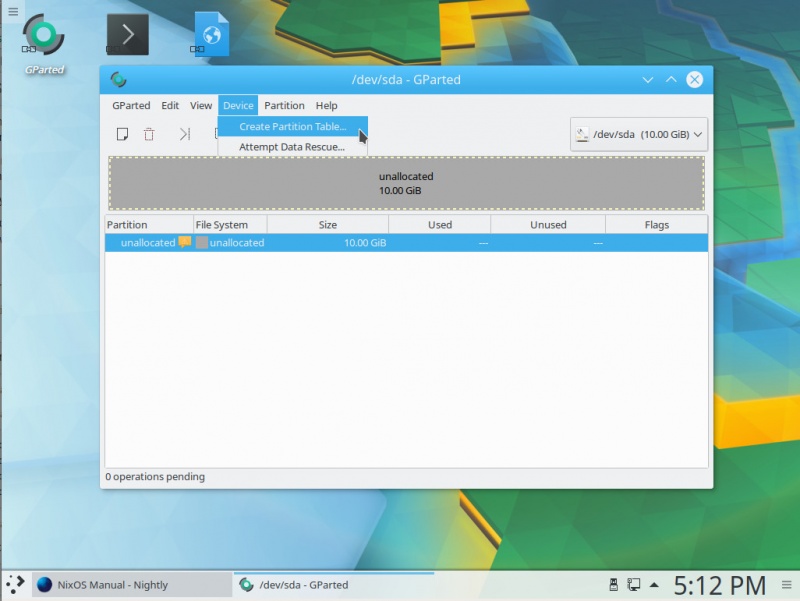
The first thing you need to do is create a partition. Since the NixOS installer does not include a partitioning tool, you have to use the included GParted (Figure 2) to create an EXT4 partition.

Figure 2: Partition the disk before installation.
Create the partition and then mount it with the command mount /dev/sdX /mnt. (Please replace sdX with your newly created partition).
You now need to create a configuration file. The command is as follows:
nixos-generate-config --root /mnt
The above command will create two files (stored in the directory /mnt/etc/nixos):
- configuration.nix — Default configuration file.
- hardware-configuration.nix — Hardware configuration (cannot be edited)
Open the file via the command nano /mnt/etc/nixos/configuration.nix. There are some edits that need to be noted. The first change is to set the startup options. Line found:
# boot.loader.grub.device = "/dev/sda"; # 或 efi 时用 "nodev"
Remove the # at the beginning of the line to enable this option (make sure /dev/sda is the same as your new partition).
Through the configuration file, you can set the time zone and append software packages to be installed. Let’s look at an example of a commented out installation package:
# List packages installed in system profile. To search by name, run:
# nix-env -aqP | grep wget
# environment.systemPackages = with pkgs; [
# wget vim
# ];
If you want to add packages and install them during installation, uncomment this and add the packages you need. For example, let's say you want to add LibreOffice. See examples below:
# List packages installed in system profile. To search by name, run:
nix-env -aqP | grep wget
environment.systemPackages = with pkgs; [
libreoffice wget vim
];
You can find the exact package name by entering the command nix-env -aqP | grep PACKAGENAME (PACKAGENAME is the package you want to find). If you don't want to type commands, you can also search the NixOS package database.
After you have added all the packages, you still have something to do (if you want to log in to the desktop, I think you will have to mess with the KDE Plasma 5 desktop). Go to the end of the configuration file and append the following content before the last } symbol:
services.xserver = {
enable = true;
displayManager.sddm.enable = true;
desktopManager.plasma5.enable = true;
};
In the official NixOS documentation, you can find more options in the configuration file. Save and close the configuration file.
InstallAfter you complete the configuration according to your needs, use the command (requires root permissions) nixos-install. The time required to complete the installation will vary depending on the number of software packages you add. After the installation is complete, you can use the command to restart the system. (After restarting) you will be greeted by the login management interface of KDE Plasma 5 (Figure 3).

Figure 3: KDE Plasma 5 login management interface
After installationOne of the first two things you need to do is to set a password for the root user (change the default password by entering the command passwd), and add a standard user. The method is the same as other Linux distributions. Log in as the root user and enter the command in the terminal:
useradd -m USER
Replace USER with the username you want to add. Then set a password for the user through the following command:
passwd USER
Similarly replace USER with the user you added.
Then there will be a prompt to guide you to fill in and verify the new password. Then, you can log in to NixOS as a standard user.
NixOS After you have it installed and running, you can add new packages to the system, but not in the usual way. If you find that you need to install something new, you have to go back to the configuration file (the location is /etc/nixos/), find the location where you added the package during the previous installation, and run the following command (root privileges are required):
nixos-rebuild switch
After the command execution is completed, you can use the newly installed software package.
Enjoy NixOSNow, NixOS is up and running with all the software you want to install and the KDE Plasma 5 desktop. You know, what you do is not just install a Linux distribution, the key is that the distribution you customize fits your needs very well. So enjoy your NixOS!
The above is the detailed content of Preparing to install Linux configuration. For more information, please follow other related articles on the PHP Chinese website!

