

 Computer TutorialsComputer KnowledgeWhat is the number of pins in the Antec 650 power supply motherboard cable interface? (Antec 650 power supply wiring diagram)
What is the number of pins in the Antec 650 power supply motherboard cable interface? (Antec 650 power supply wiring diagram)

How many pins does the Antec 650w motherboard cable have?

The power cable of the Antec 650W power supply motherboard is usually 24 pins, which is the largest power interface on the motherboard. Its function is to connect the motherboard and power supply to provide power to the motherboard and other system components. In addition, the Antec 650W power supply may also include other types of power interfaces, such as CPU 8pin, PCIe 6 2pin, etc., for connecting other components such as the CPU and independent graphics cards.
Motherboard wiring tutorial

Motherboard wiring refers to the process of connecting the circuits between various electronic components when designing the motherboard. In this process, factors such as circuit stability, signal transmission speed and accuracy need to be considered.
When routing according to the circuit diagram, pay attention to the layout and select appropriate line width and distance to avoid interference and crossover. In addition, the number of layers and layout of the circuit board, as well as the layering and distribution of signals need to be considered. Wiring skills and experience play an important role in the performance and reliability of your motherboard.
Motherboard wiring is the process of connecting the circuits between various components on the computer motherboard (such as CPU, memory, graphics card, hard disk, etc.). Here are the steps for a simple motherboard wiring tutorial: 1. First, prepare the components that need to be connected, including CPU, memory, graphics card, hard disk, etc. 2. Find the corresponding slot on the motherboard and insert the component into the corresponding slot according to the interface type. 3. Make sure it is inserted correctly and there is full contact between the plug and the socket. 4. Use the data cable to connect the component to the motherboard. The connection methods of different components may be different. You can make the correct connection according to the instruction manual of the component. 5. For some components, additional power cords may be required for connection. Make sure the power cord matches the motherboard and component connectors exactly and is securely connected. 6. Check that all connections are tight and make sure nothing is loose. 7. After completing the wiring of the motherboard, install the motherboard into the computer case and make sure it is securely fixed. 8. Finally, plug the power cord into the power socket and connect the motherboard to peripherals such as a monitor, keyboard, and mouse. By following the above steps for motherboard wiring, you can ensure that the various components of your computer can work properly and that data transmission is stable and reliable. At the same time, pay attention to following safe operating practices, ensure that the power is disconnected when wiring the motherboard, and avoid static electricity and other factors that may cause damage to the circuit.
Before wiring the motherboard, make sure you have correctly installed all necessary hardware components, such as CPU, memory, graphics card, etc., and inserted them into the motherboard's slots. Also, make sure both the plug-in and the connector are tightly connected to avoid electrical problems.
First, we need to make sure the power connection is correct. First, connect the power supply unit (PSU) to the appropriate slot on the motherboard. There are two main connectors to note here: one is the 24-pin or 20-pin power connector on the motherboard, and the other is the 8-pin or 4-pin CPU power connector. Please ensure that these connectors are correctly inserted into the corresponding slots to ensure stable and normal operation of the power supply.
3. Connect data cables: Next, connect data cables (such as SATA data cables and data cables) to connect hard drives, optical drives, etc. to the appropriate slots on the motherboard. Make sure the data cable plug is properly inserted into the corresponding slot on the drive and motherboard.
4. Connect the front panel cables: Connect the computer's power button, reset button, LED light and other interfaces to the appropriate slots on the motherboard by connecting the front panel cables. The socket for the front panel cable is usually located on the bottom or side of the motherboard.
When connecting the expansion card, please make sure to correctly insert the expansion card (such as graphics card, sound card, etc.) into the corresponding slot on the motherboard and secure it with screws. This ensures that the expansion card will work properly.
6. Connection check: After completing all connections, be sure to carefully check whether each connection is firm and correct. Make sure the plug is inserted into the slot correctly and not in the wrong position.
This is a general guide on motherboard routing steps. However, please note that the exact routing steps and slot locations may vary between different motherboard models. Therefore, it is highly recommended that you refer to your motherboard's user manual or contact the manufacturer or technical support team for accurate routing guidelines.
Mainboard routing refers to the process of arranging the connection lines between various electronic components on the motherboard. First, the location and connection of components need to be determined based on the circuit design drawing.
According to the requirements of signal transmission, we need to arrange the wiring paths reasonably to avoid interference and cross-interference. At the same time, we also need to consider the signal transmission speed and electromagnetic compatibility. During the wiring process, we must pay special attention to the separation of signal lines and power lines to avoid mutual interference between them. In addition, we must also pay attention to the length and level of the traces to reduce the effects of signal attenuation and crosstalk.
Finally, we need to verify and optimize the wiring layout to ensure the stability and reliability of the circuit. This step is very important, it can help us discover possible problems and take appropriate measures to fix them. By verifying, we can ensure that the circuit is connected correctly and that there are no shorts or breaks. At the same time, optimizing the wiring layout can improve the performance and reliability of the circuit and reduce signal interference and power consumption. During the verification and optimization process, we need to carefully check each trace to ensure that it meets the design requirements and make necessary adjustments and improvements. Through these steps, we can ensure the quality and performance of our circuits are at their best.
What cable is plugged into the motherboard panel?
The motherboard panel is used to connect various external devices. Common interfaces include the following: Power connector (used to connect the motherboard and power supply ), USB interface (used to connect USB devices, such as keyboard, mouse, U disk, etc.), audio interface (used to connect audio devices such as headphones, speakers, etc.), display interface (such as VGA, DVI, HDMI, etc., used to connect a monitor ), Ethernet interface (for connecting to the network), and other expansion slots (such as PCI, PCI-E for installing graphics cards, network cards and other hardware expansion devices). Through the connection of these interfaces, the motherboard can transmit and interact with various devices to realize the normal operation of the computer.
Panel is an interface used to connect the wires on the front panel of the chassis.
FPANEL is the abbreviation for FrontPanel, which is a double row of pins connected to the front panel. These pins are used to indicate where the circuits on the motherboard are connected.
3. Panel means panel. The pins marked panel are connected to the control (power\reset) and indicator wires (power light\hard disk light) of the chassis panel.
Sata 3-wire straight plug into the motherboard or elbow
Whether it is a straight plug or an elbow plug, it can be used on the motherboard. For SATA 3 plugs, whether to choose a straight plug or an angled plug depends on the position of the motherboard in the chassis. If the data cable plug will not affect the installation of other components on the motherboard, it is best to choose a data cable with a straight plug. But if the data cable plug is blocked by other components, such as a graphics card, then you can only choose a data cable with a curved plug. Therefore, the choice of plug shape should be determined according to the specific situation.
The above is the detailed content of What is the number of pins in the Antec 650 power supply motherboard cable interface? (Antec 650 power supply wiring diagram). For more information, please follow other related articles on the PHP Chinese website!

 Linux vs Mac: How to Install Linux on Mac - MiniToolMay 14, 2025 am 01:21 AM
What’s the difference between Linux and Mac? Do you want to install Linux on Mac? This post from php.cn will show you all. You can refer to this guide to dual boot Linux and macOS.
 What Is MHTML & What Are the Differences Between It and HTML - MiniToolMay 14, 2025 am 01:20 AM
What is MHTML? How to open or view it? What are the differences between it and HTML? How to convert MHTML to HTML? If you are looking for the answers to the above questions, you can refer to this post from php.cn.
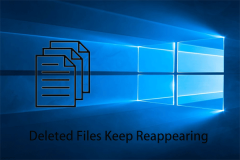 Solve Deleted Files Keep Reappearing in Windows 10 - MiniToolMay 14, 2025 am 01:19 AM
This article focuses on the topic that deleted files keep reappearing in Windows 10, introducing the responsible reasons and feasible solutions.
 How to Deactivate Windows 10/11 by Uninstalling Product Key - MiniToolMay 14, 2025 am 01:18 AM
This post teaches you how to deactivate Windows 10/11 by removing product key or license. You can use that product key to activate another computer later if you want. For more computer tips and tricks, you can visit php.cn Software official website.
 Instant Fixes for Error 0164: Memory Size DecreasedMay 14, 2025 am 01:15 AM
Some Windows users report that they are prompted by the error 0164 memory size decreased screen every time they boot the computer. What’s wrong with it? If you are in the same boat, congratulations! You’ve come to the right place! In this post from p
 Best Fixes: This Page Isn't Available Right Now on Facebook - MiniToolMay 14, 2025 am 01:11 AM
This Page Isn’t Available Right Now is an error message you may encounter when you visit Facebook using your web browser. In this php.cn post, we will list some effective methods you can try to get rid of this error.
 Windows 11 KB5010414 Was Released with Many New Features - MiniToolMay 14, 2025 am 01:09 AM
Windows 11 KB5010414, a new optional update for Windows 11, is available now. Do you know what’s new and fixes in it? php.cn Software will show you this information in this post. Besides, it also tells you how to download and install it on your compu
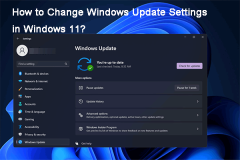 How to Change Windows Update Settings in Windows 11? - MiniToolMay 14, 2025 am 01:08 AM
Want to pause Windows Update on your Windows 11 computer? Want to set active hours to arrange a computer restart to complete the update process? You need to know how to change Windows Update settings in Windows 11. This php.cn post will show you the


Hot AI Tools

Undresser.AI Undress
AI-powered app for creating realistic nude photos

AI Clothes Remover
Online AI tool for removing clothes from photos.

Undress AI Tool
Undress images for free

Clothoff.io
AI clothes remover

Video Face Swap
Swap faces in any video effortlessly with our completely free AI face swap tool!

Hot Article
Hot Tools

Zend Studio 13.0.1
Powerful PHP integrated development environment

SublimeText3 Linux new version
SublimeText3 Linux latest version

SAP NetWeaver Server Adapter for Eclipse
Integrate Eclipse with SAP NetWeaver application server.

MinGW - Minimalist GNU for Windows
This project is in the process of being migrated to osdn.net/projects/mingw, you can continue to follow us there. MinGW: A native Windows port of the GNU Compiler Collection (GCC), freely distributable import libraries and header files for building native Windows applications; includes extensions to the MSVC runtime to support C99 functionality. All MinGW software can run on 64-bit Windows platforms.

DVWA
Damn Vulnerable Web App (DVWA) is a PHP/MySQL web application that is very vulnerable. Its main goals are to be an aid for security professionals to test their skills and tools in a legal environment, to help web developers better understand the process of securing web applications, and to help teachers/students teach/learn in a classroom environment Web application security. The goal of DVWA is to practice some of the most common web vulnerabilities through a simple and straightforward interface, with varying degrees of difficulty. Please note that this software

