Home >System Tutorial >Windows Series >How to manually add a wireless network connection in win7 system
How to manually add a wireless network connection in win7 system
- 王林forward
- 2024-01-02 14:50:091505browse
When we use a computer with win7 operating system installed, some friends may encounter a situation where there is no wireless network connection on the computer during some operations. For this situation, many people want to know how to manually add a wireless network connection in win7 system. So as far as the editor knows, we can find and change the adapter settings in the computer's properties to solve the problem. Let’s take a look at how the editor did it for detailed steps~


How to manually add a wireless network connection in win7 system
1. Enter the win7 desktop, right-click the network icon, and select Properties to open.
2. In the Network and Sharing Center interface, click "Change Adapter Configuration" on the left side of the interface and proceed to the next step.

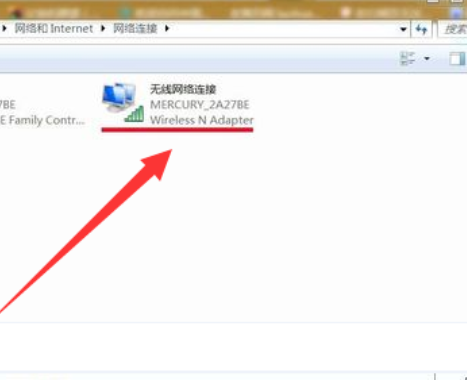
3. Double-click the "Wireless Network Connection Icon" in the opened interface to open it.

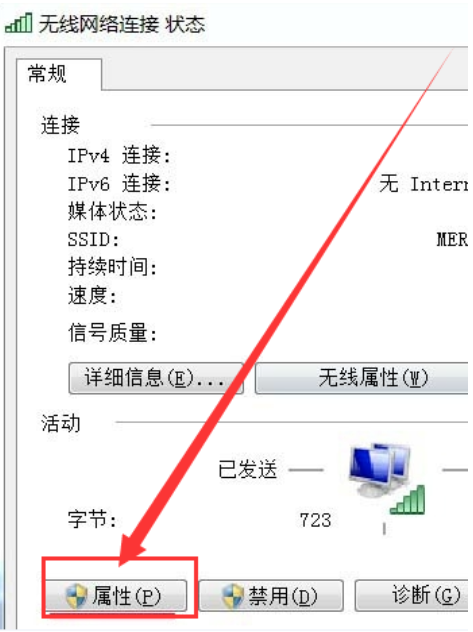
4. In the pop-up wireless network connection status window, click Properties to open it.

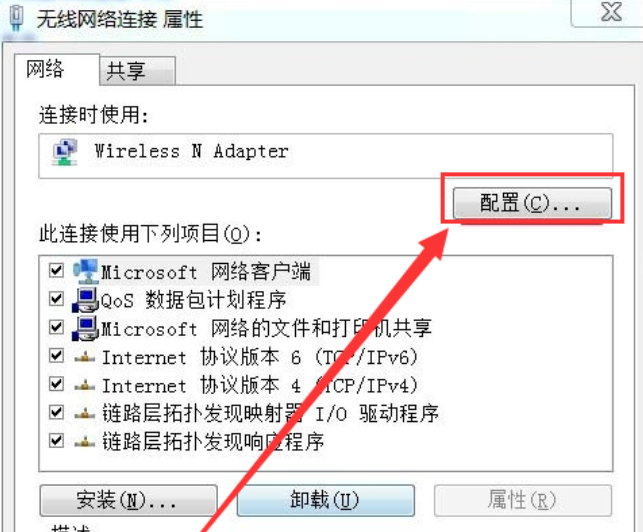
5. Then click the "Configure" button in the new interface to proceed to the next step.

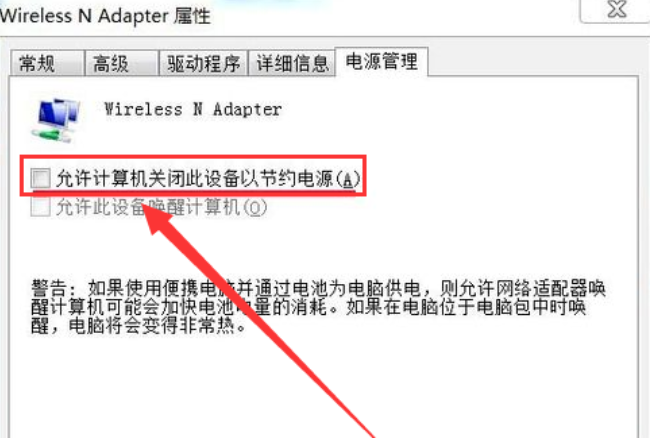
6. Uncheck "Allow the computer to turn off this device to save power" and click "OK".

More win7 network related information:
>>>The win7 system network connection is normal but cannot access the Internet
>>>How to solve the problem of exclamation mark displayed on win7 when surfing the Internet
>>>How to solve the problem of win7 when the wireless network is missing and unable to access the Internet
>>>What should I do if my laptop win7 network connection is not available
>>>What should I do if my win7 network connection is not available
The above is the detailed content of How to manually add a wireless network connection in win7 system. For more information, please follow other related articles on the PHP Chinese website!

