If we are connected to the same wifi network as our friends, we can quickly transfer files by setting up shared folders. So how to set up shared folders in win11? In fact, just turn on folder sharing.
How to set up a shared folder in win11:
1. First, right-click the folder and open "Properties"

2. Then open the last "Share" tab above.

3. Then click on "Advanced Sharing" below

4. After opening, check "Enable" Share this folder”

5. After opening, click the “Permissions” button below.

6. Then click "Add" and add the users who need to share.

7. Finally modify the sharing permissions and save it.

The above is the detailed content of Tutorial on setting up shared folders in win11. For more information, please follow other related articles on the PHP Chinese website!
 快速共享功能在三星手机上不起作用 – 修复Sep 19, 2023 pm 04:25 PM
快速共享可以节省三星用户在设备间传输文件的大量时间。但是三星Galaxy用户抱怨手机上的快速共享功能面临问题。通常,是快速共享中的可见性问题导致了此问题。因此,这是您对Galaxy设备上的快速共享功能进行故障排除所需的唯一指南。修复1–更改快速共享可见性设置切换手机上的快速共享可见性设置。快速共享可能设置为错误的设置,从而导致此问题。步骤1–首先,向上滑动一次以打开应用程序抽屉。步骤2–在那里,打开“设置”.第3步–进入“设置”页面,打开“连接的设备”选项卡。第4步–打开“快速共享”功能。步骤5
 如何在iPhone iOS 17上使用NameDropSep 22, 2023 pm 11:41 PM
随着新款苹果iPhone15系列手机的推出和最新的iOS17移动操作系统的推出,为苹果设备带来了丰富的新功能,调整和增强功能。用户可能想知道如何在iPhone和iOS17上使用新的NameDrop功能。本指南将简要概述如何使用iOS17上提供的新NameDrop系统快速有效地共享您的联系信息。NameDrop是一项功能,允许iPhone用户快速与他人共享他们的联系信息。它是社交活动、商务会议或社交聚会的便捷工具,您需要与新朋友交换联系方式。但是,请务必注意,NameDrop仅适用于发送新的联系人
 如何在iPhone上保护联系人照片和海报的隐私Sep 18, 2023 am 10:49 AM
谁可以在iPhone上查看您的联系人照片和海报?Apple提供了一些选项,用于个性化您在致电或发消息时在某人的iPhone上的显示方式。这些选项包括拟我表情、简单文本或带有效果的自定照片作为您的联系人照片和显示图像。您可以随时自由更改这些选择,并在联系人卡片上在不同配置文件之间转换。此外,Apple还使您能够控制谁可以在iOS17上查看和访问您选择的照片或显示图像。您可以决定与保存在联系人列表中的个人共享这些内容,也可以将iPhone设置为每次与联系人交互时提示您。如果您愿意,还可以永久禁用名称
 如何使用 AirDrop 邻近共享发送文件和照片:iOS 17的新功能Sep 16, 2023 am 10:17 AM
在iOS17中,Apple使共享文件和媒体比以往任何时候都更容易,这要归功于一个很酷的新AirDrop邻近感应功能,可以为您完成大部分工作。在以前版本的iOS中,在Apple设备之间传输文件或照片涉及打开相关文件、轻点“共享”按钮、选择AirDrop,然后选择要将文件发送到的附近设备。在iOS17和iPadOS17中,此过程仍然存在于Apple设备之间的共享,但是如果您要在iPhone或iPad之间传输,则可以使用AirDrop的新邻近感应功能来减少一些典型的共享步骤。要发起传输,请选择要与他人
 Win10系统更新后无法共享打印机如何解决Jul 07, 2023 am 09:25 AM
Win10系统更新后无法共享打印机如何解决?很多小伙伴反应说在更新到win10系统之后,就无法共享打印机了,这种情况是怎么回事呢,无法共享打印机对一些小伙伴来说是比较麻烦的一件事,如果你不知道如何解决,小编下面整理了Win10系统更新后无法共享打印机解决方法,感兴趣的话一起往下看看吧!Win10系统更新后无法共享打印机解决方法1、首先,按下“win+r”键打开运行窗口,输入“control”命令打开控制面板界面,如图所示;2、接着,在打开的控制面板界面中,找到并打开“卸载程序”选项,再点击左侧的
 Win7共享打印机出错0x0000011b极致处理Jul 09, 2023 pm 06:13 PM
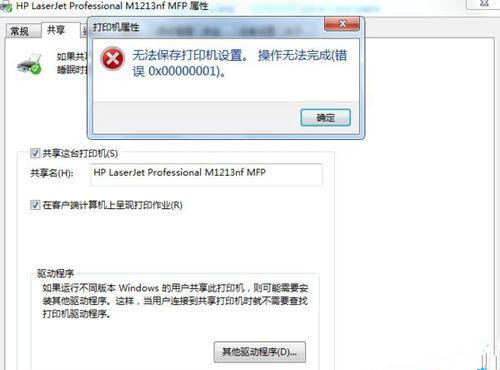
近期有许多win7客户在设定打印机共享时错误并提醒“无法保存打印机设置,实际操作没法进行(不正确0x00000001)”,客户因而没法打印出,那麼碰到这个问题怎么解决呢?一起来看一下解决方案。Win7共享打印机出错0x0000011b极致处理1、电脑键盘键盘快捷键徽标键Win+R键打开运行,在弹出来的运作框中键入【services.msc】明确开启服务窗口,查验这两个服务项目是不是已运行:PrintSpooler和WindowsFirewall一般Win7易出的不正确6d9是后边的服务项目未运行
 win7共享文件夹设置方法详解Jul 15, 2023 pm 10:53 PM
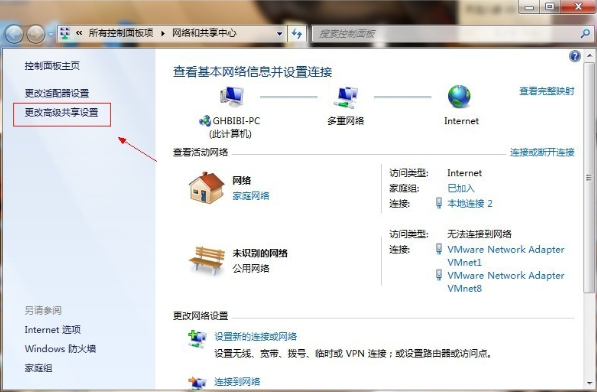
在同一个办公局域网内,设置共享文件夹可以更方便文件的传输和共享,提供办公效率。不过不同系统设置共享文件夹的方法会有不同,有网友不清楚win7如何设置共享文件夹。下面小编教下大家win7共享文件夹设置方法。具体步骤如下:1、首先开启guest账户,点击桌面右下角的网络,右键“属性”出现网络共享中心打开,按图操作。2、点击图中标出的位置“更改高级共享设置”出现如下界面。3、双击图中红圈内的位置,会出现一个列表,找到所示内容。4、点击“关闭密码保护共享”-“保存修改”结束。5、然后选择需要共享的磁盘分
 win11共享打印机设置Jan 11, 2024 pm 06:54 PM
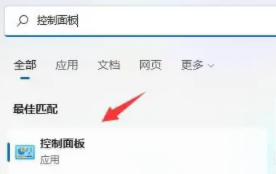
打印机也是可以实现共享了,我们可以一起共享同一台打印机,这样就可以一起打印了十分的方便,这些设置都是可以在控制面板中查看的,一起来看看吧。win11共享打印机设置:1、首先我们打开“设置”然后搜索控制面板并点击。2、接着点击“查看设备和打印机”。3、点击上方的“添加打印机”。4、然后系统就会进行一个自动扫描。5、最后搜索到了就可以进行连接了。阅读拓展:浏览器打不开


Hot AI Tools

Undresser.AI Undress
AI-powered app for creating realistic nude photos

AI Clothes Remover
Online AI tool for removing clothes from photos.

Undress AI Tool
Undress images for free

Clothoff.io
AI clothes remover

AI Hentai Generator
Generate AI Hentai for free.

Hot Article

Hot Tools

SublimeText3 Linux new version
SublimeText3 Linux latest version

WebStorm Mac version
Useful JavaScript development tools

Dreamweaver CS6
Visual web development tools

SAP NetWeaver Server Adapter for Eclipse
Integrate Eclipse with SAP NetWeaver application server.

SublimeText3 Chinese version
Chinese version, very easy to use


