


Deepin Technology System is a very exquisite and easy-to-use high-quality system. This system can help the majority of users to install and use it quickly. However, many users do not know how to install Deepin Technology System. So, How to install the deepin technology system, come and take a look at the detailed tutorial~
How to install the win7 deepin system:
1. First download the Ghost Win7 system to the local hard disk (download here on disk F).

2. Unzip the downloaded win7 system.

3. Unzipped folder contents.

4. Double-click "One-click installation system.EXE", select "C drive (C drive is the system disk)", and then click Execute, as shown in the figure:
ps: Before performing the installation, you must turn off anti-virus software such as 360, otherwise the installation will not work properly. (If the 360 anti-virus software is turned on, it will prompt that it is poisonous. The downloaded Ghost Win7 system software is safe and non-toxic, and users can use it with confidence.)

5. Select " After executing ", the computer will automatically restart, format the C drive, and restore the data.

6. After the data is restored, it will automatically restart and enter the driver installation interface.

7. After the driver installation is completed, restart again and enter the new Win7 system interface.

8. Enter the Win7 desktop, so that the steps to install the Win7 system on the local hard disk are completed.
The above is the detailed content of How to install Win7 deepin system. For more information, please follow other related articles on the PHP Chinese website!

 CentOS安装exe及CentOS安装方法详解Feb 10, 2024 pm 12:27 PM
CentOS是一种基于Linux的开源操作系统,广泛应用于服务器和桌面环境,在CentOS上安装exe文件是一种常见的需求,但由于CentOS是基于Linux的系统,无法直接运行Windows的可执行文件,有一些方法可以在CentOS上运行exe文件,本文将详细介绍CentOS上安装exe文件的方法,并提供CentOS的安装方法。CentOS安装exe方法1.使用Wine:Wine是一款能够在Linux系统上运行Windows程序的兼容层,您可以通过以下步骤在CentOS上安装Wine并运行ex
 Win11系统安装步骤详解Dec 25, 2023 pm 04:50 PM
如果一些朋友无法在windows更新中直接安装win11,那么还可以使用镜像版win11进行安装,但是很多朋友没有使用过镜像安装,不知道如何操作,其实方法非常简单,下面就跟着小编一起来看看吧。怎么安装镜像版win111、需要安装镜像版win11,首先当然需要下载一个win11镜像版系统。2、下载好了之后,找到下载位置,右键选中它,点击“装载”3、接着自动进入系统文件夹,然后运行其中的“setup”程序。4、等待安装程序运行完成,选择“windows11”系统。5、接着勾选下方同意相关的协议条款,
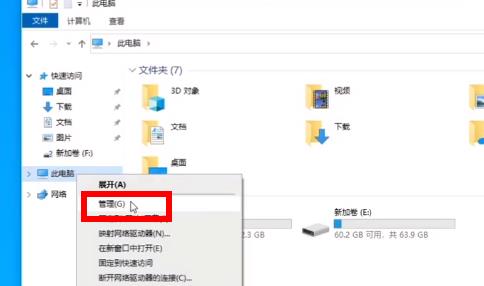 Win11安装教程:双系统电脑的安装步骤Jan 09, 2024 pm 12:41 PM
win11系统已经很多的用户进行了安装了,但是对于双系统电脑的用户还是很多没更新的,一是不知道怎么安装,二是担心安装之后影响双系统的使用,所以我们今天就带来了双系统电脑win11安装方法,快来一起试试吧。双系统电脑win11怎么安装:1、首先打开此电脑,然后右击此电脑选择,点击“管理”。2、然后点击“磁盘管理”右击新加卷,点击“压缩卷”。3、在空间量中输入“32768”点击压缩。4、随后点击“新建简单卷”。5、一路按下一步完成安装。6、随后点击“浏览”,加入win11系统。7、进入安装界面后点击
 如何安装盈通3060ti显卡驱动Jan 03, 2024 pm 11:26 PM
购买了盈通3060ti显卡的一些用户可能不清楚如何安装驱动程序。只需前往官方网站下载相应的驱动程序即可。现在让我们一起来看看盈通3060ti驱动程序的正确安装方法盈通3060ti驱动怎么安装首先,打开浏览器并搜索盈通官网在进入官网后,点击顶部菜单中的“产品中心”在这里选择你的显卡类型点击进入进入详情页后,点击“驱动下载”6、根据你的电脑系统,点击下载相应的驱动程序并进行安装即可7.下载文件后,找到文件并确认安装目录,然后点击“确认”安装完成后,即可开始使用
 如何在家庭版系统上安装Windows 10Dec 25, 2023 pm 07:49 PM
我们在使用计算机的时候,如果想对自己的win10系统进行重装或者是安装win10家庭版,小编觉得我们可以去本站下载相关的系统资源然后再进行安装即可。那么对于windows10家庭版系统怎么安装,也可以依靠第三方软件来进行操作即可。具体步骤就来看下小编是怎么做的吧~希望可以帮助到你。windows10家庭版系统怎么安装1.将电脑的硬盘模式设置为ahciahci硬盘模式怎么设置>>>2.制作一个u盘启动盘,这里以大白菜为例。3.下载你需要的win10系统。>>>win10家
 逐步指南:安装Lombok插件的详细步骤Jan 28, 2024 am 08:26 AM
一步步教你:Eclipse安装Lombok插件的详细方法,需要具体代码示例Lombok是一个在Java开发中非常实用的插件,可以极大地简化代码编写过程,提高开发效率。在Eclipse中安装Lombok插件可以让我们在开发过程中更好地使用Lombok提供的注解和功能。本文将详细介绍如何在Eclipse中安装Lombok插件并展示一些常用的代码示例。首先,我们需
 deb安装包怎么安装Feb 18, 2024 pm 12:02 PM
deb安装包是DebianLinux系统和基于Debian的发行版的软件包管理格式之一。以.deb为扩展名,使用dpkg工具进行安装和管理。下面将介绍deb安装包的安装方法,并提供具体的代码示例。一、通过apt-get安装deb包apt-get是Debian及其衍生版本中常用的软件包管理工具,可以方便地从各种源中安装软件包。使用apt-get安装deb包的
 Python中使用pip安装方法1分钟搞定Jan 16, 2024 am 10:42 AM
一分钟学会Python中pip的安装方法,需要具体代码示例在Python开发中,使用第三方库是非常常见的。而要下载和安装这些库,我们通常会使用pip来进行操作。pip是Python官方推荐的包管理工具,它能够帮助我们快速安装、卸载、更新和管理Python包。下面是一分钟学会Python中pip的安装方法,以及具体的代码示例:步骤一:检查pip是否已安装在终端


Hot AI Tools

Undresser.AI Undress
AI-powered app for creating realistic nude photos

AI Clothes Remover
Online AI tool for removing clothes from photos.

Undress AI Tool
Undress images for free

Clothoff.io
AI clothes remover

AI Hentai Generator
Generate AI Hentai for free.

Hot Article
Hot Tools

Dreamweaver CS6
Visual web development tools

WebStorm Mac version
Useful JavaScript development tools

Zend Studio 13.0.1
Powerful PHP integrated development environment

SAP NetWeaver Server Adapter for Eclipse
Integrate Eclipse with SAP NetWeaver application server.

Safe Exam Browser
Safe Exam Browser is a secure browser environment for taking online exams securely. This software turns any computer into a secure workstation. It controls access to any utility and prevents students from using unauthorized resources.

