


U disk reinstallation system can help users reinstall the system when the computer freezes, blue screen, black screen, or cannot boot. Many users don’t know how to install it, or they get confused after seeing the tutorial. It’s actually very simple. Just look at the detailed graphic steps to install a new and easy-to-use system on your computer. Let’s take a look at the detailed steps below. Bar.

Computer system installation video
U disk reinstallation system preparation work
Note: This The software used in the tutorial is completely free, green and non-toxic. Both desktop and laptop users can install the system according to the tutorial!
1. First prepare a U disk with a memory size of 8G or more, and then download the U disk creation tool to your computer. Insert the USB flash drive into the computer and follow the tool prompts to create a system USB flash drive.
2. Download the system you want to install and put the file in a USB flash drive. The system size is generally 3-7GB.
U disk reinstallation system into PE method
1. Restart the computer and press F12 when booting to enter the startup item selection. (Different computer models have different startup item buttons. Generally, the computer starts The keys are F8, F9, F11, F12, ESC)

2. Then use the direction keys to select the option where the U disk is located in the list. It will usually have the word USB or U Enter the brand name of the USB flash drive (Sandisk, Toshiba, etc.), and then press Enter to enter the PE menu selection interface of the USB flash drive.
Find the U disk to be booted and identify the UEFI and Legacy modes
The micro PEU disk supports two boot methods:
Legacy


3. Select a suitable WinPE system version to enter
Micro PEU disk supports multiple PE systems. You can choose on demand in the black or blue PE selection interface. The blue menu of legacy startup allows you to freely decide the PE system version and bit number 32-bit or 64-bit.
The black menu of UEFI startup has been The number of bits is automatically determined according to the machine, and you can only select the system version. 10PE and 8PE are the two most commonly used PEs at present. 10PE is used for newer machines, and 8PE is used for older machines.
If you are not sure, just choose the default Win10PEx64. The specific functional differences between 10PE, 8PE, 32-bit and 64-bit will be listed separately in subsequent tutorials. After selecting, hit Enter to officially enter the PE system.

If you can successfully enter this PE desktop and know whether you are entering legacy mode PE or UEFI mode PE (by selecting the PE version in the menu page The background is blue/black (OK), and the first step is completed. Although it may seem like only a small step has been completed now, it is a big step towards success.
Start partitioning after entering micro PE
Note! The partitioning tutorial will completely format the hard drive.
This partition method can reclassify the partition into GPT or MBR.
Be sure to back up your data before partitioning.
To perform this operation, you need to use professional partitioning tools. Here we recommend the partition assistant, which is relatively simple and intuitive. Open the "Partition Assistant (lossless)" on the PE desktop. You will see a list of your current hard drives.

Right-click on the hard disk that needs to be partitioned and select Quick Partition.

In the pop-up quick partition window, select the number of partitions required, partition table type GPT or MBR, 4K alignment, etc., and then click to start execution.
Note:
If you need to use UEFI to boot the system, you must select the GPT partition table here. If you use Legacy mode to boot the computer, you must select MBR here.

Wait for the partition operation to be completed after the execution is completed.
U disk reinstallation system process
1. Directly open the system with the U disk to start the one-click smart installation.


#3. Ghost is restoring computer system settings, please wait patiently.

4. Then the system will automatically install the driver for the users, and no operation is required during the whole process. (Install the necessary drivers for users to prevent the system from being unable to be used normally after the system is installed successfully.)

5. After the system is installed, restart and it can be used normally. .

The above is the detailed content of Reinstalling the system from USB disk. For more information, please follow other related articles on the PHP Chinese website!

 手机内屏出现彩色条纹?教你自己修复!(手机内屏彩色条纹问题解决方案及实用技巧)Feb 02, 2024 pm 06:00 PM
有时我们可能会遇到手机内屏出现彩色条纹的问题,随着手机的普及和使用。还可能会导致屏幕显示异常或完全无法使用,这不仅影响了我们正常使用手机的体验。我们是否可以自己修复呢,面对这样的问题?帮助您自己修复手机内屏的彩色条纹问题,本文将为大家分享一些解决方案和实用技巧。一:检查连接线是否松动首先需要拆开手机、确保连接紧密,检查手机内屏连接线是否松动,并小心地将连接线插头重新连接到相应的插槽上。二:清洁内屏表面清除可能导致彩色条纹的污垢或灰尘,使用专业的手机清洁液或者螺丝刀平口靠胶粘性较强的瞬间胶以及纸巾
 如何解决Win11验证凭据失败的问题?Jan 30, 2024 pm 02:03 PM
有win11用户在使用凭据登录时,收到的却是您的凭据无法验证的错误提示,这是怎么回事?小编调查此问题后,发现可能有几种不同的情况直接或者间接导致该问题,下面就和小编一起来看看吧。
 windows7系统注册表文件遗失或损坏怎么办Jul 08, 2023 pm 05:29 PM
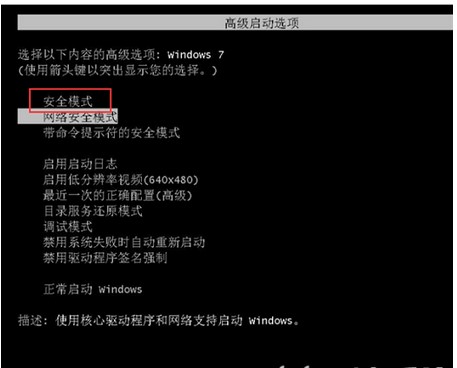
windows7用户在启动时遇到了系统注册表文件遗失或损坏的现象,像这种情况要怎么解决呢?你先强制重启电脑,以后按F8键,在打开的页面中选择安全模式进到,之后在菜单栏找到命令提示符开启,输入SFC/SCANNOW指令并回车实行,这时候系统就会自动对电脑缺失或已损坏的安装文件进行修复。windows7系统注册表文件遗失或损坏怎么办1、最先开机自检之后,立刻按住F8键,应用方向键挑选安全模式,敲打回车即可。2、以后点击开始按钮,挑选命令提示符,以管理员的身份运作。3、最后在弹出的提示符中输入SFC/
 win10系统提示0xe06d7363错误代码怎么办Jan 31, 2024 pm 10:03 PM
Win10系统提示0xe06d7363错误代码怎么办在使用Windows10操作系统时,有时候会遇到各种各样的错误代码。其中,0xe06d7363错误代码是比较常见的一种。这个错误代码通常与应用程序崩溃或无法正常运行有关。如果你遇到了这个错误代码,不要担心,下面将为你提供一些解决办法。1.重新启动电脑有时候,错误代码0xe06d7363可能只是一个暂时的问题,重新启动电脑可能会解决这个问题。尝试重新启动电脑,然后再次运行出现错误的应用程序,看看问题是否得到解决。2.更新操作系统有时候,错误代码0
 win7开机黑屏只有鼠标怎么办的解决方法Jul 20, 2023 pm 08:01 PM
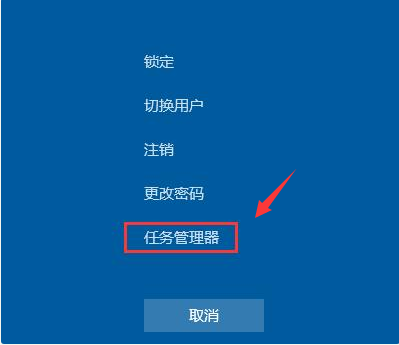
win7系统开机之后直接进入系统操作,开机启动后黑屏状态很久不能进系统,只显示鼠标箭头,等待一段时间后还是一样的问题,怎么回事呢?今天小编就来跟大家说说说win7开机黑屏只有鼠标怎么办的解决方法,大家快来看看吧。方法一:任务管理器进程错误,重启进程即可1、在黑屏界面按下Ctrl+Alt+Del快捷键,如果出现如图界面就不用担心啦,选择任务管理器2、打开任务管理器,点击上方的文件,选择运行新任务3、弹出新建任务窗口,输入Explorer.exe,点击确定即可方法二:进入安全模式修复黑屏问题1、重启
 Win11无法显示WiFi的解决方案Jan 29, 2024 pm 04:03 PM
wifi是我们上网的重要媒介,可不少的用户们近期都在反应Win11不显示wifi了,那么这要怎么办?用户们可以直接的点击搜索选项下的服务,然后选择启动类型改成自动就可以了或者是点击左边的网络和internet来进行操作就可以了。下面就让本站来为用户们来仔细的介绍一下win11电脑显示不出wifi列表问题解析吧。win11电脑显示不出wifi列表问题解析方法一:1、点击搜索选项。3、接着我们将启动类型改成自动。方法二:1、我们按住win+i,进入设置。2、点击左边的网络和internet。4、随后
 解决win11电池图标感叹号问题的方法Jan 29, 2024 pm 09:18 PM
win11电池图标有感叹号怎么办?我们在使用win11系统的时候会发现电池图标显示感叹号,那么这是怎么回事?用户们要是使用笔记本的话可以看看是不是电池问题,不是的话就进入到驱动下看,下面就让本站来为用户们来仔细的介绍一下win11电池图标有感叹号问题解析吧。win11电池图标有感叹号问题解析方法一:1、首先尝试拔出笔记本电池,连接电源充电。2、如果问题解决,说明电池坏了,更换电池即可。3、如果还是有感叹号,那应该是驱动问题,尝试方法二来解决。3、进入后选择在本站查找驱动,再搜索我们的笔记本型号。
 windows7系统怎么恢复出厂设置方式介绍Jul 20, 2023 pm 12:17 PM
windows7系统如何恢复出厂设置此难题往往是客户的系统出现了不可避免的问题或是过多文档必须清理或是要售出电脑的时候才会有这个行为,但是许多客户不清楚如何把系统开展恢复出厂设置,事实上恢复出厂设置便是还原系统,客户依照windows7系统如何恢复出厂设置方式介绍的内容就可以还原系统了。windows7系统如何恢复出厂设置1、Win7只能在您以前有备份的前提下还原到备份点或者重装系统达到还原出厂设置;2、开启【开始】-【操作面板】,选择【备份和还原】;3、随后选择下方的【修复系统设定或计算机】;


Hot AI Tools

Undresser.AI Undress
AI-powered app for creating realistic nude photos

AI Clothes Remover
Online AI tool for removing clothes from photos.

Undress AI Tool
Undress images for free

Clothoff.io
AI clothes remover

AI Hentai Generator
Generate AI Hentai for free.

Hot Article
Hot Tools

Safe Exam Browser
Safe Exam Browser is a secure browser environment for taking online exams securely. This software turns any computer into a secure workstation. It controls access to any utility and prevents students from using unauthorized resources.

SublimeText3 Mac version
God-level code editing software (SublimeText3)

Atom editor mac version download
The most popular open source editor

PhpStorm Mac version
The latest (2018.2.1) professional PHP integrated development tool

VSCode Windows 64-bit Download
A free and powerful IDE editor launched by Microsoft

