Many experienced drivers who install the system know that the system in msdn is the original version and is pure, and will be updated in real time. However, many users know how to download it, but do not know how to install it. Let’s take a look at the detailed installation tutorial. .

MSDN original win10 installation tutorial
Required tools:
Micro PE toolbox official download:
8G or above U disk
PS: Find the corresponding keys of your computer here
Preliminary preparation:
> >>Download the original win10 CD image file (here is win10 1909 64-bit 2020 Thunder and network disk can be opened)
Installation steps
1. Select the U disk in the pop-up startup interface The boot disk, such as the one used by Porter, is made by Kingston USB disk.

2. After entering the interface, open "CGI Backup Restore"

3. Select the installation disk in sequence (generally (C drive) and the image file, and then click "Execute"

PS: Then select the version of Win10 in the pop-up window (the new version of win10 image generally contains multiple versions)

4. Choose whether to retain the original system content and automatically restart. At this time, you can remove the U disk

5. Start During the installation of the system, there will be multiple restarts, please wait patiently
6. The default country is

7. You can choose Microsoft Pinyin or Microsoft Wubi Input method

8. You can also add another input method. If you don’t need it, skip it

9. Set according to personal usage

10. Create an account or use an existing account, you don’t need to fill in the password

11. Fill it in according to your own wishes. You can skip the step of filling in the mobile phone


12. Set up the computer according to your needs


13. Watch a few slides, do not turn off the computer


14. After a while, you will enter the win10 interface. Congratulations, you have completed the installation of win10 system

15. Then, we can bring out the commonly used icons. Right-click on the desktop>Personalize>Change desktop icons, and then check the icons you want to display

Notes
The demo version is Win10 1709, different versions may have slight differences, please refer to the actual situation
To install 64-bit win10 in a 32-bit system environment, you need to start the installation through other media
win10 original installation tutorial related articles
>>>Original win10 installation tutorial
The above is the detailed content of U disk tutorial for installing win10 original system. For more information, please follow other related articles on the PHP Chinese website!
 解决win11安装dx9组件卡顿的方法Dec 26, 2023 am 08:37 AM
dx9组件是能够帮助我们玩游戏非常好的程序,它能够提高我们的各种游戏画质、流畅度,但是很多用户在使用win11系统安装dx9组件时出现了卡住的情况,其实我们可以在win11上安装dx12,下面就一起来看一下吧。win11安装dx9组件卡住怎么办1、win11系统中支持的是dx12,而不是dx9,因此我们就无法正常安装dx9了。2、当然也有可能是因为我们的dx9安装包有问题,可以重新下载一个dx9试一试。3、而且dx12作为最新的DirectX程序,相比dx9拥有更好的性能和效果,能够提高更多的游
 解决win11安装简体中文失败的方法及教程Dec 22, 2023 am 10:09 AM
有的用户发现自己安装的win11系统不是中文版的,也不想重新安装系统,想要直接安装一个简体中文包,但是发现安装失败了。这可能是因为下载安装简体中文包的时候,被系统防火墙给拦截了,只要暂时把它关闭就可以正常安装了。win11安装简体中文失败怎么办:1、首先按下键盘的“win+r”组合键调出运行,输入“regedit”回车确定。2、然后进入“计算机\HKEY_LOCAL_MACHINE\SOFTWARE\Policies\Microsoft\WindowsDefender”路径。3、右键右侧空白处,
 如何解决Win11安装要求TPM2.0的问题Dec 26, 2023 pm 09:50 PM
众多用户纷纷在windows11系统的安装过程中遭遇到了标题为"ThePCmustsupportTPM2.0"的困扰,对此我们可通过在BIOS设置界面成功启用TMP功能或者巧妙地替换相应文件以绕过TPM检测这两种途径予以有效解决!接下来就让我们一同深入探秘这些解决方案吧!win11安装提示tpm2.0怎么办方法一:1、首先重启电脑,重启计算机并采用快捷键(热键)进入BIOS设置界面。2、在此次的BIOS设置中,查找TMP或CMOC相关选项并将其顺利启动即可。二、替换文件1、若在BIOS设置界面前
 如何解决win11安装界面卡死的问题Dec 26, 2023 pm 05:55 PM
不少的用户在安装win11系统时都卡死宰了安装的界面导致无法继续安装,为此下面给大家带来了win11安装卡死在安装界面解决方法,其实很多时候是系统不稳定或者缺少驱动导致的,快来解决一下吧。win11安装卡死在安装界面怎么办:1、首先点击左下角的跳过,此时可以跳过安装直接进入系统但是会缺少驱动。2、进入之后点击左下角的win图标,打开进入设置。3、然后选择里面的“设备管理器”。4、进入之后可以看到“显示适配器”选项,点击打开。5、右击选择显卡并点击“卸载设备”。6、卸载完成后重新下载驱动进行安装并
 Win10的安装占用空间有多大Dec 28, 2023 pm 06:20 PM
许多小伙伴在准备安装win10操作系统之前想要了解一下安装windows10需要多大内存,win10系统大小是多少。那么据小编所知32位的win10系统大约占16G内存,64位的操作系统大约要占20G内存容量。具体内容就来看看小编是怎么说的吧~安装win10有多大32位系统——约16G64位系统——约20G>>>台式机雨林木风win1064位系统下载<<<>>>台式机雨林木风win1032位系统下载<<<>>>笔记本
 雨林木风win7安装教程的详细介绍Jul 14, 2023 am 10:37 AM
雨林木风win7是最受用户欢迎的系统之一,雨林木风win7安装步骤很简单,在系统城下载到雨林木风ghostwin7到本地,解压后就可以直接硬盘一键安装,由于雨林木风win7集成了硬件驱动,大家在安装后不用担心驱动的问题,下面我们就来看看具体的教程吧。1、雨林木风win7系统下载后是iso格式的文件,要下载到C盘之外的分区,比如D盘,右键使用WinRAR等软件解压出来;2、不要解压到C盘或桌面,解压后的win7系统安装文件,如图所示;3、双击【安装系统.exe】,打开安装工具onekeyghost
 win7安装提示无法验证发行者处理方法Jul 08, 2023 pm 11:02 PM
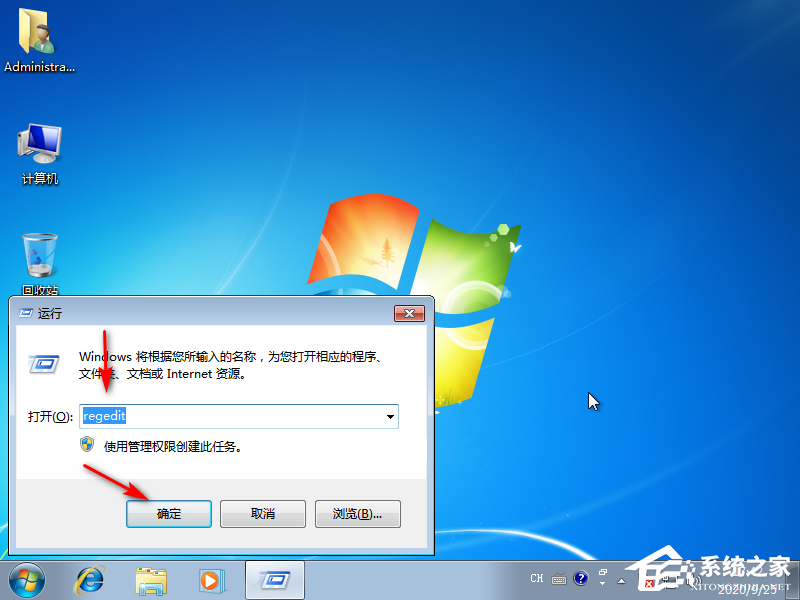
win7系统中,用户安装某些软件时,系统会提示不能验证发行者,一般我们点击确定即可解决,但每次安装都会跳出,很烦人,安装时提示无法验证发布者这个通知要怎么解决?以下小编介绍的win7安装提示不能验证发布程序处理方法。1.同时按win+r键打开运行窗口,输入"regedit",然后单击OK。2.进入后依次展开HKEY_CURRENT_USER\软件\Microsoft\Windwos\CurrentVersion\Policices。3.右键单击Policices,选择新的项目
 win11操作系统权限设置教程Dec 26, 2023 am 10:25 AM
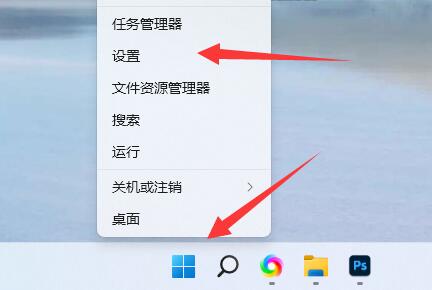
在win11中,由于应用商店变得非常普及,所以默认会限制只有应用商店有安装权限,导致我们无法手动安装,那么win11怎么设置安装权限呢。win11怎么设置安装权限:1、首先右键“windows图标”,打开“设置”2、然后在左边找到并打开“应用”3、接着打开最上面的“应用和功能”设置。4、打开后,找到“选择获取应用的位置”5、在其中就可以修改设置win11安装权限了。


Hot AI Tools

Undresser.AI Undress
AI-powered app for creating realistic nude photos

AI Clothes Remover
Online AI tool for removing clothes from photos.

Undress AI Tool
Undress images for free

Clothoff.io
AI clothes remover

AI Hentai Generator
Generate AI Hentai for free.

Hot Article

Hot Tools

SublimeText3 Chinese version
Chinese version, very easy to use

SAP NetWeaver Server Adapter for Eclipse
Integrate Eclipse with SAP NetWeaver application server.

VSCode Windows 64-bit Download
A free and powerful IDE editor launched by Microsoft

Dreamweaver CS6
Visual web development tools

SublimeText3 Mac version
God-level code editing software (SublimeText3)


