Home >System Tutorial >Windows Series >Learn more about how to take screenshots in Win7 system
Learn more about how to take screenshots in Win7 system
- WBOYWBOYWBOYWBOYWBOYWBOYWBOYWBOYWBOYWBOYWBOYWBOYWBforward
- 2023-12-25 11:17:131240browse
Win7 system is one of the systems that users have used for a long time. This system is adapted to many programs. Many people who just bought their computers use this system as the default system. So many people need the screenshot function. Let’s take a look at it together. Let’s see how you use the screenshot function in win7.
How to take screenshots in Win7 system
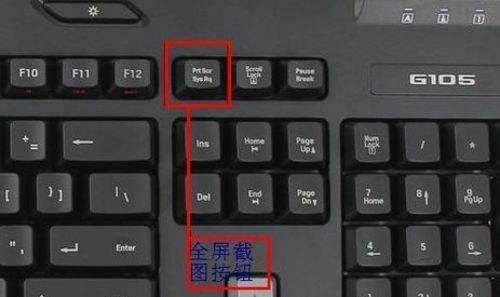
1. Shortcut keys for full-screen screenshots in Win7 system
1. Press 'PrintScreen' to capture the contents of the entire screen. You can "copy and paste" in the tool you need
2. The built-in screenshot tool of Win7 system
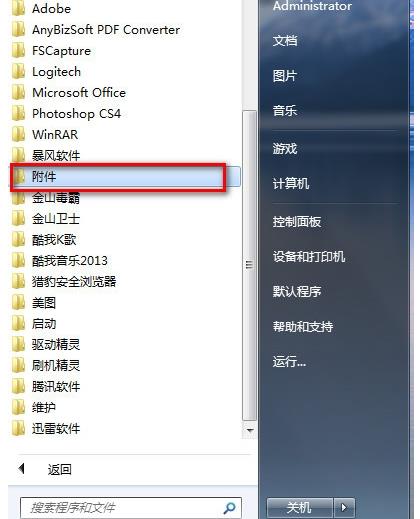
1. Click the "Start" menu and find "Attachments"
2. Find it in "Attachments" "Snipping Tool"
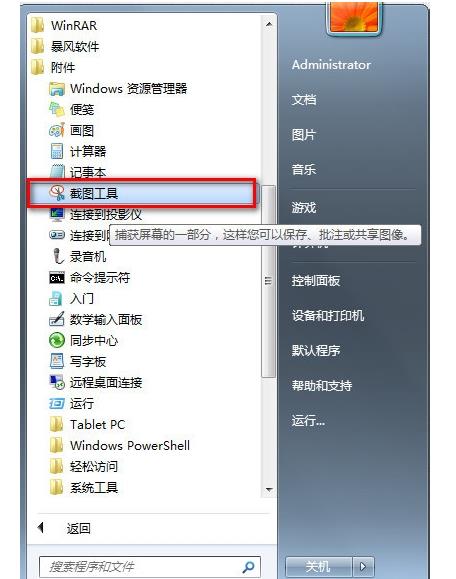
3. Right-click "Snipping Tool" and select "Properties"
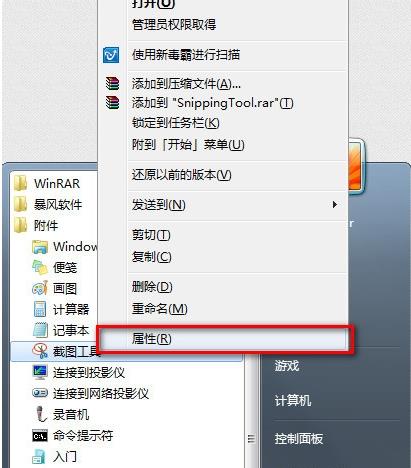
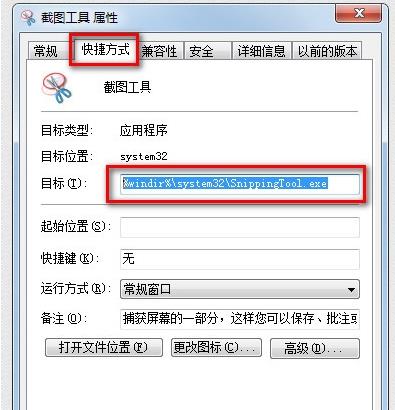
4. When the property box pops up, click "Shortcut" and copy the "Target" link
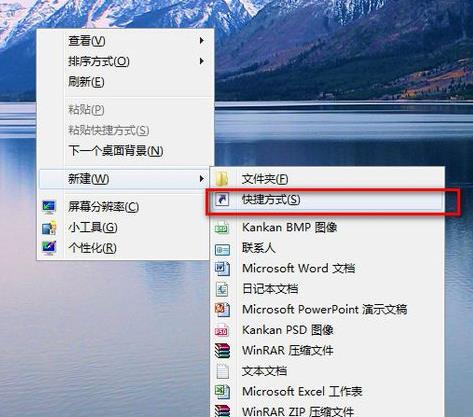
5. After copying, return to the desktop, right-click and select "New" ->"Shortcut ”
6. After the shortcut pop-up window appears, paste the previously copied link into it and click “Next”
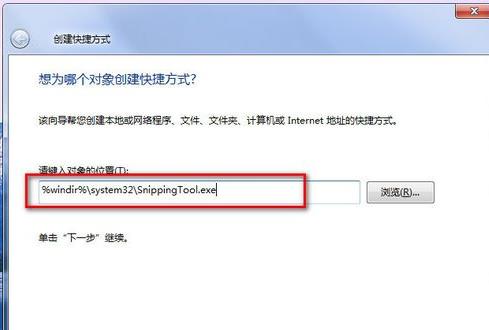
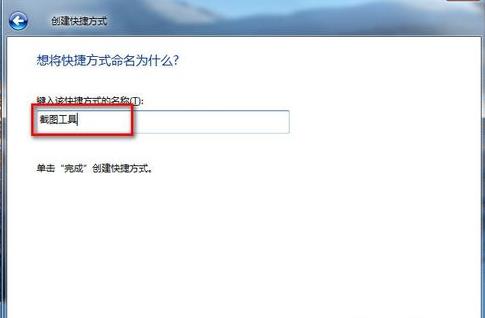
7. Give it a name and call it Snipping Tool (users can also fill it in according to their own preferences), and then click "Finish"
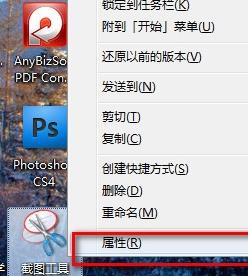
8. Finally, click on the desktop Right-click the shortcut tool and select "Properties"
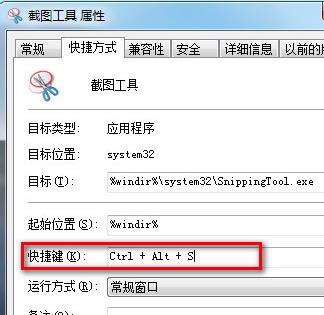
9. In the "Shortcut Key" in the pop-up box, enter "CTRL ALT S" (users can choose according to their personal habits. Settings), then click Save
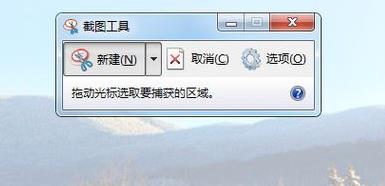
10. When we need to take a screenshot, just press "CTRL ALT S" to pop up the screenshot box for customized screenshots
The above is the detailed content of Learn more about how to take screenshots in Win7 system. For more information, please follow other related articles on the PHP Chinese website!
Related articles
See more- html5 uses html2canvas to implement browser screenshots
- How to calculate css priority? Give you an in-depth understanding of what CSS priority is
- what is the difference between windows7 and windows10
- What's wrong with windows 10 Ethernet and no internet?
- Detailed explanation of what is the shortcut key for taking screenshots in Windows 7

