准备工作
首先需要搭建ftpserver
yum install vsftpd

service vsftpd start
这样ftp服务就起来了,这里只是简单的使用,所以没有使用配置文件。这样我们只要将需要的文件置于/var/ftp/pub/文件夹下,匿名用户就可以copy文件到本机了。
安装rpm-build
build需要用到rpm-build,这里简单安装即可
yum install rpm-build
下面开始rpm打包
mget http://dev.mysql.com/get/Downloads/MySQL-5.6/mysql-5.6.21.tar.gz
cd /u01/mysql-5.6.21
mkdir rpm
cd rpm
修改mysql.spec
Name: mysql-rpm
Version:5.6.21
Release: renfengjun
License: GPL
URL: http://dev.mysql.com/
Group: applications/database
BuildRoot:%{_tmppath}/%{name}-%{version}-%{release}-root
BuildRequires: cmake
Packager: dexter.ren.jl@gmail.com
Autoreq: no
prefix: /u01/mysql
Summary: mysql-5.6.21.tar.gz

%description
The MySQL(TM) software delivers a very fast,multi-threaded, multi-user,
and robust SQL (Structured Query Language)database server. MySQL Server
is intended for mission-critical, heavy-loadproduction systems as well
as for embedding into mass-deployed software.

%define MYSQL_USER mysql
%define MYSQL_GROUP mysql
%define __os_install_post %{nil}

%build
cd $OLDPWD/../
CFLAGS="-O3 -g -fno-exceptions-static-libgcc -fno-omit-frame-pointer -fno-strict-aliasing"
CXX=g++
CXXFLAGS="-O3 -g -fno-exceptions -fno-rtti-static-libgcc -fno-omit-frame-pointer -fno-strict-aliasing"
export CFLAGS CXX CXXFLAGS

cmake .                                                 \
 -DSYSCONFDIR:PATH=%{prefix}                            \
 -DCMAKE_INSTALL_PREFIX:PATH=%{prefix}                  \
 -DCMAKE_BUILD_TYPE:STRING=Release                      \
 -DENABLE_PROFILING:BOOL=ON                             \
 -DWITH_DEBUG:BOOL=OFF                                  \
 -DWITH_VALGRIND:BOOL=OFF                               \
  -DENABLE_DEBUG_SYNC:BOOL=OFF                           \
 -DWITH_EXTRA_CHARSETS:STRING=all                       \
 -DWITH_SSL:STRING=bundled                              \
 -DWITH_UNIT_TESTS:BOOL=OFF                             \
 -DWITH_ZLIB:STRING=bundled                             \
 -DWITH_PARTITION_STORAGE_ENGINE:BOOL=ON                \
 -DWITH_INNOBASE_STORAGE_ENGINE:BOOL=ON                 \
 -DWITH_ARCHIVE_STORAGE_ENGINE:BOOL=ON                  \
 -DWITH_BLACKHOLE_STORAGE_ENGINE:BOOL=ON                \
 -DWITH_PERFSCHEMA_STORAGE_ENGINE:BOOL=ON               \
 -DDEFAULT_CHARSET=utf8                                 \
 -DDEFAULT_COLLATION=utf8_general_ci                    \
 -DWITH_EXTRA_CHARSETS=all                             \
 -DENABLED_LOCAL_INFILE:BOOL=ON                         \
 -DWITH_EMBEDDED_SERVER=0                               \
 -DINSTALL_LAYOUT:STRING=STANDALONE                     \
 -DCOMMUNITY_BUILD:BOOL=ON                              \
  -DMYSQL_SERVER_SUFFIX='-r5436';

make -j `cat /proc/cpuinfo | grep processor| wc-l`

%install
cd $OLDPWD/../
make DESTDIR=$RPM_BUILD_ROOT install

%clean
rm -rf $RPM_BUILD_ROOT

%files
%defattr(-, %{MYSQL_USER}, %{MYSQL_GROUP})
%attr(755, %{MYSQL_USER}, %{MYSQL_GROUP})%{prefix}/*

%pre
mkdir -p /u01/mysql/data
mkdir -p /u01/mysql/run
mkdir -p /u01/mysql/log
groupadd mysql
useradd -g mysql mysql
chown -R mysql:mysql /u01/mysql/data
chown -R mysql:mysql /u01/mysql/log
chown -R mysql:mysql /u01/mysql/run
echo "exportPATH=$PATH:/u01/mysql/bin" >> /home/mysql/.bash_profile

%post
ln -s %{prefix}/lib %{prefix}/lib64
cp /u01/mysql/support-files/mysql.server/etc/init.d/mysql
chkconfig mysql on


%preun
chkconfig --del mysql
rm -rf /u01
userdel mysql
rm -rf /var/spool/mail/mysql
rm -rf /etc/init.d/mysql
rm -rf /home/mysql

%changelog
执行打包命令
rpmbuild -bb ./mysql.spec
输出:
Requires(pre): /bin/sh
Requires(post): /bin/sh
Requires(preun): /bin/sh
Checking for unpackaged file(s):/usr/lib/rpm/check-files /var/tmp/mysql-rpm-5.6.21-renfengjun-root
warning: Could not canonicalize hostname:centos511
Wrote:/usr/src/redhat/RPMS/x86_64/mysql-rpm-5.6.21-renfengjun.x86_64.rpm
Executing(%clean): /bin/sh -e /var/tmp/rpm-tmp.62530
+ umask 022
+ cd /usr/src/redhat/BUILD
+ rm -rf/var/tmp/mysql-rpm-5.6.21-renfengjun-root
+ exit 0
生成的rpm包在这里:
/usr/src/redhat/RPMS/x86_64/mysql-rpm-5.6.21-renfengjun.x86_64.rpm
打包数据模板
打包的时候记得关闭mysql。这里写了一点测试数据:
mysql> select * from dexdb.t ;
+------+------------+
| id   |name       |
+------+------------+
|    1 |renfengjun |
+------+------------+
1 row in set (0.00 sec)
数据模板打包,记得ibdata1打包上
cd /u01/mysql/data
tar cf data.tar ibdata1 mysql/ dexdb/performance_schema/ test/
修改my.cnf
my.cnf文件内容:
[mysqld_safe]
pid-file=/u01/mysql/run/mysqld.pid
#malloc-lib=/u01/mysql/lib/libjemalloc.so

[mysql]
port=3306
prompt=\\u@\\d \\r:\\m:\\s>
default-character-set=gbk
no-auto-rehash

[client]
port=3306
socket=/u01/mysql/run/mysql.sock

[mysqld]
#dir
basedir=/u01/mysql
datadir=/u01/mysql/data
tmpdir=/tmp
lc_messages_dir=/u01/mysql/share
log-error=/u01/mysql/log/alert.log
slow_query_log_file=/u01/mysql/log/slow.log
general_log_file=/u01/mysql/log/general.log
socket=/u01/mysql/run/mysql.sock

#innodb
innodb_data_home_dir=/u01/mysql/data
innodb_log_group_home_dir=/u01/mysql/data
innodb_data_file_path=ibdata1:12M
innodb_buffer_pool_size=10G
innodb_buffer_pool_instances=4
innodb_log_files_in_group=2
innodb_log_file_size=1G
innodb_log_buffer_size=200M
innodb_flush_log_at_trx_commit=1
innodb_additional_mem_pool_size=20M
innodb_max_dirty_pages_pct=60
innodb_io_capacity=1000
innodb_thread_concurrency=16
innodb_read_io_threads=8
innodb_write_io_threads=8
innodb_open_files=60000
innodb_file_format=Barracuda
innodb_file_per_table=1
innodb_flush_method=O_DIRECT
innodb_change_buffering=inserts
innodb_adaptive_flushing=1
innodb_old_blocks_time=1000
innodb_stats_on_metadata=0
innodb_read_ahead=0
innodb_use_native_aio=0
innodb_lock_wait_timeout=5
innodb_rollback_on_timeout=0
innodb_purge_threads=1
innodb_strict_mode=1
transaction-isolation=READ-COMMITTED

#myisam
key_buffer=64M
myisam_sort_buffer_size=64M
concurrent_insert=2
delayed_insert_timeout=300

#replication
master-info-file=/u01/mysql/log/master.info
relay-log=/u01/mysql/log/relaylog
relay_log_info_file=/u01/mysql/log/relay-log.info
relay-log-index=/u01/mysql/log/mysqld-relay-bin.index
slave_load_tmpdir=/u01/mysql/tmp
slave_type_conversions="ALL_NON_LOSSY"
slave_net_timeout=4
skip-slave-start
sync_master_info=1000
sync_relay_log_info=1000

#binlog
log-bin=/u01/mysql/log/mysql-bin
#server_id=2552763370
binlog_cache_size=32K
max_binlog_cache_size=2G
max_binlog_size=500M
binlog-format=ROW
sync_binlog=1000
log-slave-updates=1
expire_logs_days=0

#server
default-storage-engine=INNODB
character-set-server=gbk
lower_case_table_names=1
skip-external-locking
open_files_limit=65536
safe-user-create
local-infile=1
#sqlmod="STRICT_ALL_TABLES,NO_ZERO_IN_DATE,NO_ZERO_DATE"
performance_schema=0

log_slow_admin_statements=1
log_warnings=1
long_query_time=1
slow_query_log=1
general_log=0

query_cache_type=0
query_cache_limit=1M
query_cache_min_res_unit=1K

table_definition_cache=65536
#table_cache=65536

thread_stack=512K
thread_cache_size=256
read_rnd_buffer_size=128K
sort_buffer_size=256K
join_buffer_size=128K
read_buffer_size=128K

port=3306
skip-name-resolve
skip-ssl
max_connections=4500
max_user_connections=4000
max_connect_errors=65536
max_allowed_packet=128M
connect_timeout=8
net_read_timeout=30
net_write_timeout=60
back_log=1024
serverid在自动化安装脚本中自动生成。
将上面的data.tar 、my.cnf、生成的rpm包copy到ftp的pub目录下
/var/ftp/pub/
自动化安装脚本
auto_install_mysql.sh:
#!/bin/sh yum install -y cmake gcc g++ bisonncurses-devel zlib ftp -n<<EOF open 192.168.0.33 user anonymous dexter binary cd pub prompt mget * EOF rpm -ivh mysql-rpm-5.6.21-renfengjun.x86_64.rpm tar -xvf data.tar -C /u01/mysql/data/ chown -R mysql:mysql /u01/mysql/ unique_id=`date "+%Y%m%d%M%S"` echo 'server_id='$unique_id >> my.cnf cp my.cnf /u01/mysql/
执行远程自动安装命令
执行远程拷贝(dcli命令是我从一体机里面拿出来的脚本,py编写,其实和scp差不多,有需要的可以发邮箱)
如果批量的安装,需要先使用-k选项初始化一下ssh。
将脚本copy到远程
[root@centos511 ~]# ./dcli -l root -c192.168.0.36 -f ./auto_install_mysql.sh
执行远程命令,也可以放在后台
[root@centos511 ~]#./dcli -l root -c192.168.0.36 /root/ auto_install_mysql.sh
输出:
[[root@centos511 ~]# ./dcli -l root -c192.168.0.36 /root/get_rpm.sh
root@192.168.0.36's password:
192.168.0.36: Address 192.168.0.36 maps tolocalhost, but this does not map back to the address - POSSIBLE BREAK-INATTEMPT!
192.168.0.36: Loaded plugins: fastestmirror,security
192.168.0.36: Loading mirror speeds from cachedhostfile
192.168.0.36: * base: mirrors.btte.net
192.168.0.36: * extras: mirrors.btte.net
192.168.0.36: * updates: mirrors.yun-idc.com
192.168.0.36: Setting up Install Process
192.168.0.36: Packagecmake-2.6.4-5.el5.4.x86_64 already installed and latest version
192.168.0.36: Package gcc-4.1.2-55.el5.x86_64already installed and latest version
192.168.0.36: No package g++ available.
192.168.0.36: Package bison-2.3-2.1.x86_64already installed and latest version
192.168.0.36: Packagencurses-devel-5.5-24.20060715.x86_64 already installed and latest version
192.168.0.36: Packagencurses-devel-5.5-24.20060715.i386 already installed and latest version
192.168.0.36: Package zlib-1.2.3-7.el5.x86_64already installed and latest version
192.168.0.36: Package zlib-1.2.3-7.el5.i386already installed and latest version
192.168.0.36: Nothing to do
192.168.0.36: Please login with USER and PASS.
192.168.0.36: Please login with USER and PASS.
192.168.0.36: KERBEROS_V4 rejected as anauthentication type
192.168.0.36: Interactive mode off.
192.168.0.36: Preparing...               ##################################################
192.168.0.36: mysql-rpm                  ##################################################
.......
结束。
验证一下
[root@study2 ~]# service mysql start
Starting MySQL.......................[  OK  ]


[root@study2 ~]# su - mysql
mys[mysql@study2 ~]$ mysql
Welcome to the MySQL monitor.  Commands end with ; or \g.
Your MySQL connection id is 1
Server version: 5.6.21-r5436-log Sourcedistribution

Copyright (c) 2000, 2014, Oracle and/or itsaffiliates. All rights reserved.

Oracle is a registered trademark of OracleCorporation and/or its
affiliates. Other names may be trademarks oftheir respective
owners.

Type 'help;' or '\h' for help. Type '\c' toclear the current input statement.

root@(none) 12:29:11>show databases ;
+--------------------+
| Database           |
+--------------------+
| information_schema |
| dexdb              |
| mysql              |
| performance_schema |
| test               |
+--------------------+
5 rows in set (0.37 sec)

root@(none) 12:29:14>use dexdb ;
Database changed
root@dexdb 12:29:17>select * from t ;
+------+------------+
| id   |name       |
+------+------------+
|    1 |renfengjun |
+------+------------+
1 row in set (0.19 sec)

root@dexdb 12:29:19>quit
Bye

[root@study2 ~]# service mysql stop
Shutting down MySQL.[  OK  ]
比较粗糙,还有需要改进的地方。慢慢完善吧。
 如何修复暗黑破坏神4蓝屏错误在Windows 11 / 10Jun 27, 2023 pm 01:16 PM
玩暗黑破坏神4时遇到蓝屏问题?好吧,您不是唯一一个在Reddit或其他论坛上抱怨此问题的人。只有当某些关键的系统组件无法承受暗黑破坏神4的要求时,蓝屏才会出现。因此,我们建议您按照这些解决方案快速解决问题并开始享受游戏。修复1–确保您的系统具有最少的支持暗黑破坏神4是一款对图形要求非常高的游戏,即使是最低的系统要求也令人困惑。这些是运行暗黑破坏神4的最低、推荐和超4k要求。最低要求–操作系统:64位Windows®10版本1909或更高版本处理器:英特尔®酷睿i5-2500K或AMDFX-835
 如何在 Windows PC 上修复 Steam 登录错误 E84Jun 28, 2023 am 08:20 AM
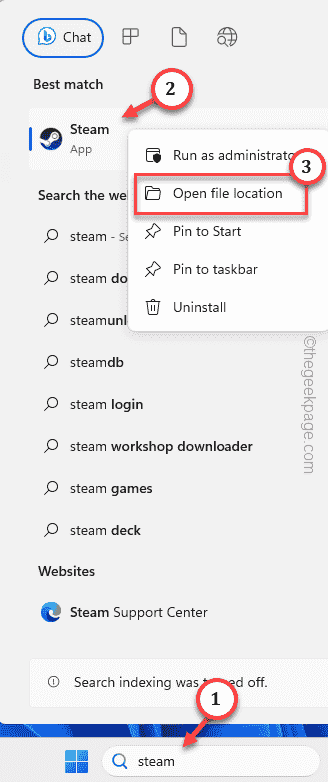
Steam登录错误E84是Steam用户在多次登录尝试中遇到的常见登录。如果您无法登录Steam,则无法执行任何有用的操作。如果您不先处理此E84登录错误,您将面临大量问题。初步解决方法–1.如果您是第一次在Steam中遇到此E84错误,重新启动系统可能会修复它。关闭Steam应用程序。将其从系统托盘中退出。然后,重新启动系统并重试整个过程。2.检查互联网连接是否有故障。如果您的互联网连接速度较慢,Steam登录可能会引发E84。修复1–将noreactlogin添加到Steam可执行文件您必须
 如何修复写字板在 Windows 11/10 中无法打开的问题Jun 28, 2023 am 08:51 AM
写字板是继记事本之后最快的工具,可以记下您丰富多彩的想法。但是,如果无法在计算机上打开写字板怎么办?写字板通常运行良好,并且打开速度非常快。但是,如果您的系统中缺少任何关键的写字板组件,写字板将无法打开。按照以下几组解决方案修复计算机上的问题。注意-由于写字板预安装在Windows上,因此您无法像执行任何其他本机应用商店应用程序那样直接重置或修复它。因此,只有一组最少的解决方案可用于解决问题。修复1–直接运行写字板您可以直接从安装目录运行写字板,并检查这是否有助于解决问题。步骤1–您需要打开文件
 如何检查iPhone型号国家Jul 09, 2023 pm 11:33 PM
您知道苹果将其产品的某些部分外包给不同的国家吗?是的。它们专门用于在这些国家/地区销售,因此在该国制造。您可能从其他人那里购买了二手iPhone/iPad,并且可能想知道是否有可能知道您的iPhone来自哪个国家。是的,有一种方法可以找出答案,我们现在将在本文中对此进行更多讨论。在这篇文章中,您将找到解释如何使用简单步骤了解iPhone原产国的方法。如何知道iPhone的原产国步骤1:首先,您应该点击主屏幕中的设置图标。第2步:这是打开“设置”应用程序,打开后,单击它转到“常规”选项,如下所示。
![如何为您的 Windows lComputer 设置首选频段 [2023]](https://img.php.cn/upload/article/000/465/014/168773917841923.png) 如何为您的 Windows lComputer 设置首选频段 [2023]Jun 26, 2023 am 08:26 AM
如何为您的 Windows lComputer 设置首选频段 [2023]Jun 26, 2023 am 08:26 AM几乎所有最新品牌的笔记本电脑都配备了双品牌WiFi。您可以将WiFi设置为5GHz或2.4GHz带宽。但是,事情并没有那么简单。笔记本电脑上的此功能很好地隐藏在设备管理器中,您无法从“设置”页面执行此操作。按照我们的指南为您的笔记本电脑、PC设置首选频段。注意–要切换到5GHz带宽WiFi,您需要WiFi路由器和设备都支持双频WiFi。如果它们中的任何一个都没有支持,则无法更改WiFi带宽。如何在设备上设置首选的WiFi频段设置首选频段以充分利用您的WiFi非常容易。方式1–设置首选频段步骤1–
![从 Windows 10/11 中删除用户帐户的 5大方法 [2023]](https://img.php.cn/upload/article/000/465/014/168782606547724.png) 从 Windows 10/11 中删除用户帐户的 5大方法 [2023]Jun 27, 2023 am 08:34 AM
从 Windows 10/11 中删除用户帐户的 5大方法 [2023]Jun 27, 2023 am 08:34 AM您的WindowsPC上有多个过时的帐户?或者,由于某些错误,您是否在从系统中删除这些帐户时陷入困境?无论出于何种原因,您都应该尽快从计算机中删除那些未使用的用户帐户。这样,您将节省大量空间并修复系统中可能的漏洞点。在本文中,我们通过详细步骤详细阐述了多种用户帐户删除方法。方法1–使用设置这是从系统中删除任何帐户的标准方法。步骤1–按Win+I键应打开“设置”窗口。步骤2–转到“帐户”。第3步–找到“其他用户”将其打开。第4步–您将在屏幕右侧找到所有帐户。步骤5–只需在那里扩展帐户即可。在帐户和
 如何在iPhone上提取RAR文件Jul 12, 2023 pm 07:53 PM
很多时候,非常大的文件很难在设备之间共享,尤其是智能手机等。因此,这些文件首先被存档/压缩成RAR文件,然后发送到另一个设备进行共享。但问题是RAR文件不容易在iPhone上提取。要提取zip文件,只需轻点一下即可。没有多少人知道在iPhone上提取RAR文件的过程,对于初学者来说,这些步骤可能会令人困惑。可以使用iPhone上称为快捷方式的默认应用程序来完成此操作。我们在这里逐步解释了如何使用快捷方式应用程序在iPhone上提取任何RAR文件。如何在iPhone上提取RAR文件步骤1:首先,您
 小编教你台式机重装系统详细步骤教程Jul 09, 2023 pm 07:29 PM
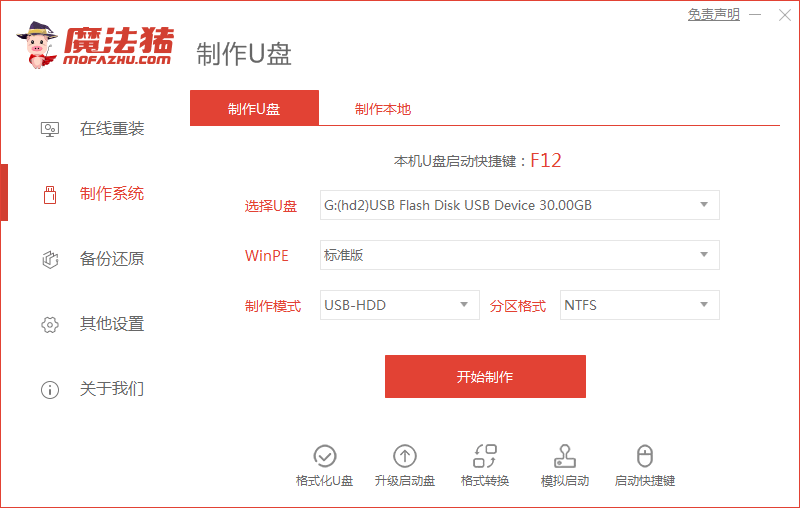
现在有很多用户买电脑都喜欢买台式机,因为可以自己组装电脑,选择自己想要的配置,但是买回来之后需要自己重装系统才能使用,那么台式机怎么一键重装系统呢,接下来小编就把台式机重装系统方法教给大家。 台式机重装系统: 1.首先我们准备一个8G内存的空白u盘,下载魔法猪一键重装系统软件,官网地址:http://www.mofazhu.com安装完成后打开软件,点击“开始制作”。 2.选择需要制作的系统,然后点击下一步。 3.我们的U盘将被格式化操作,点击“确定”即可。(重要文件资料提前备份)


Hot AI Tools

Undresser.AI Undress
AI-powered app for creating realistic nude photos

AI Clothes Remover
Online AI tool for removing clothes from photos.

Undress AI Tool
Undress images for free

Clothoff.io
AI clothes remover

AI Hentai Generator
Generate AI Hentai for free.

Hot Article

Hot Tools

DVWA
Damn Vulnerable Web App (DVWA) is a PHP/MySQL web application that is very vulnerable. Its main goals are to be an aid for security professionals to test their skills and tools in a legal environment, to help web developers better understand the process of securing web applications, and to help teachers/students teach/learn in a classroom environment Web application security. The goal of DVWA is to practice some of the most common web vulnerabilities through a simple and straightforward interface, with varying degrees of difficulty. Please note that this software

EditPlus Chinese cracked version
Small size, syntax highlighting, does not support code prompt function

Dreamweaver CS6
Visual web development tools

SublimeText3 Chinese version
Chinese version, very easy to use

MantisBT
Mantis is an easy-to-deploy web-based defect tracking tool designed to aid in product defect tracking. It requires PHP, MySQL and a web server. Check out our demo and hosting services.


