While Windows 11 Narrator is a great feature, it won't turn off for some users, even after disabling the dedicated toggle in Settings. For a few people, Narrator started at the login screen, or a male robot voice was heard when starting or shutting down the PC.
The issue also existed in previous iterations of the operating system, including Windows 10 and Windows 7, where Windows Narrator would not stop running.
Why doesn't my Narrator turn off?
How do we test, review and rate?
Over the past 6 months we have been working hard to establish a new review system for how we produce content. Using this, we subsequently redid much of the article to provide practical, hands-on expertise on the guides we produced.
For more details, you can read about how we test, review, and rate on WindowsReport.
This usually occurs when some related settings or permissions are misconfigured. Alternatively, if Narrator is turned off but your computer is still talking, your Ease of Access Center configuration may be the culprit, especially if you inadvertently configured Ease of Access Center to use your computer without a monitor.
How to completely disable Narrator in Windows 11?
Perform the following checks and if the issue is not resolved, go to the solutions listed below:
- Make sure Narrator is disabled in Accessibility settings.
- Install the latest Windows updates.
- Disable any program that controls or facilitates VoiceOver in Windows 11, or simply uninstall the app.
1. Rename the Narrator.exe file
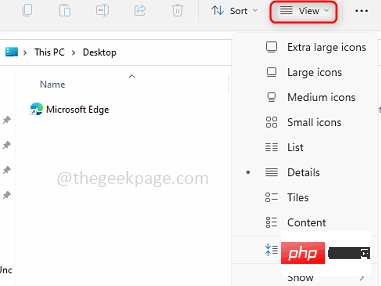
- Press to open File Explorer, paste the following path into the address bar, and then click to access the file location:WindowsEEnter
<strong>C:\Windows\System32</strong> - Now, find " Narrator.exe" file, right-click it, select Rename, and name it Narator_old.exe.

- Finally, restart your PC and check for improvements.
Rename files to turn off Narrator in Windows 11, which works when your computer speaks everything you do. Additionally, to restore functionality, revert the changes.
2. Disable Narrator.exe file execution
- Press to open File Explorer and navigate to the following path: WindowsE
<strong>C:\Windows\System32</strong> - Right-click the "Narrator.exe" file and select "Properties".

- Go to the Security tab and click the Advanced button.

- Click "Change".
- Now enter your username in the text field, click "Check Name" and click "OK" in all windows to save the changes.

- Again, go to the Security tab in Narrator.exe Properties and click the Edit button.
- Click "Add".

- Enter your username as before, click "Check Names" and then "OK".
- Now, select your username from the list, uncheck the checkboxes for all permissions, and click OK to apply the changes. Alternatively, you can check the "Deny" box next to all entries.

- Restart your computer and check if Windows 11 Narrator is now closed.
3. Change the Ease of Access settings
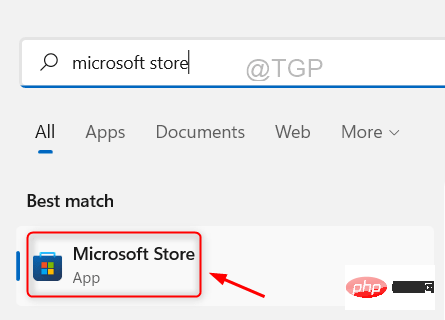
- Press to open Search, type"Control Panel" in the search box, and then click Click on the relevant result. WindowsS
- Click "Easy Access".

- Click "Ease of Access Center".
- Now, select "Use a computer without a monitor".

- Uncheck the "Open Narrator" checkbox, then click "Apply" and "OK" to save the changes.

- Restart your computer and verify that Windows 11 Narrator still won't shut down.
4. Change Narrator settings
- Press to open the "Settings" app, go to "Accessibility" from the left panel, and Click "Narrator". WindowsI

- Expand the Narrator entry and uncheck "Start Narrator before signing in" and "After signing in Start Narrator" checkbox.
 Also, disable the Keyboard Shortcuts
 - toggle switch for Narrator to prevent accidentally enabling the feature every time. 5. Reconfigure Narrator settings in the registry
- regedit
- in the text field, and click . WindowsREnter
 Click "Yes
 - " at the UAC prompt.
- Navigate the following path or paste it into the address bar and click: Enter
<strong>HKEY_LOCAL_MACHINE\SOFTWARE\Microsoft\Windows NT\CurrentVersion\Image File Execution Options</strong>
- Now, right-click on "Image File Execution Options", hover your cursor over "New", select "Key", and name it " narrator.exe".

- Similarly, right-click "Narrator.exe", select "New", select "String Value", and name it "Debugger ".
- Double-click the REG_SZ just created.
- Enter %1 under "Value Data" and click "OK" to save the changes.

- Finally, restart your PC, the built-in features will now not work.
If the Windows 11 Narrator feature cannot be turned off, you can always disable it through the Registry Editor. Additionally, to re-enable the feature, simply delete the debugger string.
In the rare case that the problem persists, we recommend that you reset Windows 11 to factory default settings. Alternatively you can reinstall Windows 11, using a bootable USB is the preferred method.
Similarly, if you find that Xbox Narrator won't turn off, change your console's accessibility settings.
The above is the detailed content of Fix: Windows 11 Narrator cannot be turned off. For more information, please follow other related articles on the PHP Chinese website!
 如何调整Win10文件夹字体大小?Jun 30, 2023 pm 08:02 PM
win10电脑文件夹字体大小怎么设置?win10文件夹字体大小设置方法是首先点击左下角开始,然后选择打开设置。很多小伙伴不知道怎操作,小编下面整理了文件夹字体大小设置方法步骤,如果你感兴趣的话,跟着小编一起往下看看吧!文件夹字体大小设置方法步骤1、首先点击左下角开始,然后选择打开设置。2、之后去点击“系统”。3、点击左侧的“屏幕”。4、在右边找到“更改文本、应用等项目的大小”。5、最后点击下拉,选择100%即可。以上就是【win10电脑文件夹字体大小怎么设置-文件夹字体大小设置方法步骤】全部内容
 怎样设置win11电池充电上限Jul 01, 2023 pm 10:41 PM
怎样设置win11电池充电上限?用户想知道win11电脑中要怎么去设置电池充电上限呢,如果使用的是win11联想电脑,就打开电脑上的电脑管家,然后点击电池充电图标,点击更改电池阈值即可设置啦,若是华为win11电脑,就打开myasus软件,点击电池健康充电选项,选择保养模式即可开始设置电源充电上限啦,不会的话,小编下面整理了win11设置电池充电上限教程,一起往下看看吧!win11设置电池充电上限教程1、联想电脑需要先下载安装联想电脑管家2、打开它,点击底部的电池充电图标,点击上方的更改电池阈值
 如何为所有文件夹在Windows 11中设置相同的文件夹视图?Apr 26, 2023 pm 10:31 PM
在Windows中,我们可以在文件资源管理器中查看文件夹、文件和其他文档。您可能已经观察到,很少有文件和文件夹具有较小的图标,而很少有较大的图标。因此可以理解,有一个定制选项可用。根据文件的性质,默认设置了不同的文件夹模板。例如,在包含照片的名为Picture的文件夹中,图像具有不同的视图。包含音乐文件的音乐文件夹将具有不同的模板。同样,对于文档、视频等文件夹,每个文件夹根据其类别包含不同的模板。您还可以选择文件夹的模板并将其设置为所有其他相同类型的文件夹。在本文中,我们将学习如何将文件夹视图应
 Win10分屏指南:如何设置分屏显示Jun 29, 2023 pm 10:37 PM
win10如何分屏操作?Win10系统中内置一个多窗口分屏功能,而这个功能很实用,不过有很多用户其实不知道要如何去为电脑进行分屏,其实实际操作起来还是非常简单的,下面就跟着小编一起来看看Win10设置分屏显示的方法,有需要的用户可不要错过。Win10设置分屏显示的指南第1步:同时单击(Windows键+I)打开Windows设置,或者您也可以单击Windows开始按钮,然后单击设置。第2步:单击系统并在左侧窗格中向下滚动,直到看到多任务处理选项。单击多任务处理。第3步:在右侧窗格中,通过单击切换
 如何在 iPhone 上使用多计时器与 iOS 17Jun 21, 2023 am 08:18 AM
什么是iOS17上的多计时器?在iOS17中,Apple现在为用户提供了在iPhone上一次设置多个计时器的能力。这是一个可喜的变化,许多人多年来一直期待的变化。时钟应用程序在iOS16之前只允许用户一次设置一个计时器,现在可用于激活任意数量的计时器,使其成为您一次完成多个任务的理想选择。您可以在计时器屏幕中设置任意数量的计时器。启动计时器后,所有活动计时器都将在锁屏界面和通知中心显示为“实时活动”通知。从这里,您可以查看计时器关闭、暂停或停止计时器的剩余时间,而无需打开时钟应用程序。当您在时钟
![如何为您的 Windows lComputer 设置首选频段 [2023]](https://img.php.cn/upload/article/000/465/014/168773917841923.png) 如何为您的 Windows lComputer 设置首选频段 [2023]Jun 26, 2023 am 08:26 AM
如何为您的 Windows lComputer 设置首选频段 [2023]Jun 26, 2023 am 08:26 AM几乎所有最新品牌的笔记本电脑都配备了双品牌WiFi。您可以将WiFi设置为5GHz或2.4GHz带宽。但是,事情并没有那么简单。笔记本电脑上的此功能很好地隐藏在设备管理器中,您无法从“设置”页面执行此操作。按照我们的指南为您的笔记本电脑、PC设置首选频段。注意–要切换到5GHz带宽WiFi,您需要WiFi路由器和设备都支持双频WiFi。如果它们中的任何一个都没有支持,则无法更改WiFi带宽。如何在设备上设置首选的WiFi频段设置首选频段以充分利用您的WiFi非常容易。方式1–设置首选频段步骤1–
 Win10专业版的鼠标dpi数值如何设置Jun 29, 2023 pm 02:08 PM
Win10专业版的鼠标dpi数值如何设置?鼠标是常用办公硬件之一,我们通常需要对鼠标的灵敏度进行调节,调整到合适我们使用的数值,不过很多用户对鼠标dpi比较陌生,不知鼠标dpi在哪里调,要怎么调,很多小伙伴不知道怎么详细操作,小编下面整理了Win10调鼠标dpi的技巧,如果你感兴趣的话,跟着小编一起往下看看吧! Win10调鼠标dpi的技巧 1、进入Windows设置选择打开备 2、左侧的选项栏切换到鼠标,在右侧的相关设置下选择他鼠标选项 3、在鼠标属性口将上方选项卡切换到针选项在下方的
 如何在 Windows 11 上快速设置动态壁纸Apr 25, 2023 pm 02:13 PM
桌面屏幕上的壁纸是系统启动后最令人兴奋和最引人注目的功能之一。它对人们产生有利的影响,并鼓励他们在感到快乐的同时提高工作效率。另一方面,更换壁纸并定期寻找它是一项耗时的任务。那么,如果你的桌面屏幕有一个动态的动态壁纸,可以让你看到各种轻松的壁纸,那不是很好吗?这也将允许用户下载任何GIF并将其设置为系统上的壁纸。在这篇文章中,我们将教您如何使用MicrosoftStore在您的PC上创建或获取动态壁纸。如何使用MicrosoftStore在Windows11上快速设置或获取动态壁

Hot AI Tools

Undresser.AI Undress
AI-powered app for creating realistic nude photos

AI Clothes Remover
Online AI tool for removing clothes from photos.

Undress AI Tool
Undress images for free

Clothoff.io
AI clothes remover

AI Hentai Generator
Generate AI Hentai for free.

Hot Article

Hot Tools

EditPlus Chinese cracked version
Small size, syntax highlighting, does not support code prompt function

Dreamweaver CS6
Visual web development tools

WebStorm Mac version
Useful JavaScript development tools

SublimeText3 Mac version
God-level code editing software (SublimeText3)

DVWA
Damn Vulnerable Web App (DVWA) is a PHP/MySQL web application that is very vulnerable. Its main goals are to be an aid for security professionals to test their skills and tools in a legal environment, to help web developers better understand the process of securing web applications, and to help teachers/students teach/learn in a classroom environment Web application security. The goal of DVWA is to practice some of the most common web vulnerabilities through a simple and straightforward interface, with varying degrees of difficulty. Please note that this software


 Click
Click 


