
How to realize taking pictures and photo editing in uni-app
1. Introduction
With the popularity of mobile devices, taking pictures and photo editing functions increasingly common in a variety of applications. This article will introduce how to use uni-app to implement photo taking and photo editing functions, and provide relevant code examples. I hope it can provide some reference for developers to implement these functions in uni-app.
2. Implement the camera function
The camera function can be implemented through the native API of uni-app. The following is a simple code example of the camera function:
<template>
  <view>
    <button @click="takePhoto">拍照</button>
  </view>
</template>

<script>
export default {
  methods: {
    takePhoto() {
      uni.chooseImage({
        count: 1,
        success: (res) => {
          const tempFilePaths = res.tempFilePaths
          // 将照片路径存储到本地或上传到服务器
        },
      })
    },
  },
}
</script>
In the above code, we trigger the camera function through the uni.chooseImage() function, and obtain the temporary file path of the photo in the success callback function .
3. Realize the photo editing function
The photo editing function can be realized through the uni-app plug-in. There are many useful photo editing plug-ins on the market, such as the u-cropper plug-in in uView-ui. The following is a code example for a simple photo editing function:
First, add "uView": "uview-ui"## to pages.json in the project root directory #rely.
<template>
  <view>
    <button @click="editPhoto">编辑照片</button>
    <u-cropper ref="cropper"></u-cropper>
  </view>
</template>

<script>
import { uCropper } from '@/uview-ui'

export default {
  components: {
    uCropper,
  },
  methods: {
    editPhoto() {
      uni.chooseImage({
        count: 1,
        success: (res) => {
          const tempFilePaths = res.tempFilePaths[0]
          this.$refs.cropper.show(tempFilePaths)
        },
      })
    },
  },
}
</script>
In the above code, we pass ## in the editPhoto method #uni.chooseImage()The function selects a photo and passes its path to the show method of the u-cropper plug-in for editing. 4. Summary
Through the native API and plug-ins of uni-app, we can easily realize the taking and photo editing functions. This article gives a simple sample code, but in actual development, further customized development can be carried out according to your own needs and project characteristics. I hope this article has provided some help for you to implement photo taking and photo editing functions in uni-app.
The above is the detailed content of How to take pictures and edit photos in uniapp. For more information, please follow other related articles on the PHP Chinese website!
 小米14怎么设置拍照水印?Mar 18, 2024 am 11:00 AM
为了让拍摄出的照片更具个性和独特性,小米14提供了拍照水印设置。通过设置拍照水印,用户可以在拍摄的照片上添加图案、文字和标志,使得每一张照片都能更好地记录下珍贵的时刻和回忆。接下来,我们将介绍如何在小米14中设置拍照水印,让您的照片更加个性化和生动。小米14怎么设置拍照水印?1、首先点击“相机”。2、然后点击“设置”。3、接着找到水印,随后就可以开始拍摄了。
 iPhone拍烟花模式火了!原相机这样设置出片刷爆朋友圈Feb 12, 2024 pm 07:00 PM
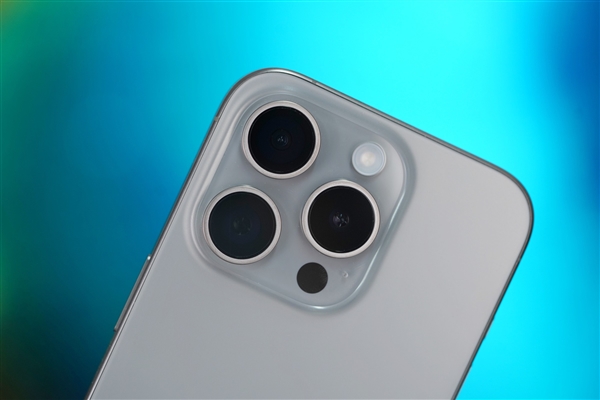
2月9日消息,爆竹声声,烟花绽放,祝大家除夕快乐。又到了放烟花的时候,很多人都会掏出手机拍几张照片分享到朋友圈,如果你用的是国产智能机,拍照基本都会有AI优化,让烟花效果更出众。手持iPhone的用户如何拍出烟花大片呢?今晚,词条#iPhone拍烟花模式#登上微博热搜榜,引来很多网友围观。其实,所谓的iPhone“烟花模式”就是在视频模式下同时拍摄照片。首先,打开iPhone自带的相机,切换到“视频”模式,点击右上角参数,将分辨率调整为4K、帧数调至60fp
 苹果13拍照不清晰怎么回事「最新iPhone拍照模糊解决方法」Feb 06, 2024 pm 10:46 PM
为拍摄对象设置好焦距焦距设置不当是照片模糊的常见原因之一,也会受到光线影响。大多数人通常使用自动聚焦拍摄,效果通常还不错。然而,自动聚焦有时会令人失望,导致类似以上照片的图像。为了获得最佳效果,你可以在iPhone自带相机应用中触按屏幕进行手动焦距设置。充足的光线充足的光线不仅可以让你获得更加清晰的照片,也会提高照片的质感,无论是拍摄风景还是人像,都应该保证iPhone镜头下的充足光线,当快门开启时间越长,动作可能越多也就会导致模糊,一般场景选择在室内光线充足的地方或者是室外自然光充足的地方进行
 激萌拍照怎么去水印呢?faceu激萌拍照水印关闭教程!Mar 15, 2024 pm 08:20 PM
一、激萌拍照怎么去水印呢?faceu激萌拍照水印关闭教程!1.打开手机里的Faceu激萌APP,点击拍摄图标。2.进入拍摄界面后,选择三点图标。3.然后在弹出的面板中,点击相机设置。4.跳转页面后,选择水印设置。5.最后在水印设置页面,点击关闭水印即可。
 电脑怎么拍照上传Jan 16, 2024 am 10:45 AM
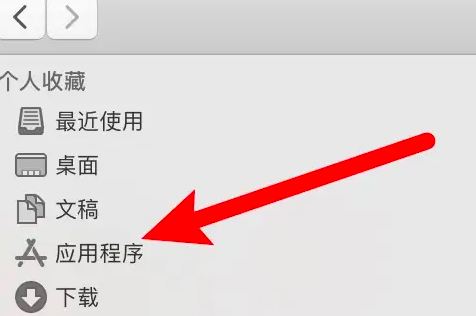
电脑只要安装了摄像头就可以进行拍照,但是有些用户还不知道该怎么拍照上传,现在就给大家具体介绍一下电脑拍照的方法,这样用户得到图片之后想上传到哪里都可以了。电脑怎么拍照上传一、Mac电脑1、打开访达,再点击左边的应用程序。2、打开后点击相机应用。3、点击下方的拍照按钮就可以了。二、Windows电脑1、打开下方搜索框,输入相机。2、接着打开搜索到的应用。3、再点击旁边的拍照按钮就可以了。
 荣耀Magic6 至臻版首发LOFIC传感器:动态范围对标索尼2万多单反!Mar 19, 2024 am 10:50 AM
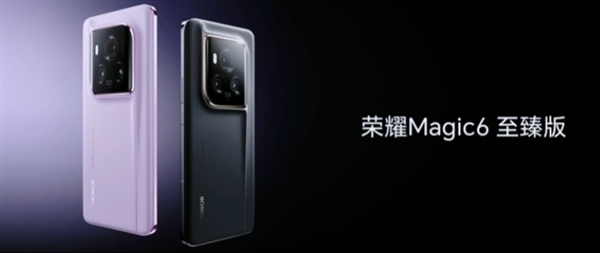
3月18日消息,荣耀Magic6至臻版今晚正式揭晓,这是荣耀内部定位仅次于保时捷设计的顶级直板旗舰,各方面达到了行业巅峰。尤其在影像系统方面,荣耀Magic6至臻版不仅继承了之前出色的鹰眼相机和影调风格,还业界首发了基于LOFIC技术的超高光比的定制H9800传感器、1200点激光雷达阵列对焦系统。如今随着传感器、光圈等硬件的发展,行业也陷入了一些瓶颈期,而荣耀通过自研技术并联合豪威行业首发基于LOFIC技术传感器,全称是LateralOverFlowIntegrationCapacitor,横
 如何在uniapp中实现相机拍照功能Jul 04, 2023 am 09:40 AM
如何在uniapp中实现相机拍照功能现在的手机功能越来越强大,几乎每个手机都配备了高像素的相机。在UniApp中实现相机拍照功能,可以为你的应用程序增添更多的交互性和丰富性。本文将针对UniApp,介绍如何使用uni-app插件来实现相机拍照功能,并提供代码示例供参考。一、安装uni-app插件首先,我们需要安装一个uni-app的插件,该插件可以方便地在u
 win10如何打开摄像头并进行拍照操作Jan 16, 2024 pm 10:06 PM
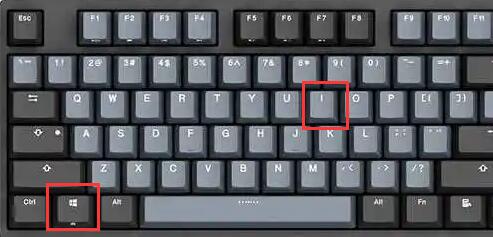
如果我们手边没有手机,只有电脑,但是需要拍照就可以使用电脑自带的摄像头来拍照,那么win10摄像头怎么打开拍照呢,其实只要下载一个相机app就可以了。win10摄像头怎么打开拍照:1、首先我们使用快捷键“Win+i”打开设置。2、打开后,进入其中的“隐私”设置。3、然后在“相机”应用权限下把访问权限打开。4、打开后,我们只要打开“相机”应用程序。(如果没有的话,可以去微软商店里下载一个)5、打开后,如果电脑自带摄像头或者安装了外接摄像头就能拍照了。(因为我们没有安装摄像头所以无法演示)


Hot AI Tools

Undresser.AI Undress
AI-powered app for creating realistic nude photos

AI Clothes Remover
Online AI tool for removing clothes from photos.

Undress AI Tool
Undress images for free

Clothoff.io
AI clothes remover

AI Hentai Generator
Generate AI Hentai for free.

Hot Article

Hot Tools

EditPlus Chinese cracked version
Small size, syntax highlighting, does not support code prompt function

MinGW - Minimalist GNU for Windows
This project is in the process of being migrated to osdn.net/projects/mingw, you can continue to follow us there. MinGW: A native Windows port of the GNU Compiler Collection (GCC), freely distributable import libraries and header files for building native Windows applications; includes extensions to the MSVC runtime to support C99 functionality. All MinGW software can run on 64-bit Windows platforms.

SublimeText3 Chinese version
Chinese version, very easy to use

PhpStorm Mac version
The latest (2018.2.1) professional PHP integrated development tool

SublimeText3 Linux new version
SublimeText3 Linux latest version


