 Operation and Maintenance
 Nginx
Nginx Teach you how to use NGINX and PM2 to deploy Node.js applications on VPS servers
Teach you how to use NGINX and PM2 to deploy Node.js applications on VPS servers
Today I will introduce to you how to use NGINX and PM2 to deploy on VPS servers Node.js application. Node.js is a very popular back-end development framework, while NGINX is a high-performance reverse proxy server and PM2 is a powerful process manager. By using these three tools together, we can achieve efficient and stable server deployment.
- Make sure you have Node.js and NPM installed. If it is not installed, you can install it with the following command:
sudo apt-get update
sudo apt-get install nodejs
sudo apt-get install npm
- Install PM2 Process Manager. PM2 can help us manage the process of Node.js applications and automatically restart them when the application crashes. Use the following command to install:
sudo npm install -g pm2
- Create a simple Node.js application. Create a new folder on your VPS and create a file named
app.jsinside it. Write your application code inapp.js. For example, here is a simple Express application code:
var express = require('express');
var app = express();

app.get('/', function(req, res) {
  res.send('Hello World!');
});

app.listen(3000, function() {
  console.log('App listening on port 3000!');
});- Launch the application using PM2. In the terminal, navigate to the application directory and run the following command:
pm2 start app.js
Now your application has been launched through PM2 and will automatically restart on failure.
- Configure NGINX reverse proxy. We want to configure NGINX to listen on port 80, forwarding incoming requests to our Node.js application. Open the NGINX configuration file, the path is generally
/etc/nginx/sites-enabled/default, and configure it as follows:
server {
  listen 80;
  server_name your-domain.com;

  location / {
    proxy_set_header   X-Real-IP $remote_addr;
    proxy_set_header   Host      $http_host;
    proxy_pass         http://127.0.0.1:3000;
  }
}
In this configuration, change your Replace -domain.com with your domain name. Then, replace 127.0.0.1:3000 with the address and port your application is running on.
- Save and close the configuration file. Then, reload the NGINX configuration to take effect:
sudo service nginx reload
NGINX will now send incoming requests to our Node.js application through the reverse proxy.
Congratulations! You have successfully deployed a Node.js application on a VPS server using NGINX and PM2. Now, you can access your domain name and should be able to see what your application is running.
The above is a brief guide to using NGINX and PM2 to deploy Node.js applications on VPS servers. I hope it will be helpful to you.
The above is the detailed content of Teach you how to use NGINX and PM2 to deploy Node.js applications on VPS servers. For more information, please follow other related articles on the PHP Chinese website!
 内存飙升!记一次nginx拦截爬虫Mar 30, 2023 pm 04:35 PM
本篇文章给大家带来了关于nginx的相关知识,其中主要介绍了nginx拦截爬虫相关的,感兴趣的朋友下面一起来看一下吧,希望对大家有帮助。
 nginx限流模块源码分析May 11, 2023 pm 06:16 PM
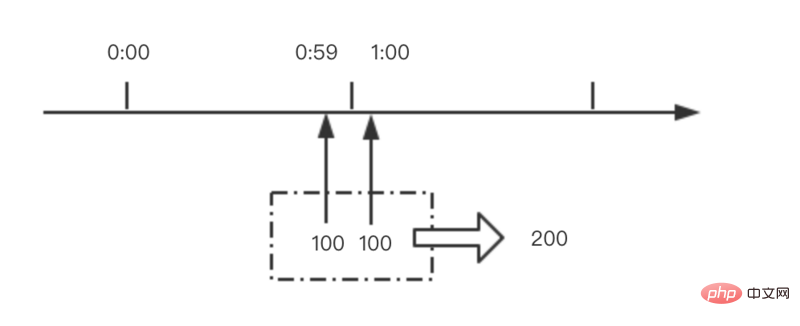
高并发系统有三把利器:缓存、降级和限流;限流的目的是通过对并发访问/请求进行限速来保护系统,一旦达到限制速率则可以拒绝服务(定向到错误页)、排队等待(秒杀)、降级(返回兜底数据或默认数据);高并发系统常见的限流有:限制总并发数(数据库连接池)、限制瞬时并发数(如nginx的limit_conn模块,用来限制瞬时并发连接数)、限制时间窗口内的平均速率(nginx的limit_req模块,用来限制每秒的平均速率);另外还可以根据网络连接数、网络流量、cpu或内存负载等来限流。1.限流算法最简单粗暴的
 nginx+rsync+inotify怎么配置实现负载均衡May 11, 2023 pm 03:37 PM
实验环境前端nginx:ip192.168.6.242,对后端的wordpress网站做反向代理实现复杂均衡后端nginx:ip192.168.6.36,192.168.6.205都部署wordpress,并使用相同的数据库1、在后端的两个wordpress上配置rsync+inotify,两服务器都开启rsync服务,并且通过inotify分别向对方同步数据下面配置192.168.6.205这台服务器vim/etc/rsyncd.confuid=nginxgid=nginxport=873ho
 nginx php403错误怎么解决Nov 23, 2022 am 09:59 AM
nginx php403错误的解决办法:1、修改文件权限或开启selinux;2、修改php-fpm.conf,加入需要的文件扩展名;3、修改php.ini内容为“cgi.fix_pathinfo = 0”;4、重启php-fpm即可。
 如何解决跨域?常见解决方案浅析Apr 25, 2023 pm 07:57 PM
跨域是开发中经常会遇到的一个场景,也是面试中经常会讨论的一个问题。掌握常见的跨域解决方案及其背后的原理,不仅可以提高我们的开发效率,还能在面试中表现的更加
 nginx部署react刷新404怎么办Jan 03, 2023 pm 01:41 PM
nginx部署react刷新404的解决办法:1、修改Nginx配置为“server {listen 80;server_name https://www.xxx.com;location / {root xxx;index index.html index.htm;...}”;2、刷新路由,按当前路径去nginx加载页面即可。
 Linux系统下如何为Nginx安装多版本PHPMay 11, 2023 pm 07:34 PM
linux版本:64位centos6.4nginx版本:nginx1.8.0php版本:php5.5.28&php5.4.44注意假如php5.5是主版本已经安装在/usr/local/php目录下,那么再安装其他版本的php再指定不同安装目录即可。安装php#wgethttp://cn2.php.net/get/php-5.4.44.tar.gz/from/this/mirror#tarzxvfphp-5.4.44.tar.gz#cdphp-5.4.44#./configure--pr
 nginx怎么禁止访问phpNov 22, 2022 am 09:52 AM
nginx禁止访问php的方法:1、配置nginx,禁止解析指定目录下的指定程序;2、将“location ~^/images/.*\.(php|php5|sh|pl|py)${deny all...}”语句放置在server标签内即可。


Hot AI Tools

Undresser.AI Undress
AI-powered app for creating realistic nude photos

AI Clothes Remover
Online AI tool for removing clothes from photos.

Undress AI Tool
Undress images for free

Clothoff.io
AI clothes remover

AI Hentai Generator
Generate AI Hentai for free.

Hot Article

Hot Tools

MinGW - Minimalist GNU for Windows
This project is in the process of being migrated to osdn.net/projects/mingw, you can continue to follow us there. MinGW: A native Windows port of the GNU Compiler Collection (GCC), freely distributable import libraries and header files for building native Windows applications; includes extensions to the MSVC runtime to support C99 functionality. All MinGW software can run on 64-bit Windows platforms.

DVWA
Damn Vulnerable Web App (DVWA) is a PHP/MySQL web application that is very vulnerable. Its main goals are to be an aid for security professionals to test their skills and tools in a legal environment, to help web developers better understand the process of securing web applications, and to help teachers/students teach/learn in a classroom environment Web application security. The goal of DVWA is to practice some of the most common web vulnerabilities through a simple and straightforward interface, with varying degrees of difficulty. Please note that this software

Notepad++7.3.1
Easy-to-use and free code editor

SublimeText3 Mac version
God-level code editing software (SublimeText3)

Atom editor mac version download
The most popular open source editor


