
Home >Backend Development >Python Tutorial >How to apply a different title to each different subplot in Plotly in Python?
How to apply a different title to each different subplot in Plotly in Python?

- 王林forward
- 2023-09-17 15:57:022930browse
introduce
Subplot creation is one of several data visualization tools provided by the Python library Plotly. A large narrative can be broken down into multiple smaller narratives through subplots. Sometimes, in order to give the main story greater depth and coherence, it may be necessary to give each subplot its own title.
grammar
By using the subplot_titles parameter, we can customize subplot titles in the plot grid. The make_subplots() function is actually a factory method that allows us to build a plot grid with a specified number of rows and columns. Let’s take a deeper look at some of the key parameters we can manipulate with make_subplots() -
rows − This parameter specifies the number of rows in the plot grid.
cols - This parameter specifies the number of columns in the plot grid.
specs - An array of arrays describing the type of each subplot in the grid. Each element in the Specs array should contain two values: the number of rows and columns that the subplot spans, and the subplot type.
subplot_titles − An array of strings used to display the titles of each subplot in the grid. The size of this array should be equal to the number of subplots in the grid.
In the code below we will do it in such a way that we will give each subplot a unique title -
fig = make_subplots(rows=1, cols=3, subplot_titles=("Subplot 1", "Subplot 2", "Subplot 3"))
The Chinese translation of Example
is:Example
Before writing the actual code, please understand its algorithm.
Import the necessary modules - plotly.graph_objs and plotly.subplots and numpy.
Use numpy to create some data for plotting.
Use the make_subplots function to create a subplot grid containing 1 row and 3 columns. Set unique titles for each subplot by passing the subplot_titles argument.
Use the add_trace method to add a trace to each subplot. For each sprite, pass a go.Scatter object containing the data to be plotted and a name parameter for labeling the data.
Use the update_layout method to assign a title to the entire chart.
Use the update_xaxes and update_yaxes methods to assign unique titles to the x- and y-axes of each subplot.
Use the show method to display the drawing.
import plotly.graph_objs as go
from plotly.subplots import make_subplots
import numpy as np
# Create data
x = np.linspace(0, 10, 100)
y1 = np.sin(x)
y2 = np.cos(x)
y3 = np.tan(x)
# Create subplots
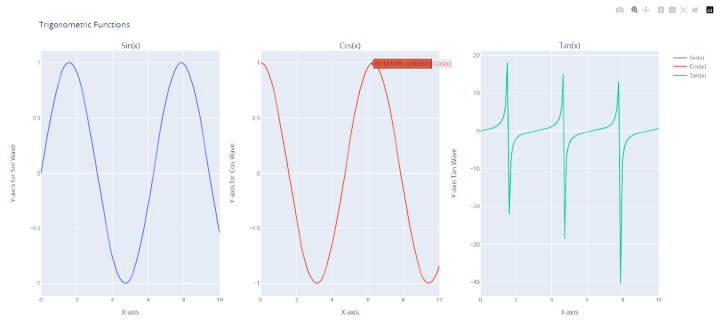
fig = make_subplots(rows=1, cols=3, subplot_titles=("Sin(x)", "Cos(x)",
"Tan(x)"))
# Add traces
fig.add_trace(go.Scatter(x=x, y=y1, name='Sin(x)'), row=1, col=1)
fig.add_trace(go.Scatter(x=x, y=y2, name='Cos(x)'), row=1, col=2)
fig.add_trace(go.Scatter(x=x, y=y3, name='Tan(x)'), row=1, col=3)
# Assign unique titles to each subplot
fig.update_layout(title_text="Trigonometric Functions")
fig.update_xaxes(title_text="X-axis for Sin Wave", row=1, col=1)
fig.update_xaxes(title_text="X-axis for Cos Wave", row=1, col=2)
fig.update_xaxes(title_text="X-axis Tan Wave", row=1, col=3)
fig.update_yaxes(title_text="Y-axis for Sin Wave", row=1, col=1)
fig.update_yaxes(title_text="Y-axis for Cos Wave", row=1, col=2)
fig.update_yaxes(title_text="Y-axis Tan Wave", row=1, col=3)
# Display the plot
fig.show()
First import plotly.graph objs and plotly.subplots as these are required libraries. To create some example data, we also imported the numpy library.
Then create some sample data using the numpy library. The sin, cos, and tan functions of the array x are represented by the three arrays we generated, y1, y2, and y3. Next, we use the make subplots() method to generate a grid of subplots with one row and three columns.
The subplot titles option also comes with an array containing three string values "Sin(x)", "Cos(x)," and "Tan(x)". The title of each grid subplot is determined from this.
Use the add trace() function to add a trace to each subgraph after creating the subgraph grid. For the three arrays y1, y2 and y3, scatter tracking is added respectively. For these three traces, we also provide name parameters as "Sin(x)", "Cos(x)" and "Tan(x)" respectively. By utilizing the row and col parameters of the add trace() method, we can define subgraphs for each trace.
Then use the update layout() method to change the overall title of the plot to "Trigonometric Functions".
Now use the update xaxes() and update yaxes() methods to set the x-axis and y-axis titles for each subplot, specifying a special title for each subplot. To indicate which subgraph we wish to update, we provide row and col parameters. We also pass the title text parameter to set the title for the x-axis or y-axis.
Finally use the show() method to display the drawing.
in conclusion
Plotly's make subplots() function provides a practical way to create a subplot grid. Each subfigure in the grid can have a different title by using the subfigure title parameter. In addition to this, the update xaxes() and update yaxes() routines allow us to change the names of the x- and y-axes for each subplot.
The above is the detailed content of How to apply a different title to each different subplot in Plotly in Python?. For more information, please follow other related articles on the PHP Chinese website!