
Home >CMS Tutorial >WordPress >How to integrate Bootstrap navigation bar into WordPress theme
How to integrate Bootstrap navigation bar into WordPress theme

- 王林Original
- 2023-09-06 09:05:171655browse
Have you ever wanted to speed up the theme development process? I think the answer is "yes" and you already know Bootstrap and develop using it in your mockups. This begs the question: "How to integrate Bootstrap components into a WordPress theme?"
This series of tutorials will show you how to integrate the most popular Bootstrap components into your WordPress theme. Let’s start with the Navbar component, which makes it easy to create a responsive navigation bar. To make this tutorial easy to follow, I'm going to use a navigation bar that just contains the logo and menu.
1. Use Bootstrap framework to write navigation bar
The following is the source code of the Bootstrap documentation page:
<nav class="navbar navbar-default" role="navigation">
<!-- Brand and toggle get grouped for better mobile display -->
  <div class="navbar-header">
    <button type="button" class="navbar-toggle" data-toggle="collapse" data-target=".navbar-ex1-collapse">
      <span class="sr-only">Toggle navigation</span>
      <span class="icon-bar"></span>
      <span class="icon-bar"></span>
      <span class="icon-bar"></span>
    </button>
    <a class="navbar-brand" href="#">Brand</a>
  </div>
  <!-- Collect the nav links, forms, and other content for toggling -->
  <div class="collapse navbar-collapse navbar-ex1-collapse">
    <ul class="nav navbar-nav">
      <li class="active"><a href="#">Link</a></li>
      <li><a href="#">Link</a></li>
      <li class="dropdown"> <a href="#" class="dropdown-toggle" data-toggle="dropdown">Dropdown <b class="caret"></b></a>
        <ul class="dropdown-menu">
          <li><a href="#">Action</a></li>
          <li><a href="#">Another action</a></li>
          <li><a href="#">Something else here</a></li>
          <li><a href="#">Separated link</a></li>
          <li><a href="#">One more separated link</a></li>
        </ul>
      </li>
    </ul>
  </div>
</nav>
Let's take a closer look at the code and clarify a few things to better understand the next part of this tutorial.
<nav role="navigation">…</nav>
Wrapper - A <nav></nav> tag with class "navbar" and role "navigation" that wraps the entire content of the navigation bar.
<div class="navbar-header">…</div>
Header – A <div> with class "navbar-header" that is visible on any screen size.
<pre class="brush:php;toolbal:false;"><button class="navbar-toggle" type="button" data-toggle="collapse" data-target=".navbar-ex1-collapse">…</button>
</pre>
<p><em>Toggle Button</em> - <code><button></button>, represents collapsed content on small screens; this button is required, but you can change its content.
<a class="navbar-brand" href="#">Brand</a>
Brand – Link with logo; it is optional and you can omit it here and include it elsewhere.
<div class="collapse navbar-collapse navbar-ex1-collapse">…</div>
Collapsible Content - A <div> with class "collapse" and "navbar-collapse"; it contains all content that should collapse on small screens.
<pre class="brush:php;toolbal:false;"><ul class="nav navbar-nav">…</ul>
</pre>
<p><em>Menu</em> – A <code><ul></ul> with class "nav navbar-nav" representing site navigation.
2.Integrate the model into the template
This step assumes that you have WordPress installed and the theme you are developing is activated.
2.1. Prepare a theme for your menu
Open your functions.php file and register your navigation if it is not already registered.
<?php
/* Theme setup */
add_action( 'after_setup_theme', 'wpt_setup' );
    if ( ! function_exists( 'wpt_setup' ) ):
        function wpt_setup() {
            register_nav_menu( 'primary', __( 'Primary navigation', 'wptuts' ) );
        } endif;
?>
Register bootstrap files and jQuery:
function wpt_register_js() {
	wp_register_script('jquery.bootstrap.min', get_template_directory_uri() . '/js/bootstrap.min.js', 'jquery');
	wp_enqueue_script('jquery.bootstrap.min');
}
add_action( 'init', 'wpt_register_js' );
function wpt_register_css() {
	wp_register_style( 'bootstrap.min', get_template_directory_uri() . '/css/bootstrap.min.css' );
	wp_enqueue_style( 'bootstrap.min' );
}
add_action( 'wp_enqueue_scripts', 'wpt_register_css' );
Download Edward McIntyre's wp-bootstrap-navwalker class from GitHub. Place the file into the theme root folder. Go back to your functions.php and paste the following code:
<?php // Register custom navigation walker
	require_once('wp_bootstrap_navwalker.php');
?>
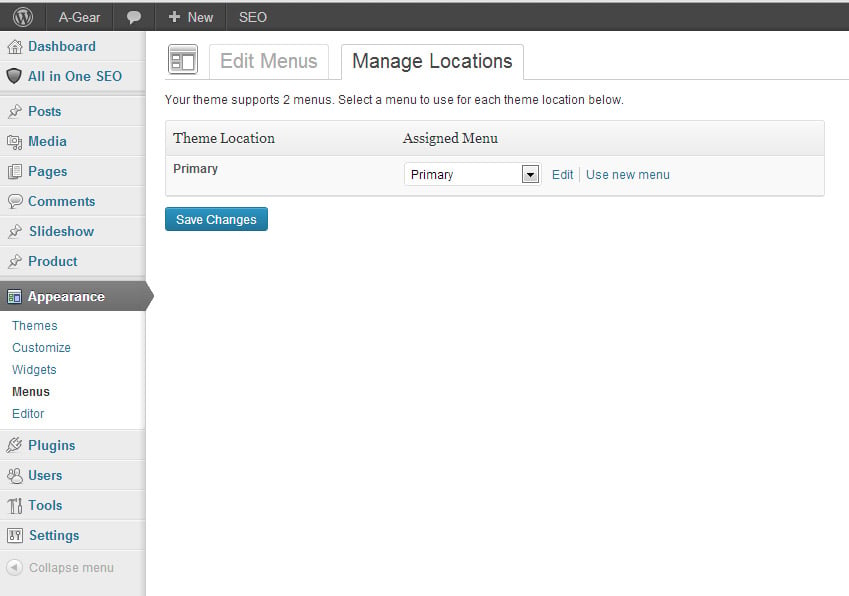
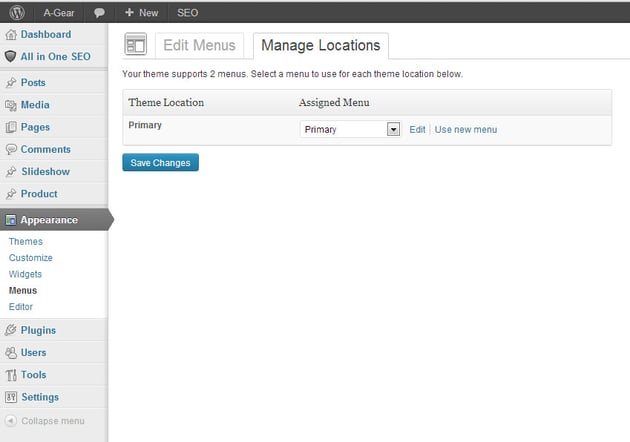
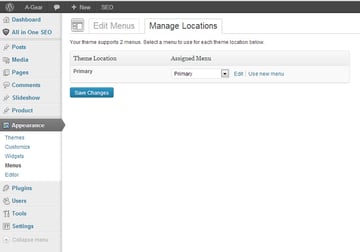
2.2. Create menu in backend
Navigate to your WordPress website backendAppearance->Menu. Create a new menu called "Primary" and add items to it. Go to the Manage Locations tab and specify the menu "Main" for the theme location named "Main". save Changes.
2.3. Integrate the navigation bar model into the template
Open your header.php and copy and paste the navigation bar model where you want it to appear. Now let’s replace part of the model with WordPress’ template functionality. Start by placing the correct link to your logo. Change this line:
<a class="navbar-brand" href="#">Brand</a>
to:
<a class="navbar-brand" href="<?php bloginfo('url')?>"><?php bloginfo('name')?></a>
The next step is to output the menu from the backend instead of the model menu. For these lines:
<ul class="nav navbar-nav">
	<li class="active"><a href="#">Link</a></li>
	<li><a href="#">Link</a></li>
	<li class="dropdown"> <a href="#" class="dropdown-toggle" data-toggle="dropdown">Dropdown <b class="caret"></b></a>
		<ul class="dropdown-menu">
			<li><a href="#">Action</a></li>
			<li><a href="#">Another action</a></li>
			<li><a href="#">Something else here</a></li>
			<li><a href="#">Separated link</a></li>
			<li><a href="#">One more separated link</a></li>
		</ul>
	</li>
</ul>
and:
<?php /* Primary navigation */
wp_nav_menu( array(
  'menu' => 'top_menu',
  'depth' => 2,
  'container' => false,
  'menu_class' => 'nav',
  //Process nav menu using our custom nav walker
  'walker' => new wp_bootstrap_navwalker())
);
?>
Now you have integrated the bootstrap navigation bar component into your theme.
in conclusion
In this tutorial, we looked at how to integrate a navigation bar created using the Bootstrap CSS framework into a WordPress theme. To speed up theme development, you can simply download the source files and paste them into your theme.
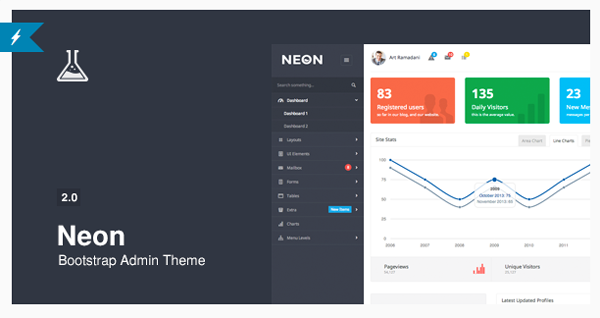
You can also find some great Bootstrap themes and templates on Envato Market, such as the Neon Bootstrap Admin Template or the Selphy Electronics E-Commerce Boostrap Template.
The above is the detailed content of How to integrate Bootstrap navigation bar into WordPress theme. For more information, please follow other related articles on the PHP Chinese website!