
Home >Backend Development >PHP Tutorial >Simplify startup onboarding with PHP and OAuth
Simplify startup onboarding with PHP and OAuth

- WBOYWBOYWBOYWBOYWBOYWBOYWBOYWBOYWBOYWBOYWBOYWBOYWBOriginal
- 2023-09-03 09:53:061072browse
This tutorial is part of the "Build Your Startup with PHP" series on Envato Tuts. In this series, I'll guide you through launching your startup from concept to reality, using my Meeting Planner app as a real-life example. Every step of the way, I'll release the Meeting Planner code as an open source example that you can learn from. I will also address startup-related business issues that arise.
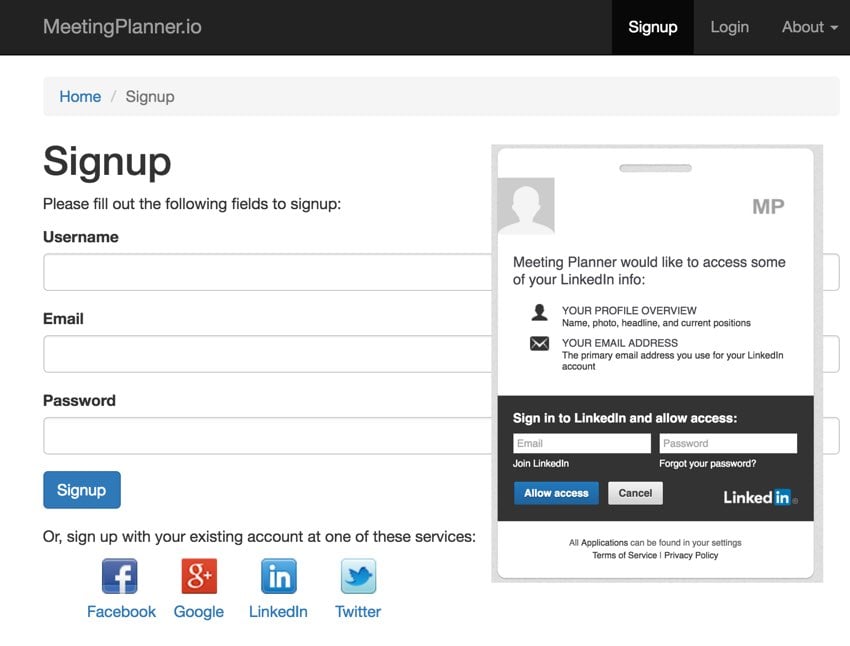
In this tutorial, I'll guide you through integrating OAuth with common social networks to make registration and reuse easier and more efficient. I will explore Facebook, Google, Twitter, and LinkedIn, which networks I believe are best suited for Meeting Planner’s target audience.
All code for Meeting Planner is written using PHP’s Yii2 framework. If you want to learn more about Yii2, check out our parallel series Programming with Yii2 on Envato Tuts.
If you haven’t tried Meeting Planner yet, try scheduling your first meeting today. This year it’s really starting to come together. Eventually, I was able to use Yii2's built-in AuthClient support to provide login from all of the above networks - so you can register using these networks out of the box.
Feedback welcome. If you have questions or topic suggestions, please leave a comment below. You can also reach me on Twitter @reifman.
What is AuthClient?
AuthClient is Yii's built-in support for your application to authenticate with a third-party service using OpenID, OAuth, or OAuth2.
If you were following my Yii2 series in June 2015, you would have seen me using AuthClient to integrate with Google via OpenID, but the company ended support for the specification shortly after. Then, in December, I wrote a tutorial using the Yii2-User extension to add Google OAuth support - something the Yii2 framework didn't have yet. However, Yii2-User does not integrate well with established code bases that already have user-facing code bases. But luckily, the Yii2 framework has added support for Google OAuth and everything becomes easier.
In this tutorial, I will guide you through using the new AuthClient functionality to integrate with various popular social networks. Out of the box, Yii provides support for the following clients:
- GitHub
- MicrosoftLive
Another motivation for supporting connections to Meeting Planner via social networks is that it allows people to show up and easily share their name and email with us. By signing up via email and password, we actually never learn their name. However, unlike other social networks, Twitter created significant barriers to obtaining user email addresses, ultimately leading me to temporarily disable it.
Let’s start code integration.
Installing AuthClient in our application
First, we need to install the Yii component for OAuth, namely Yii's AuthClient.
Add AuthClient to Composer
Let’s add the AuthClient library to composer.json:
    "minimum-stability": "stable",
    "require": {
        "php": ">=5.4.0",
        "yiisoft/yii2": "*",
        "yiisoft/yii2-bootstrap": "*",
        "yiisoft/yii2-swiftmailer": "*",
        "2amigos/yii2-google-maps-library": "*",
        "2amigos/yii2-google-places-library": "*",
        "stichoza/google-translate-php": "~2.0",
        "2amigos/yii2-date-time-picker-widget": "*",
        "yiisoft/yii2-jui": "*",
        "cebe/yii2-gravatar": "*",
        "kartik-v/yii2-widget-fileinput": "*",
        "kartik-v/yii2-widget-switchinput": "*",
        "yiisoft/yii2-imagine": "*",
        "2amigos/yii2-resource-manager-component": "0.1.*",
        "yiisoft/yii2-authclient": "~2.0.0"
            },
Then, we need to update Composer:
sudo composer update
Password:
Loading composer repositories with package information
Updating dependencies (including require-dev)
  - Updating 2amigos/yii2-date-time-picker-widget (0.1.0 => 0.1.1)
    Checking out 572e2448ba1cd207b339dd5d117e3d1d23f0bbc3

  - Installing yiisoft/yii2-authclient (2.0.2)
    Loading from cache

Writing lock file
Generating autoload files
Configure AuthClient support
And, we need to add the AuthClient configuration settings to the configuration file in \frontend\config\main.php.
Add array elements for all third-party services you wish to support (details for each service can be found in the AuthClient guide):
'components' => [
      'authClientCollection' => [
              'class' => 'yii\authclient\Collection',
              'clients' => [
                  'facebook' => [
                      'class' => 'yii\authclient\clients\Facebook',
                      'clientId' => $config['oauth_fb_id'],
                      'clientSecret' => $config['oauth_fb_secret'],
                  ],
                  'google' => [
                      'class' => 'yii\authclient\clients\GoogleOAuth',
                      'clientId' => $config['oauth_google_client_id'],
                      'clientSecret' => $config['oauth_google_client_secret'],
                    ],
                  'linkedin' => [
                      'class' => 'yii\authclient\clients\LinkedIn',
                      'clientId' => $config['linkedin_client_id'],
                      'clientSecret' => $config['linkedin_client_secret'],
                  ],
                  'twitter' => [
                      'class' => 'yii\authclient\clients\Twitter',
                      'consumerKey' => $config['oauth_twitter_key'],
                      'consumerSecret' => $config['oauth_twitter_secret'],
                              ],
              ],
          ],
In order to get the codes for all these keys and secrets, you need to register your application with each social network. This is usually very time consuming.
Register Developer Application
Please follow my lead as I guide you through the registration of some networks and some deeper configuration of others.
Sign up with Twitter
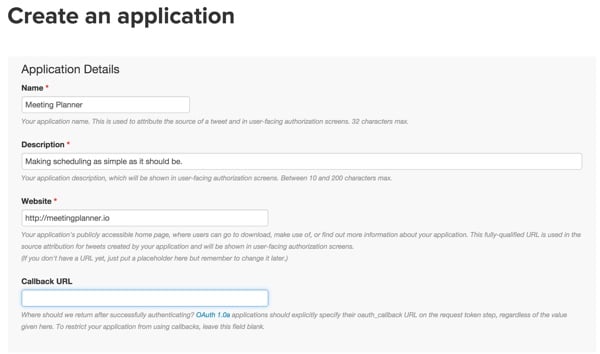
Create a new Twitter application on the Twitter application dashboard:
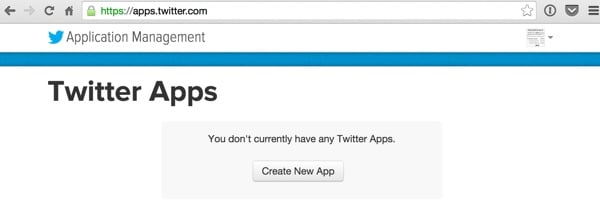
ClickCreate New App - I found the callback URL unnecessary, but now I use the placeholder http://mydomain.com/user/security /auth.
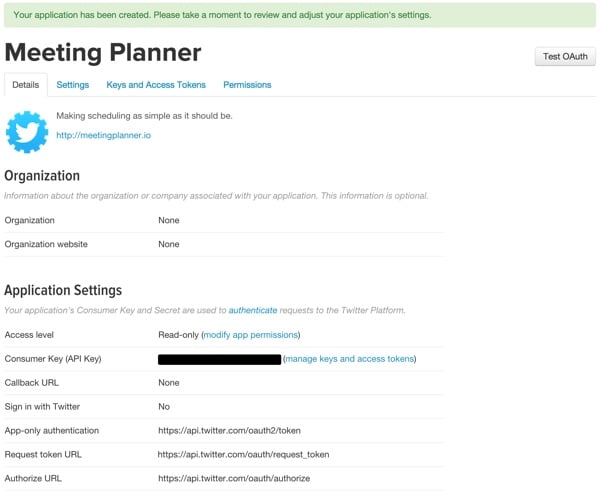
This is the new page of our application:
This is the Settings page:

This is the Keys and Access Tokens page. Here we need to copy Consumer Key (API Key) and Consumer Secret (API Secret) :
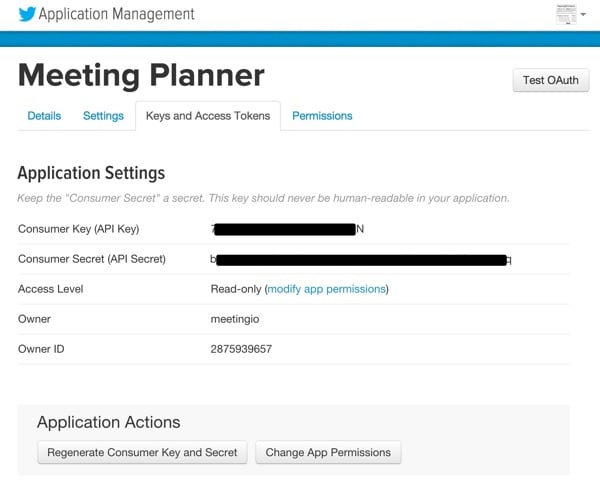
这些密钥位于我们的 mp.ini 文件中,该文件被读入 $config 变量上面为 Twitter 配置 AuthClient。
注册我们的 Facebook 应用程序
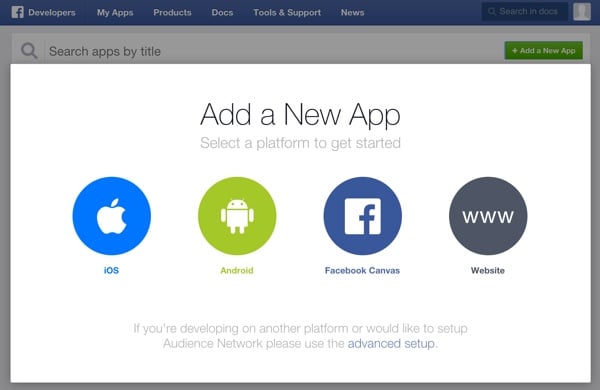
接下来,让我们访问 Facebook 开发者控制台并添加新应用:
我们现在选择创建一个WWW网站应用:
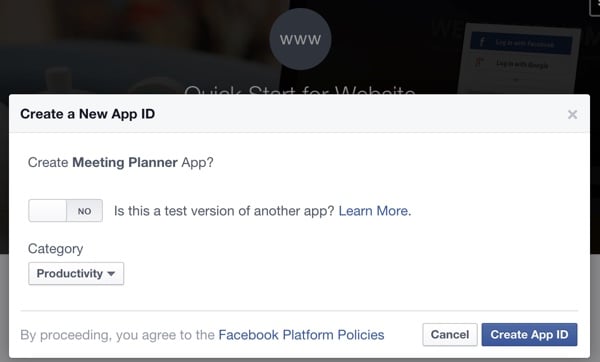
提供我们的应用程序名称:
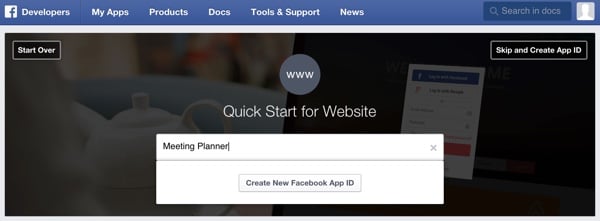
并收集我们的新应用 ID:
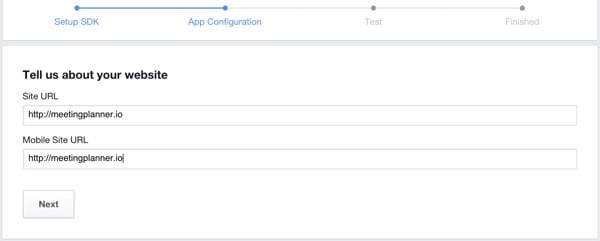
他们要求提供所有常规信息,例如网址:
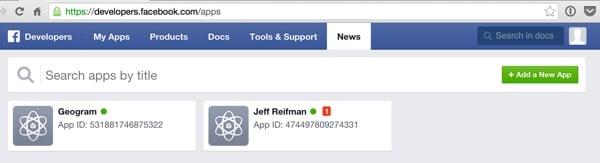
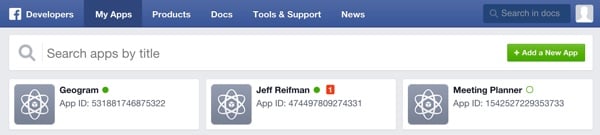
然后您可以在列表中找到我们的Meeting Planner应用程序:
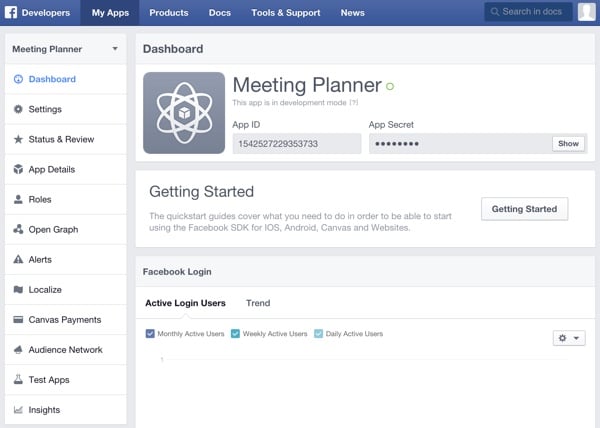
以下是您的应用程序的 Facebook 仪表板:
向 Google 注册
Google API 比 Twitter 和 Facebook 稍微复杂一些,因此用户体验有点难以遵循。但基本上,一旦您创建了应用程序,您就需要 OAuth 2.0 密钥,您可以通过在凭据屏幕上打开应用程序区域来获取该密钥:
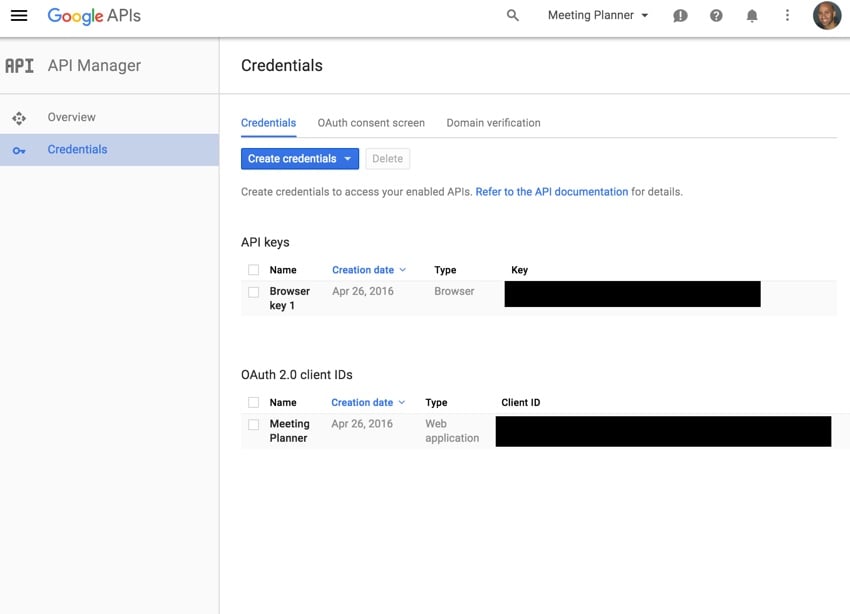
这将带您到这里:
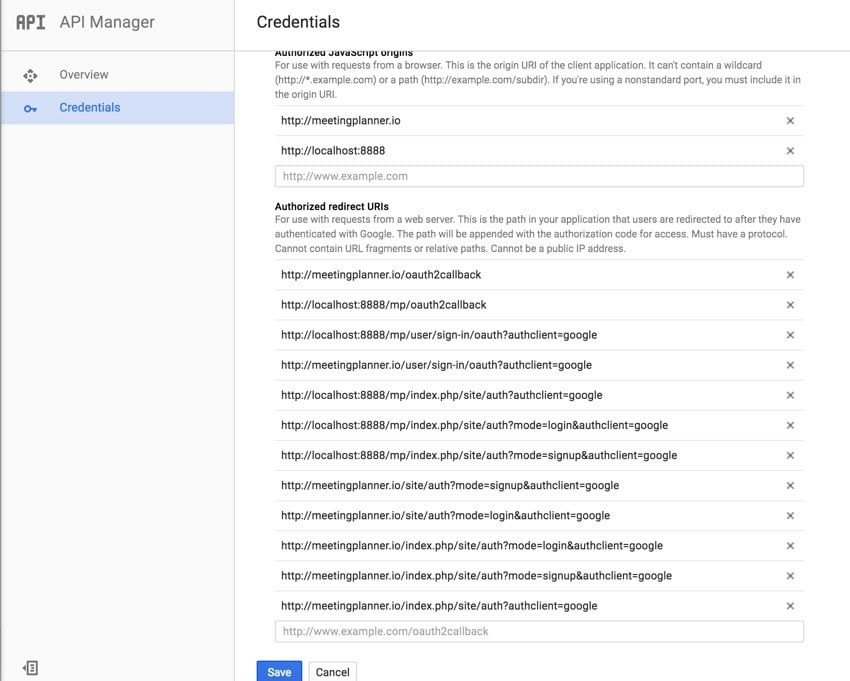
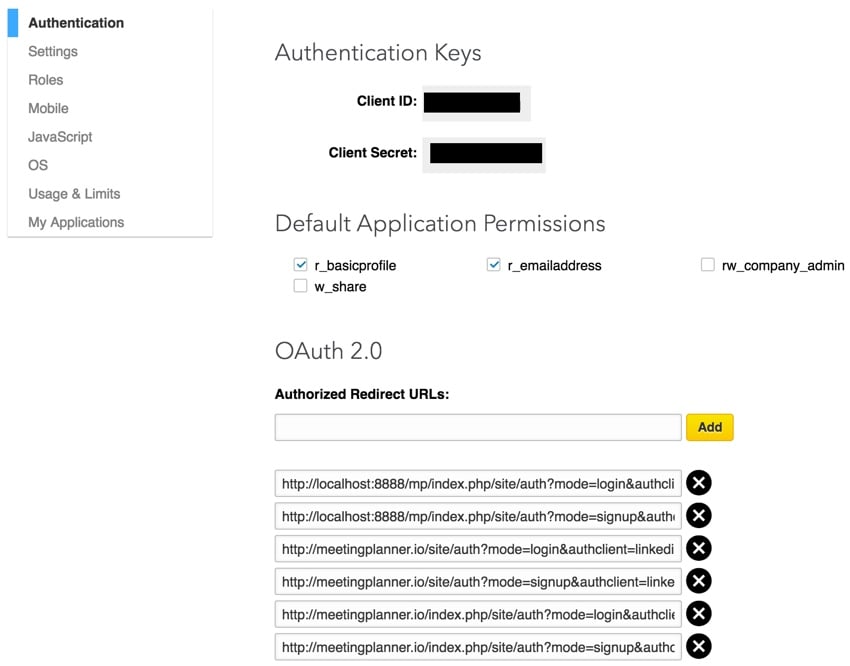
出于安全原因,Google(和 LinkedIn)需要完整列表,详细说明在执行过程中可能会使用哪些 URL 路径和参数。 OAuth 序列。在开发过程中,这可能需要大量调整 - 即使是从本地主机进行测试也是如此。
输入后,您将看到下面列出的内容:
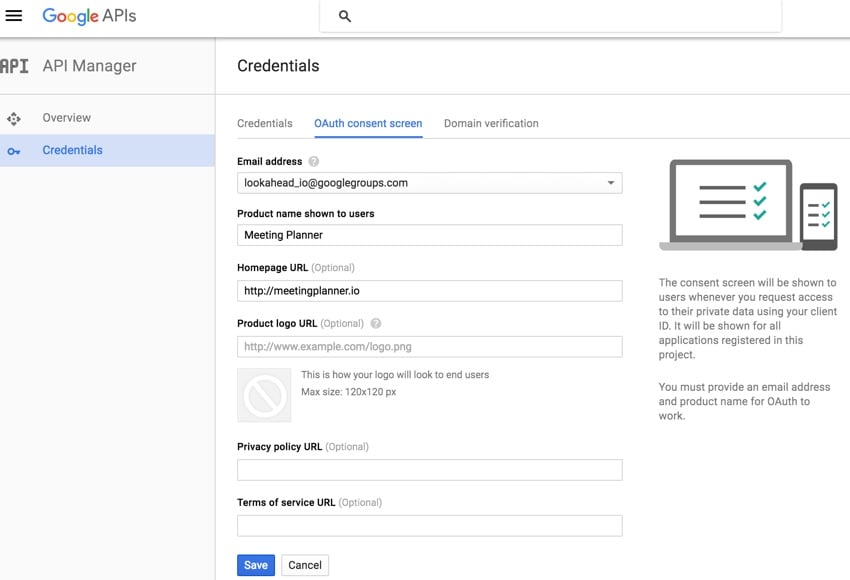
Google 在帮助您配置同意屏幕方面做得很好,您的用户在尝试注册或链接时将看到该屏幕他们的 Google 帐户与会议策划者的关系:
通过 LinkedIn 注册
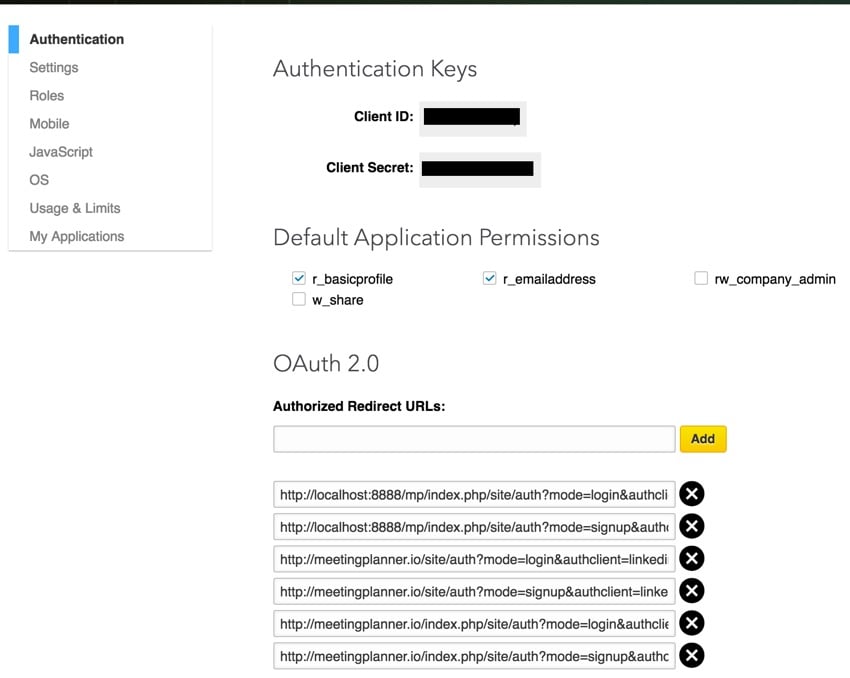
与 Google 相比,LinkedIn 相当简单。您需要申请的基本详细信息:
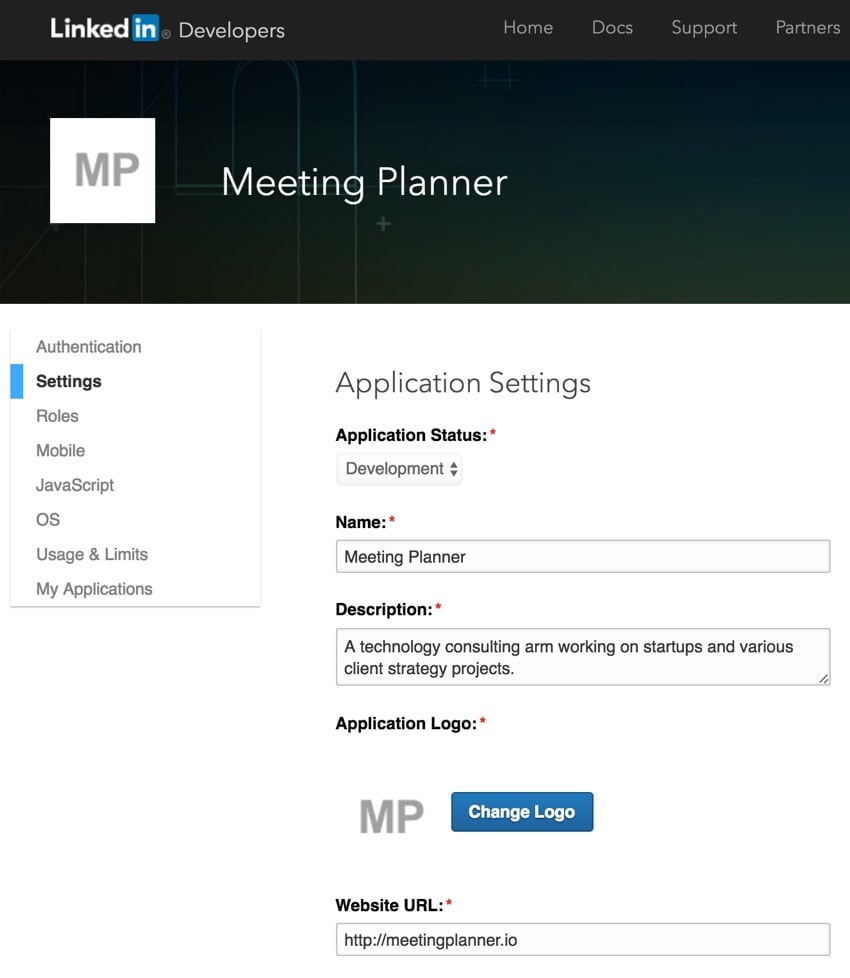
与 Google 一样,它们需要您在开发和生产中使用的所有网址。您还可以在此页面获取密钥:
将密钥放入我们的配置文件
在从 GitHub 中保护您的密钥中,我详细描述了如何使用配置文件来存储除 GitHub 存储库之外的所有密钥。然后,我将此文件包含在 Yii 配置文件的开头。这可以防止我意外地将我的密钥签入我的存储库并危及我的帐户。
我们将 Twitter 和 Facebook 应用程序密钥和机密放入存储库外部的 /var/secure/mp.ini 中:
oauth_fb_id="154xxxxxxxxxxxxxx33"
oauth_fb_secret="bcxxxxxxxxxxxxxxdda"
oauth_twitter_key ="JCpxxxxxxxxxxxxxxnsF"
oauth_twitter_secret="f3xxxxxxxxxxxxxxxxxxxxxxxxxxxxu37"
oauth_twitter_token="153xxxxxxxxxxxxxxxxxxxxxxxxxxxxxxxxxxxxxxxxxxfBj"
oauth_twitter_token_secret="Synxxxxxxxxxxxxxxxxxxxxxxxxxxxx4X"
oauth_google_client_id = "1xxxxxxxxxxxxxxxxxxxxxxq.apps.googleusercontent.com"
oauth_google_client_secret = "cfkxxxxxxxxxxxxxxox"
linkedin_client_id = "7xxxxxxxxxxxxxxq"
linkedin_client_secret ="IxxxxxxxxxxxxxxI"
这里又是 \frontend\config\main.php 中的代码,其中包含这些设置并设置各个配置变量:
<?php
$config = parse_ini_file('/var/secure/mp.ini', true);

$params = array_merge(
    require(__DIR__ . '/../../common/config/params.php'),
    require(__DIR__ . '/../../common/config/params-local.php'),
    require(__DIR__ . '/params.php'),
    require(__DIR__ . '/params-local.php')
);

return [
    'id' => 'app-frontend',
    'basePath' => dirname(__DIR__),
    'bootstrap' => ['log'],
    'controllerNamespace' => 'frontend\controllers',
    'components' => [
      'authClientCollection' => [
              'class' => 'yii\authclient\Collection',
              'clients' => [
                  'google' => [
                      'class' => 'yii\authclient\clients\GoogleOpenId'
                  ],
                  'facebook' => [
                      'class' => 'yii\authclient\clients\Facebook',
                      'clientId' => $config['oauth_fb_id'],
                      'clientSecret' => $config['oauth_fb_secret'],
                  ],
                  'twitter' => [
                      'class' => 'yii\authclient\clients\Twitter',
                      'consumerKey' => $config['oauth_twitter_key'],
                      'consumerSecret' => $config['oauth_twitter_secret'],
                              ],
              ],
          ],
      'urlManager' => [
更新架构以存储会话密钥
现在我们已经准备好编写代码来集成社交注册和登录,我们需要数据库来创建一个 Auth 表,该表将存储社交服务、该人的 ID 以及会议规划器中该人员的 user_id:
./yii migrate/create create_auth_table
Yii Migration Tool (based on Yii v2.0.2)

Create new migration '/Users/Jeff/Sites/mp/console/migrations/m150227_235635_create_auth_table.php'? (yes|no) [no]:yes
New migration created successfully.
迁移如下所示:
<?php

use yii\db\Schema;
use yii\db\Migration;

class m150227_235635_create_auth_table extends Migration
{
   public function up()
   {
       $tableOptions = null;
       if ($this->db->driverName === 'mysql') {
           $tableOptions = 'CHARACTER SET utf8 COLLATE utf8_unicode_ci ENGINE=InnoDB';
       }

       $this->createTable('{{%auth}}', [
           'id' => Schema::TYPE_PK,
           'user_id' => Schema::TYPE_BIGINT.' NOT NULL',
           'source' => Schema::TYPE_STRING.' NOT NULL',
           'source_id' => Schema::TYPE_STRING.' NOT NULL',
       ], $tableOptions);
       $this->addForeignKey('fk-auth-user_id-user-id', '{{%auth}}', 'user_id', '{{%user}}', 'id', 'CASCADE', 'CASCADE');
   }

   public function down()
   {
     $this->dropForeignKey('fk-auth-user_id-user-id', '{{%auth}}');
     $this->dropTable('{{%auth}}');
   }
}
这是我们运行时的结果:
./yii migrate/up
Yii Migration Tool (based on Yii v2.0.2)

Total 1 new migration to be applied:
    m150227_235635_create_auth_table

Apply the above migration? (yes|no) [no]:yes
*** applying m150227_235635_create_auth_table
    > create table {{%auth}} ... done (time: 0.016s)
    > add foreign key fk-auth-user_id-user-id: {{%auth}} (user_id) references {{%user}} (id) ... done (time: 0.012s)
*** applied m150227_235635_create_auth_table (time: 0.033s)

Migrated up successfully.
我再次使用 Yii 的代码生成器 Gii 来创建 Auth 模型:

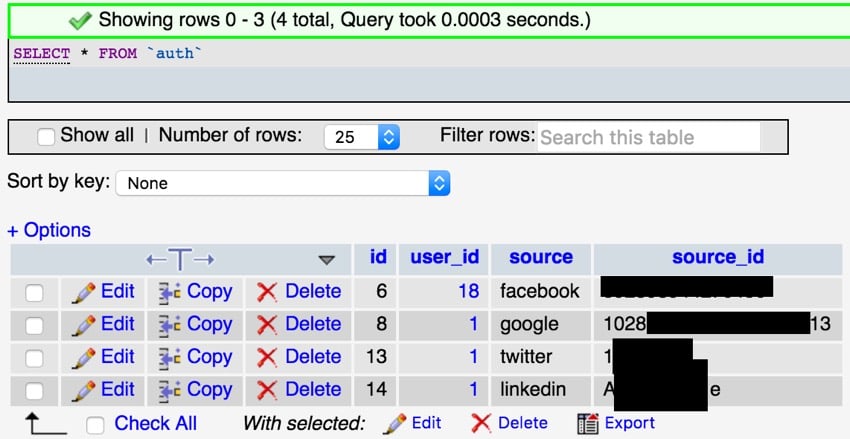
最终,Auth 表将包含如下内容:
将 AuthChoice 小部件添加到会议规划器
Yii2 的 AuthChoice 小部件在为您配置的每个服务实现登录按钮方面做得非常出色。它按照您设置服务和密钥数组的顺序执行此操作(以便您可以更改它)。
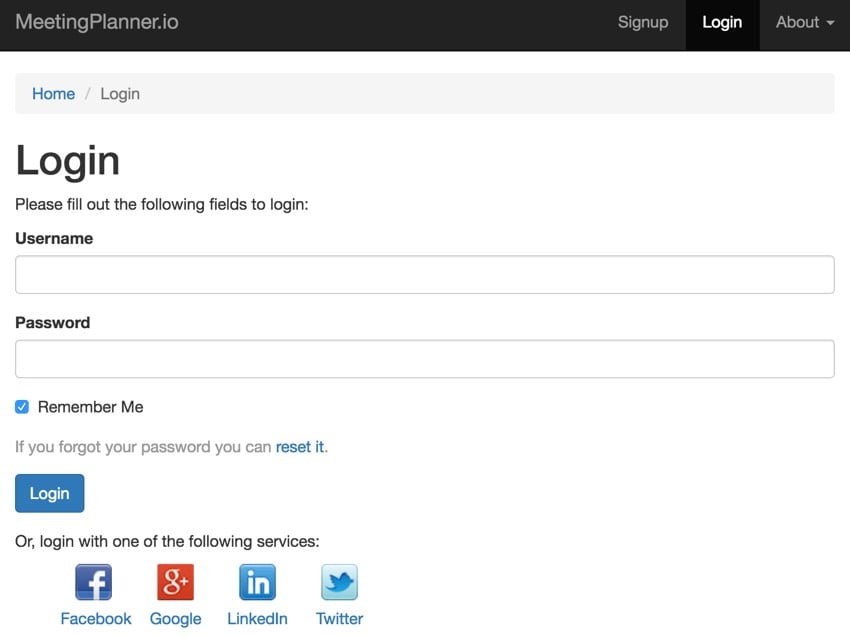
将小部件添加到我们的表单(login.php 和 signup.php)非常简单:
<div class="row">
        <div class="col-lg-5">
          <p>Or, login with one of the following services:</p>
          <?= yii\authclient\widgets\AuthChoice::widget([
               'baseAuthUrl' => ['site/auth','mode'=>'login'],
               'popupMode' => false,
          ]) ?>
        </div> <!-- end col-lg-5 -->
      </div> <!-- end row -->
现在这是我们的注册页面:
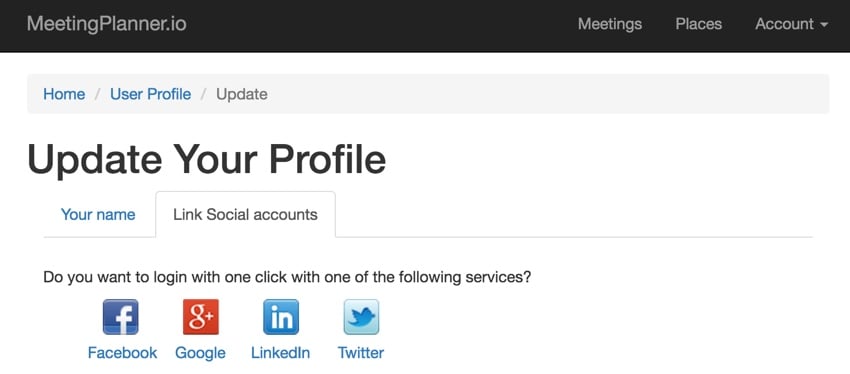
对于已登录的现有用户,我为他们创建了一种简单的方法来关联其帐户。它在个人资料设置页面上称为关联社交帐户:
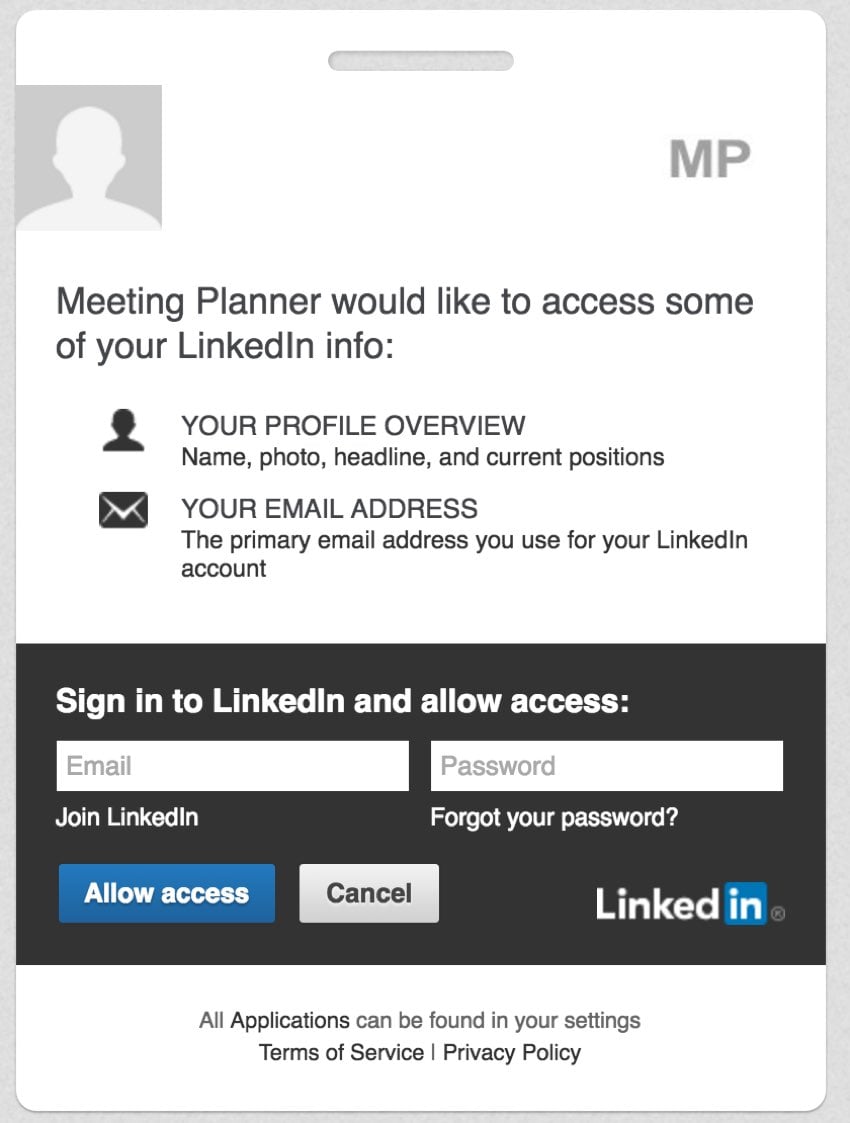
如果您点击LinkedIn,这是他们的 OAuth 屏幕,要求您授予会议策划者权限:
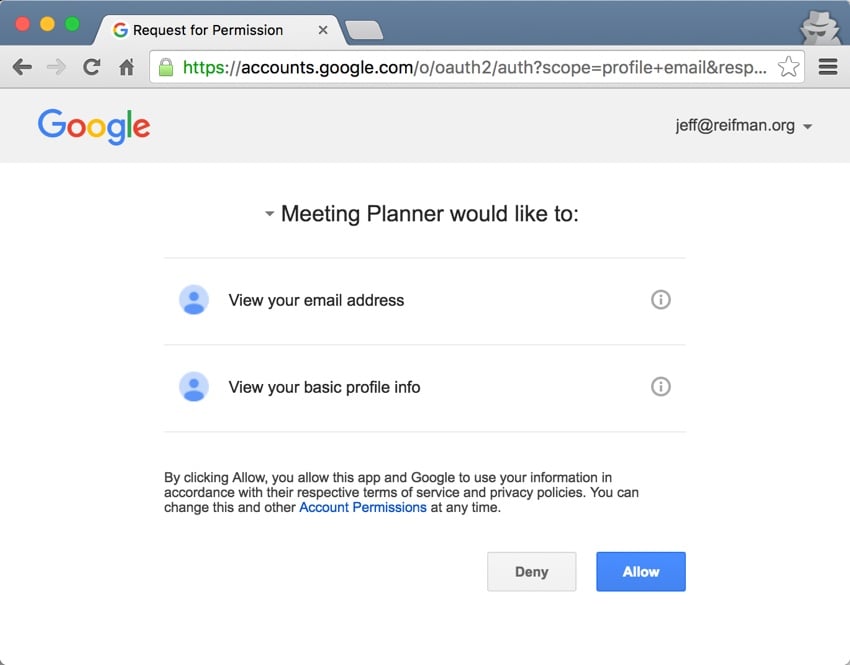
这是 Google 的屏幕:
但是当用户允许我们分享他们的社交帐户详细信息时,到底发生了什么?让我们看一下我编写的用于处理用户操作的代码。
处理 OAuth 权限
\frontend\controllers\SiteController.php 处理传入的 auth 操作到函数 onAuthSuccess:
    /**
     * @inheritdoc
     */
    public function actions()
    {
        return [
            'error' => [
                'class' => 'yii\web\ErrorAction',
            ],
            'captcha' => [
                'class' => 'yii\captcha\CaptchaAction',
                'fixedVerifyCode' => YII_ENV_TEST ? 'testme' : null,
            ],
            'auth' => [
                'class' => 'yii\authclient\AuthAction',
                'successCallback' => [$this, 'onAuthSuccess'],
            ],
        ];
    }
大多数优秀的 OAuth 客户端都会在类似的属性数组中提供类似的信息,Twitter 除外。 Twitter 在共享电子邮件地址方面起步较晚,对于我的 MVP 来说,现在不值得进行额外的工作来配置它。 Google 和 Facebook 更为流行。
首先,我正在收集服务详细信息并收集尽可能多的个人数据:电子邮件、名字和姓氏、全名,尤其是该社交网络中该用户的外部 ID:
public function onAuthSuccess($client)
        {
          $mode =  Yii::$app->getRequest()->getQueryParam('mode');
          $attributes = $client->getUserAttributes();
          $serviceId = $attributes['id'];
          $serviceProvider = $client->getId();
          $serviceTitle = $client->getTitle();
          $firstname ='';
          $lastname='';
          $fullname ='';
          switch ($serviceProvider) {
            case 'facebook':
              $username = $email = $attributes['email'];
              $fullname = $attributes['name'];
              break;
            case 'google':
              $email = $attributes['emails'][0]['value'];
              if (isset($attributes['displayName'])) {
                  $fullname = $username = $attributes['displayName'];
              }
              if (isset($attributes['name']['familyName']) and isset($attributes['name']['givenName'])) {
                $lastname = $attributes['name']['familyName'];
                $firstname = $attributes['name']['givenName'];
              }
            break;
            case 'linkedin':
              $username = $email = $attributes['email-address'];
              $lastname = $attributes['first-name'];
              $firstname = $attributes['last-name'];
              $fullname = $firstname.' '.$lastname;
            break;
            case 'twitter':
              $username = $attributes['screen_name'];
              $fullname = $attributes['name'];
              // to do - fix social helpers
              $email = $serviceId.'@twitter.com';
            break;
          }
          // to do - split names into first and last with parser
            $auth = Auth::find()->where([
                'source' => (string)$serviceProvider,
                'source_id' => (string)$serviceId,
            ])->one();
在上面的最后几行代码中,我们在 Auth 表中搜索此人的外部 ID。如果它们不存在,则它们对于 Meeting Planner 来说是新的。如果它们存在,我们就会认出它们。
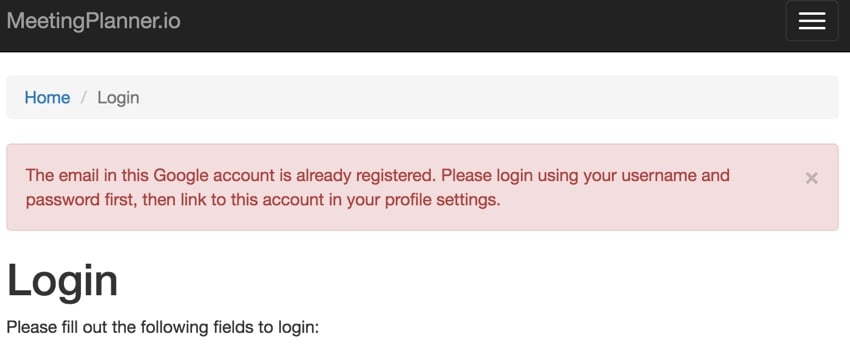
同样,我们需要检查他们的电子邮件地址是否已存在,因为该电子邮件地址的人可能之前已在 Meeting Planner 中注册过。
当 MeetingPlanner.io 当前没有经过身份验证的用户时,下面的代码将查看传入的用户数据。
如果外部 ID 已在我们的 Auth 表中,我们会将其登录。这对他们来说很简单!
如果我们无法识别该 ID,但我们已经注册了电子邮件地址,我们会要求他们通过用户名和密码登录,然后关联他们的帐户。
if (Yii::$app->user->isGuest) {
    if ($auth) {
      // if the user_id associated with this oauth login is registered, try to log them in
      $user_id = $auth->user_id;
      $person = new \common\models\User;
      $identity = $person->findIdentity($user_id);
      Yii::$app->user->login($identity);
    } else {
      // it's a new oauth id
      // first check if we know the email address
      if (isset($email) && User::find()->where(['email' => $email])->exists()) {
        // the email is already registered, ask person to link accounts after logging in
        Yii::$app->getSession()->setFlash('error', [
            Yii::t('frontend', "The email in this {client} account is already registered. Please login using your username and password first, then link to this account in your profile settings.", ['client' => $serviceTitle]),
        ]);
        $this->redirect(['login']);
      } else {
        if ($mode == 'login') {
          // they were trying to login with an unconnected account - ask them to login normally and link after
          Yii::$app->getSession()->setFlash('error', [
              Yii::t('frontend', "We don't recognize the user with this email from {client}. If you wish to sign up, try again below. If you wish to link {client} to your Meeting Planner account, login first with your username and password. Then visit your profile settings.", ['client' => $serviceTitle]),
          ]);
          $this->redirect(['signup']);
        }
接下来,如果他们在点击社交帐户按钮后进入登录页面,并且我们无法识别外部 ID或电子邮件地址,我们将他们重定向到注册页面并要求他们从注册页面重试。
如果他们从注册页面进行链接,我们将确保新用户不会面临(先前存在的 Meeting Planner 用户的)重复用户名的风险。在这种情况下,我们暂时用随机字符串扩展用户名。我们使用密码将他们注册为 Meeting Planner 的新用户(他们实际上并不需要密码)。
else if ($mode == 'signup') {
 // sign up a new account using oauth
 // look for username that exists already and differentiate it
 if (isset($username) && User::find()->where(['username' => $username])->exists()) {
   $username.=Yii::$app->security->generateRandomString(6);
 }
 $password = Yii::$app->security->generateRandomString(12);
   $user = new User([
       'username' => $username, // $attributes['login'],
       'email' => $email,
       'password' => $password,
       'status' => User::STATUS_ACTIVE,
   ]);
   $user->generateAuthKey();
   $user->generatePasswordResetToken();
   $transaction = $user->getDb()->beginTransaction();
   if ($user->save()) {
       $auth = new Auth([
           'user_id' => $user->id,
           'source' => $serviceProvider, // $client->getId(),
           'source_id' => $serviceId, // (string)$attributes['id'],
       ]);
       if ($auth->save()) {
           $transaction->commit();
           Yii::$app->user->login($user);
       } else {
           print_r($auth->getErrors());
       }
   } else {
       print_r($user->getErrors());
   }
 } // end signup
}
}
在上述最后步骤中,我们将其外部社交帐户详细信息添加到 Auth 表中,以供将来识别。
关联现有会议策划者帐户
如果它们来自用户个人资料页面(而不是我们的登录或注册页面)上的“链接社交帐户”选项卡,那么我们只需将其外部帐户详细信息添加到 Auth ,并将其登录名移至 User::STATUS_ACTIVE。 (请记住,从会议策划者邀请链接到达但从未注册的用户具有 User::STATUS_PASSIVE 模式。)
} else {
// user already logged in, link the accounts
if (!$auth) { // add auth provider
$auth = new Auth([
'user_id' => Yii::$app->user->id,
'source' => $serviceProvider,
'source_id' => $serviceId,
]);
$auth->validate();
$auth->save();
$u = User::findOne(Yii::$app->user->id);
$u->status = User::STATUS_ACTIVE;
$u->update();
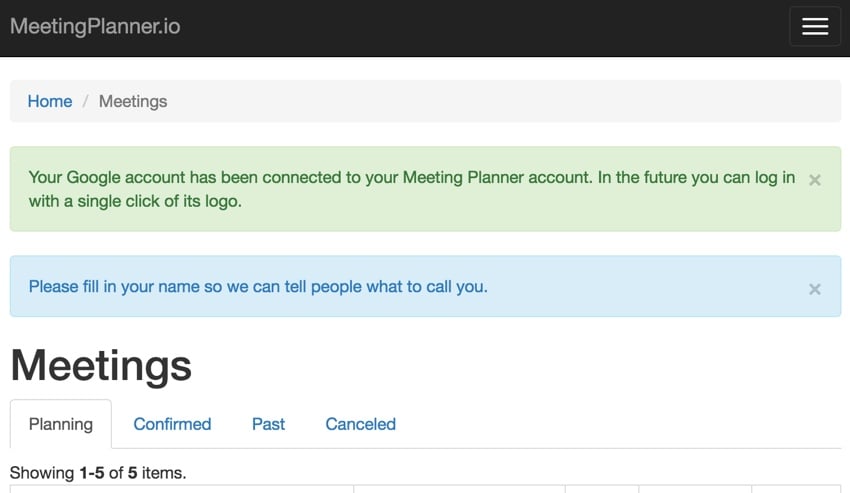
Yii::$app->session->setFlash('success', Yii::t('frontend', 'Your {serviceProvider} account has been connected to your Meeting Planner account. In the future you can log in with a single click of its logo.',
array('serviceProvider'=>$serviceTitle)));
}
}
看起来是这样的(将来我会从 OAuth 信息中填写命名信息——还没有完成):
Finish
I have to admit, the impact of establishing OAuth connections to major services like Google, Facebook, and LinkedIn is pretty huge. It makes signing up and using Meeting Planner on a regular basis so easy, and speeds up future authentication. This is indeed a bit unbelievable.
Meeting planners have really come together over the past few months. Please try social login and registration now! Check out the upcoming tutorials in our "Build your startup with PHP" series - there will be a lot of interesting features as the product moves toward MVP.
I also started trying WeFunder in light of the implementation of the SEC’s new crowdfunding rules. Please consider following our profile. I'll probably talk more about this as part of our series.
Feel free to add your questions and comments below; I'll generally join in on the discussion. You can also reach me on Twitter @reifman. I welcome feature and theme requests.
If you would like to know when the next Yii2 tutorial is released, follow me on Twitter @reifman or check out my instructor page. My instructor page will immediately contain all articles from this series.
Related Links
- Meeting Planner: Schedule Your First Meeting
- Meeting Planner Funding Overview
- Programming with Yii2: Getting Started
-
Yii 2 AuthClient Extension Guide
- Yii2 OAuth2 Library Documentation
- Yii2 Developer Exchange Meeting
The above is the detailed content of Simplify startup onboarding with PHP and OAuth. For more information, please follow other related articles on the PHP Chinese website!