

 Web Front-endJS TutorialEnhancing Project Management in Angular-Based Grocery List Manager: Part 2
In the first part of this Angular tutorial series, you learned how to get started creating a grocery list manager using Angular. You learned how to create a view of the Grocery component, add items to a grocery list, and display the added items.
In this section, you will implement the functionality of marking completed projects, editing existing projects, and deleting added projects.
start using
Let's start by cloning the source code for the first part of this tutorial. In your terminal, write the following code to clone the source code:
git clone https://github.com/royagasthyan/AngularGrocery
After cloning the source code, navigate to the project folder and install the required dependencies.
cd AngularGrocery
npm install
After installing the dependencies, you will be able to start the server. From the project folder, enter the following command:
ng serve
Point your browser to http://localhost:4200/ and the application should be running.
Update grocery items
After you add grocery items to your list, you should be able to edit and update them. Let's provide an edit button in the list grid, which when clicked will enable editing of existing items.
Modify app.grocery.html code to include edit buttons within the grid.
<span class="glyphicon glyphicon-pencil floatright"></span>
Save the above changes and restart the server. Load the page and enter some items, you will see edit buttons for each item.
You need to add an on click method to handle item editing when the user clicks the edit button. Modify app.grocery.html to add a click event for editing items.
<span (click)="onEdit(task)" class="glyphicon glyphicon-pencil floatright"></span>
Pass task to the onEdit method (as shown in the code above) to identify the item to be edited.
Initialize the task scope variable in the GroceryComponent class as follows:
task = {
    name: '',
	id: 0
  };
In the onClick method you will check the id to see if it is an existing item or a new item. Modify the onClick method as follows:
if(this.task.id == 0){
    this.tasks.push({id: (new Date()).getTime(),name: this.task.name});
}
As shown in the picture, you have assigned each task a unique timestamp, which is id. Now let's define the onEdit method to edit an existing item. In the onEdit method, assign the incoming item to the task variable.
onEdit(item){
    this.task = item;
}
Save changes and restart the server. Enter new items in your shopping list and click the corresponding edit button. You can edit and update this entry by clicking the OK button.

Delete Grocery Items
Let's add a delete icon to delete existing items. Update the app.grocery.html file and modify the HTML code as follows:
<span class="glyphicon glyphicon-remove floatright paddingLeft"></span>
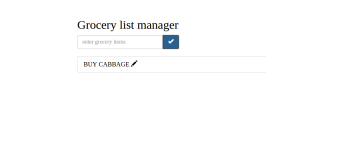
Here is what the complete app.grocery.html file looks like:
Grocery list manager
- {{ task.name }} <span class="glyphicon glyphicon-remove floatright paddingLeft"></span> <span (click)="onEdit(task)" class="glyphicon glyphicon-pencil floatright"></span>
Add click event to delete icon to delete groceries.
<span (click)="onDelete(task)" class="glyphicon glyphicon-remove floatright paddingLeft"></span>
Save changes and restart the server. Try adding new items to the grocery management app and you will see these items along with delete and edit icons.

To implement the delete function, you need to add onDelete method = "inline">app.grocery.ts in
<pre class='brush:php;toolbar:false;'>onDelete(item){
    // Delete functionality will be here
}
</pre>
<p> After the user clicks the delete icon, you need to check the item <code class="inline">id
against the list of grocery items and delete the entry from the tasks list. Here's what the onDelete method looks like:
onDelete(item){
    for(var i = 0;i < this.tasks.length; i++){
    	if(item.id == this.tasks[i].id){
    		this.tasks.splice(i,1);
    		break;
    	}
    }
}
As shown in the code above, you have iterated over the tasks list and checked it based on the clicked item id. If it matches an item in the tasks list, use the splice method to remove it.
Save the above changes and restart the server. Add some items to the grocery list manager. It will be added to the task list grid along with the delete and edit icons. Try clicking the delete icon and the item will be removed from the items list.
Mark groceries as complete
Let's add the ability to remove items added to the list. Once the user completes a task in the shopping list manager, it should be possible to delete the completed task. To track new and completed tasks, add a new variable strike to the task information.
Modify the onClick method to include the new strike variable as follows:
  onClick(){
    if(this.task.id == 0){
		this.tasks.push({id: (new Date()).getTime(),name: this.task.name, strike: false});
	}

  	this.task = {
		name: '',
		id: 0
	};
  }
在 src/style.css 文件中添加一个名为 strike 的新类,该类将删除该项目。
.strike{
    text-decoration:line-through;
}
在项目上包含单击事件,以切换 items 变量中的 strike 变量。您将根据 strike 变量的布尔值将 strike 类应用于项目。默认情况下,它将为 false。以下是用于切换罢工变量值的 onStrike 方法:
onStrike(item){
  for(var i = 0;i < this.tasks.length; i++){
    if(item.id == this.tasks[i].id){
      if(this.tasks[i].strike){
        this.tasks[i].strike = false;
      }
      else{
        this.tasks[i].strike = true;
      }
      break;
    }
  }
}
如上面的方法所示,您将迭代项目列表。找到该项目后,您可以切换罢工值。
基于 strike 变量,您需要将类 strike 应用到任务名称范围。其外观如下:
<span (click)="onStrike(task)" [ngClass]="{'strike': task.strike}"> {{ task.name }} </span>
如图所示,如果 task.strike 值为 ngClass 指令将类 strike 应用于 span 元素class="inline">true
保存以上更改并重新启动服务器。将项目添加到列表中,然后单击添加的项目。单击后,该项目将按预期被删除。

总结
在本教程中,您了解了如何使用 Angular 在杂货店管理应用中更新、删除任务并将任务标记为完成。我希望您喜欢本教程。请在下面的评论中告诉我您的想法。
JavaScript 已成为事实上的网络工作语言之一。它并非没有学习曲线,而且还有大量的框架和库可以让您忙碌起来。如果您正在寻找其他资源来学习或在工作中使用,请查看我们在 Envato 市场中提供的资源。
哦,不要忘记本教程的源代码可以在 GitHub 上找到。
The above is the detailed content of Enhancing Project Management in Angular-Based Grocery List Manager: Part 2. For more information, please follow other related articles on the PHP Chinese website!

 Python vs. JavaScript: Community, Libraries, and ResourcesApr 15, 2025 am 12:16 AM
Python and JavaScript have their own advantages and disadvantages in terms of community, libraries and resources. 1) The Python community is friendly and suitable for beginners, but the front-end development resources are not as rich as JavaScript. 2) Python is powerful in data science and machine learning libraries, while JavaScript is better in front-end development libraries and frameworks. 3) Both have rich learning resources, but Python is suitable for starting with official documents, while JavaScript is better with MDNWebDocs. The choice should be based on project needs and personal interests.
 From C/C to JavaScript: How It All WorksApr 14, 2025 am 12:05 AM
The shift from C/C to JavaScript requires adapting to dynamic typing, garbage collection and asynchronous programming. 1) C/C is a statically typed language that requires manual memory management, while JavaScript is dynamically typed and garbage collection is automatically processed. 2) C/C needs to be compiled into machine code, while JavaScript is an interpreted language. 3) JavaScript introduces concepts such as closures, prototype chains and Promise, which enhances flexibility and asynchronous programming capabilities.
 JavaScript Engines: Comparing ImplementationsApr 13, 2025 am 12:05 AM
Different JavaScript engines have different effects when parsing and executing JavaScript code, because the implementation principles and optimization strategies of each engine differ. 1. Lexical analysis: convert source code into lexical unit. 2. Grammar analysis: Generate an abstract syntax tree. 3. Optimization and compilation: Generate machine code through the JIT compiler. 4. Execute: Run the machine code. V8 engine optimizes through instant compilation and hidden class, SpiderMonkey uses a type inference system, resulting in different performance performance on the same code.
 Beyond the Browser: JavaScript in the Real WorldApr 12, 2025 am 12:06 AM
JavaScript's applications in the real world include server-side programming, mobile application development and Internet of Things control: 1. Server-side programming is realized through Node.js, suitable for high concurrent request processing. 2. Mobile application development is carried out through ReactNative and supports cross-platform deployment. 3. Used for IoT device control through Johnny-Five library, suitable for hardware interaction.
 Building a Multi-Tenant SaaS Application with Next.js (Backend Integration)Apr 11, 2025 am 08:23 AM
I built a functional multi-tenant SaaS application (an EdTech app) with your everyday tech tool and you can do the same. First, what’s a multi-tenant SaaS application? Multi-tenant SaaS applications let you serve multiple customers from a sing
 How to Build a Multi-Tenant SaaS Application with Next.js (Frontend Integration)Apr 11, 2025 am 08:22 AM
This article demonstrates frontend integration with a backend secured by Permit, building a functional EdTech SaaS application using Next.js. The frontend fetches user permissions to control UI visibility and ensures API requests adhere to role-base
 JavaScript: Exploring the Versatility of a Web LanguageApr 11, 2025 am 12:01 AM
JavaScript is the core language of modern web development and is widely used for its diversity and flexibility. 1) Front-end development: build dynamic web pages and single-page applications through DOM operations and modern frameworks (such as React, Vue.js, Angular). 2) Server-side development: Node.js uses a non-blocking I/O model to handle high concurrency and real-time applications. 3) Mobile and desktop application development: cross-platform development is realized through ReactNative and Electron to improve development efficiency.
 The Evolution of JavaScript: Current Trends and Future ProspectsApr 10, 2025 am 09:33 AM
The latest trends in JavaScript include the rise of TypeScript, the popularity of modern frameworks and libraries, and the application of WebAssembly. Future prospects cover more powerful type systems, the development of server-side JavaScript, the expansion of artificial intelligence and machine learning, and the potential of IoT and edge computing.


Hot AI Tools

Undresser.AI Undress
AI-powered app for creating realistic nude photos

AI Clothes Remover
Online AI tool for removing clothes from photos.

Undress AI Tool
Undress images for free

Clothoff.io
AI clothes remover

AI Hentai Generator
Generate AI Hentai for free.

Hot Article
Hot Tools

SublimeText3 Chinese version
Chinese version, very easy to use

MantisBT
Mantis is an easy-to-deploy web-based defect tracking tool designed to aid in product defect tracking. It requires PHP, MySQL and a web server. Check out our demo and hosting services.

PhpStorm Mac version
The latest (2018.2.1) professional PHP integrated development tool

WebStorm Mac version
Useful JavaScript development tools

ZendStudio 13.5.1 Mac
Powerful PHP integrated development environment

