
Home >Backend Development >PHP Tutorial >Explore WordPress HTTP API: Real-life illustration of wp_remote_get
Explore WordPress HTTP API: Real-life illustration of wp_remote_get

- PHPzOriginal
- 2023-09-01 17:37:011252browse
In the last article of this series, we looked at the PHP functions that can be used to make remote requests.
Specifically, we reviewed:
file_get_contentscURL
We also discussed the WordPress function wp_remote_get.
In this article, we will put wp_remote_get to work. This function is part of the HTTP API - actually use it by using it to retrieve the following two things:
- Our number of followers on Twitter
- Our latest tweets
The benefit is that we don’t need to use any OAuth or authentication mechanisms, but just leverage Twitter responses and PHP’s JSON capabilities.
So in this article we'll actually see how to do that, and then we'll review all the information wp_remote_get returns at the end of the series so that we know how to do it correctly in the future Handle it well at work.
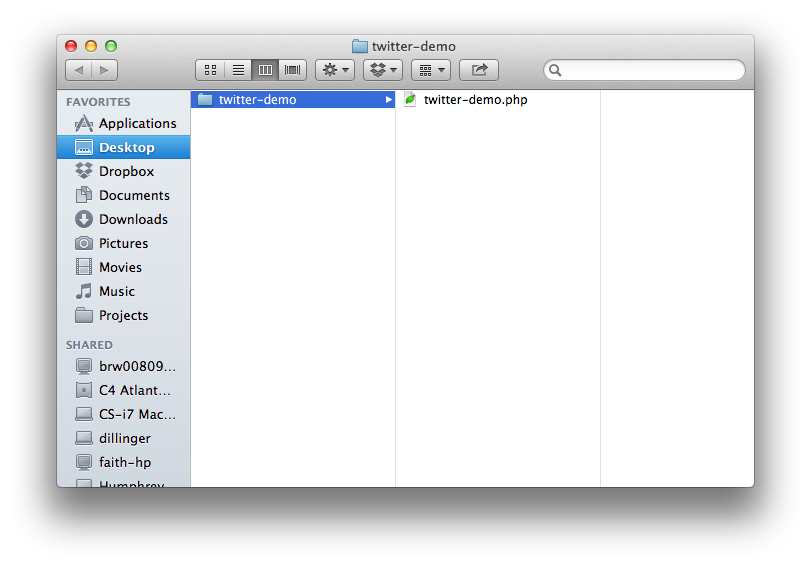
Prepare plug-in directory
As with all plugins, the first thing we need to do is create a directory inside the wp-content/plugins directory. For the purposes of this demo, we'll call our plugin TwitterDemo.
Therefore, we named the plugin directory twitter-demo and the associated plugin file twitter-demo.php.
Next, we need to go ahead and remove the plugin’s headers so that WordPress can detect the plugin file, so we’ll do that now.
Delete plugin
First, put the following code into the header of the twitter-demo.php file:
<?php
/* Plugin Name: Twitter Demo
 * Plugin URI:  http://example.com/twitter-demo/
 * Description: Retrieves the number of followers and latest Tweet from your Twitter account.
 * Version:     1.0.0
 * Author:      Tom McFarlin
 * Author URI:  http://tommcfarlin.com/
 * License:     GPL-2.0+
 * License URI: http://www.gnu.org/licenses/gpl-2.0.txt
 */
Please note that we will not internationalize this plugin. We discuss this topic in another article, which is beyond the scope of what we try to do in this article.
At this point, you should be able to see the plugin in your WordPress installed plugins dashboard. You can activate it; however, it won't actually do anything.
At least not yet.
Bringing plugins to life
As with other demo plugins I've posted here, I think it's important to first outline what the plugin is going to do before you start coding.
Therefore, we can expect the following results:
- At the bottom of each post, we display a small notification that reads: I have X followers on Twitter. My last tweet was Y.
- We will make sure to only do this on a single post page so that it does not show up on the main index or archive page.
Of course, it's a bit annoying to have this at the bottom of the post, but remember, the purpose of this plugin is to demonstrate how how to parse a response from Twitter using wp_remote_get, and how to display it.
We don't care too much where the content is displayed.
So, let's go ahead and delete the class that will provide this functionality.
1. Delete Twitter demo class
Before doing anything, let's remove the class that will be used to make requests to Twitter. I've included all of the code below along with documentation for each property and method.
<?php
/**
 * Plugin Name: Twitter Demo
 * Plugin URI:  http://tommcfarlin.com/twitter-demo/
 * Description: Retrieves the number of followers and latest Tweet from your Twitter account.
 * Version:     1.0.0
 * Author:      Tom McFarlin
 * Author URI:  http://tommcfarlin.com/
 * License:     GPL-2.0+
 * License URI: http://www.gnu.org/licenses/gpl-2.0.txt
 */

class Twitter_Demo {

	/**
	 * Instance of this class.
	 *
	 * @var      Twitter_Demo
	 */
	private static $instance;

	/**
	 * Initializes the plugin so that the Twitter information is appended to the end of a single post.
	 * Note that this constructor relies on the Singleton Pattern
	 *
	 * @access private
	 */
	private function __construct() {

	} // end constructor

	/**
	 * Creates an instance of this class
	 *
	 * @access public
	 * @return Twitter_Demo    An instance of this class
	 */
	public function get_instance() {

	} // end get_instance

	/**
	 * Appends a message to the bottom of a single post including the number of followers and the last Tweet.
	 *
	 * @access public
	 * @param  $content    The post content
	 * @return $content    The post content with the Twitter information appended to it.
	 */
	public function display_twitter_information( $content ) {

	} // end display_twitter_information

	/**
	 * Attempts to request the specified user's JSON feed from Twitter
	 *
	 * @access public
	 * @param  $username   The username for the JSON feed we're attempting to retrieve
	 * @return $json       The user's JSON feed or null of the request failed
	 */
	private function make_twitter_request( $username ) {

	} // end make_twitter_request

	/**
	 * Retrieves the number of followers from the JSON feed
	 *
	 * @access private
	 * @param  $json     The user's JSON feed
	 * @return           The number of followers for the user. -1 if the JSON data isn't properly set.
	 */
	private function get_follower_count( $json ) {

	} // end get_follower_count

	/**
	 * Retrieves the last tweet from the user's JSON feed
	 *
	 * @access private
	 * @param  $json     The user's JSON feed
	 * @return           The last tweet from the user's feed. '[ No tweet found. ]' if the data isn't properly set.
	 */
	private function get_last_tweet( $json ) {

	} // end get_last_tweet

} // end class

// Trigger the plugin
Twitter_Demo::get_instance();
Please note that we will fill in the rest of these methods as we go, and I will also provide the full source code of the plugin at the end of the article.
Before we go any further, I want to point out that we will be using the singleton pattern for this plugin. We covered this design pattern in a previous article, and while its advantages are beyond the scope of this article, I recommend reading the related article to make sure you fully understand why we set up the plugin this way. p>
Next, let’s take a look at the features we’ve listed so we know exactly where we’re headed:
- We will add an action in the constructor for appending Twitter information to a single post
-
display_twitter_informationwill be used to render the message at the bottom of the post -
make_twitter_requestWill actually request and return the data from Twitter (returns null if the request fails) -
get_follower_countWill return the number of followers of the specified user (returns -1 if there is a problem) -
get_last_tweetWill return the user's last tweet, or a message if the plugin failed
Is it clear enough? Now, let's request information from Twitter so we can process it.
2. Requesting data from Twitter
First, let's populate the make_twitter_request function with the following code. Please note that I will explain it after the code:
private function make_twitter_request( $username ) {

	$response = wp_remote_get( 'https://twitter.com/users/' . $username . '.json' );
	try {

		// Note that we decode the body's response since it's the actual JSON feed
		$json = json_decode( $response['body'] );

	} catch ( Exception $ex ) {
		$json = null;
	} // end try/catch

	return $json;

}
In the first line of code, we use wp_remote_get to make our request. Note that we use the $username parameter to retrieve the user's JSON feed. Notice how simple it is to make the request using the wp_remote_get function.
This username is passed in from another function we will look at later.
接下来,请注意我们将代码包装在 try/catch 中。这是因为向 Twitter 发出的请求可能会失败。如果没有失败,那么我们将使用 PHP 的 json_decode 函数来解码响应的正文;否则,我们会将响应设置为 null。
这将使调用函数中的条件变得简单。
在我们进一步讨论之前,重要的是要注意这里有一个微妙的要点:请注意,我们正在解码返回的 $response 数组的 'body' 键。对于对此更好奇的人,我们将在下一篇文章中详细查看使用 wp_remote_get 时出现的响应。
现在,只需注意 $response 数组的 body 索引只是我们可用的一条信息。
3。调用请求函数
现在我们已经定义了负责向 Twitter 发出请求的函数,接下来让我们定义一个函数,该函数将从 Twitter 请求数据,然后将其显示在帖子内容下方。
同样,这是代码,之后我将准确解释它的作用:
public function display_twitter_information( $content ) {

	// If we're on a single post or page...
	if ( is_single() ) {

		// ...attempt to make a response to twitter. Note that you should replace your username here!
		if ( null == ( $json_response = $this->make_twitter_request( 'wptuts' ) ) ) {

			// ...display a message that the request failed
			$html = '
<div id="twitter-demo-content">';
 $html .= 'There was a problem communicating with the Twitter API..';
 $html .= '</div>
<!-- /#twitter-demo-content -->';

		// ...otherwise, read the information provided by Twitter
		} else {

			$html = '
<div id="twitter-demo-content">';
 $html .= 'I have ' . $this->get_follower_count( $json_response ) . ' followers and my last tweet was "' . $this->get_last_tweet( $json_response ) . '".';
 $html .= '</div>
<!-- /#twitter-demo-content -->';

		} // end if/else

		$content .= $html;

	} // end if/else

	return $content;

}
首先,要知道这是整个插件中最长的函数。如果您能对此进行筛选,那么您就可以开始了。
记住:这个函数将在插件完全完成后在我们的构造函数中定义的 the_content 操作期间被调用。
因此,该函数首先检查我们是否在单个帖子上。如果没有,那么它只会返回内容;否则,它将执行以下操作:
- 尝试向 Twitter 提出请求
- 如果请求失败,则会显示一条消息
- 否则,如果将打印一条消息,显示关注者数量以及该人留下的最后一条推文
- 它将把消息附加到帖子内容
重要说明:在此函数中,您可以指定要检索其信息的用户名。例如,请注意,我正在尝试通过调用 $this->make_twitter_request('wptuts') 来检索 @WPTuts 的信息。
4。阅读信息
此时,我们已准备好读取信息并将字符串连接到消息中以显示给用户。我们将使用 get_follower_count 方法和 get_last_tweet 来完成此操作。
因为这些方法非常相似,所以我们将看一下它们,然后我将在代码后面解释它们:
private function get_follower_count( $json ) {
	return ( -1 < $json->followers_count ) ? $json->followers_count : -1;
} // end get_follower_count

private function get_last_tweet( $json ) {
	return ( 0 < strlen( $json->status->text ) ) ? $json->status->text : '[ No tweet found. ]';
} // end get_last_tweet
请注意,这两个函数的相似之处在于它们都接受插件早期的 $json 数据。接下来,它们都使用三元运算符来确定是否应该返回请求的文本或默认消息。
换句话说,如果我们要显示 followers_count 并且该值大于 -1,那么我们知道我们有一个要显示的值,因此我们将返回它;否则,我们将返回 -1 作为该值未正确设置的指示符。
这使我们能够针对处理数据时可能出错的问题进行防御性编码。
Twitter 演示插件
正如所承诺的,这里是完整的源代码以及匹配的文档:
<?php
/**
 * Plugin Name: Twitter Demo
 * Plugin URI:  http://example.com/twitter-demo/
 * Description: Retrieves the number of followers and latest Tweet from your Twitter account.
 * Version:     1.0.0
 * Author:      Tom McFarlin
 * Author URI:  http://tommcfarlin.com/
 * License:     GPL-2.0+
 * License URI: http://www.gnu.org/licenses/gpl-2.0.txt
 */
class Twitter_Demo {
	/**
	 * Instance of this class.
	 *
	 * @var      Twitter_Demo
	 */
	private static $instance;

	/**
	 * Initializes the plugin so that the Twitter information is appended to the end of a single post.
	 * Note that this constructor relies on the Singleton Pattern
	 *
	 * @access private
	 */
	private function __construct() {
		add_action( 'the_content', array( $this, 'display_twitter_information' ) );
	} // end constructor

	/**
	 * Creates an instance of this class
	 *
	 * @access public
	 * @return Twitter_Demo    An instance of this class
	 */
	public function get_instance() {
		if ( null == self::$instance ) {
			self::$instance = new self;
		}
		return self::$instance;
	} // end get_instance

	/**
	 * Appends a message to the bottom of a single post including the number of followers and the last Tweet.
	 *
	 * @access public
	 * @param  $content    The post content
	 * @return $content    The post content with the Twitter information appended to it.
	 */
	public function display_twitter_information( $content ) {
		// If we're on a single post or page...
		if ( is_single() ) {
			// ...attempt to make a response to twitter. Note that you should replace your username here!
			if ( null == ( $json_response = $this--->make_twitter_request('wptuts') ) ) {

				// ...display a message that the request failed
				$html = '
<div id="twitter-demo-content">';
 $html .= 'There was a problem communicating with the Twitter API..';
 $html .= '</div>
<!-- /#twitter-demo-content -->';

				// ...otherwise, read the information provided by Twitter
			} else {

				$html = '
<div id="twitter-demo-content">';
 $html .= 'I have ' . $this->get_follower_count( $json_response ) . ' followers and my last tweet was "' . $this->get_last_tweet( $json_response ) . '".';
 $html .= '</div>
<!-- /#twitter-demo-content -->';

			} // end if/else

			$content .= $html;

		} // end if/else

		return $content;

	} // end display_twitter_information

	/**
	 * Attempts to request the specified user's JSON feed from Twitter
	 *
	 * @access public
	 * @param  $username   The username for the JSON feed we're attempting to retrieve
	 * @return $json       The user's JSON feed or null of the request failed
	 */
	private function make_twitter_request( $username ) {

		$response = wp_remote_get( 'https://twitter.com/users/' . $username . '.json' );
		try {

			// Note that we decode the body's response since it's the actual JSON feed
			$json = json_decode( $response['body'] );

		} catch ( Exception $ex ) {
			$json = null;
		} // end try/catch

		return $json;

	} // end make_twitter_request

	/**
	 * Retrieves the number of followers from the JSON feed
	 *
	 * @access private
	 * @param  $json     The user's JSON feed
	 * @return           The number of followers for the user. -1 if the JSON data isn't properly set.
	 */
	private function get_follower_count( $json ) {
		return ( -1 < $json->followers_count ) ? $json->followers_count : -1;
	} // end get_follower_count

	/**
	 * Retrieves the last tweet from the user's JSON feed
	 *
	 * @access private
	 * @param  $json     The user's JSON feed
	 * @return           The last tweet from the user's feed. '[ No tweet found. ]' if the data isn't properly set.
	 */
	private function get_last_tweet( $json ) {
		return ( 0 < strlen( $json->status->text ) ) ? $json->status->text : '[ No tweet found. ]';
	} // end get_last_tweet

} // end class

// Trigger the plugin
Twitter_Demo::get_instance();
其实很简单,对吧?事实上,代码注释的数量与实际代码行的数量一样多,因此插件本身非常小。
结论
这个演示展示了使用 wp_remote_get 与第三方服务交互、解析它们的响应并将其集成到插件中是多么容易。诚然,这非常很简单,但它仍然证明了这个概念。
在本系列的下一篇文章中,我们将查看可以传递给 wp_remote_get 的所有信息,以了解该方法的灵活性。之后,我们将详细查看响应数据,以便我们能够编写更复杂的请求并编写更多的防御性代码,更具防御性。
The above is the detailed content of Explore WordPress HTTP API: Real-life illustration of wp_remote_get. For more information, please follow other related articles on the PHP Chinese website!