Home >CMS Tutorial >WordPress >6 easy steps to use Twitter's @Anywhere service
6 easy steps to use Twitter's @Anywhere service
- WBOYWBOYWBOYWBOYWBOYWBOYWBOYWBOYWBOYWBOYWBOYWBOYWBOriginal
- 2023-09-01 17:21:081075browse
Last week, Twitter launched @Anywhere, which brings all of Twitter’s platform features to your website by just adding a few lines of code. @Anywhere allows for anything from turning a simple @username into a clickable link or even creating new tweets directly from your personal website. I'll show you exactly how in this tutorial!
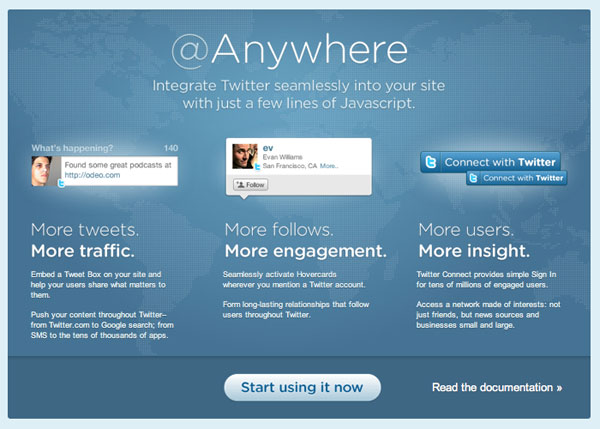
Before you begin, create an application
In order to start using @Anywhere, you must have an API key. What? Don't you? no problem. Simply go here to register a new application (do not register from here).
- If you installed a local server, set it to a domain (e.g., developertutorial.com) as it won't work with your localhost (if you don't know how, check out this tutorial, hosts file section Particularly important).
- If you do not have a local server, leave this section blank. Remember that for a production environment you must set this to the domain you are using.
Finally, set the default access type to "Read and Write". This is very important!
Now you will be redirected to the application settings page. Copy the consumer key (API key) and let's start using @Anywhere.
Includes Javascript for @Anywhere
Open a new HTML file and include within the tags:
<script src="http://platform.twitter.com/anywhere.js?id=<strong>APIKey</strong>&v=1" type="text/javascript"></script>
Your code should look like this:
<!DOCTYPE HTML>
<html>
<head>
<title>@Anywhere</title>
<meta http-equiv="Content-Type" content="text/html; charset=UTF-8" />
<link href="styles.css" rel="stylesheet" type="text/css" />
<script src="http://platform.twitter.com/anywhere.js?id=APIKey&v=1" type="text/javascript"></script>
</head>
<body>
...
</body>
</html>
Replace APIKey with your application's API key you obtained in the previous step. Parameter v=1 is the version. Maybe in the future, Twitter will add new features and maybe new syntax. To prevent breaking existing @Anywhere code, they will retain the old code (if specified). Version 1 supports all major browsers, including IE6.
After including this JavaScript file, we have access to the twttr object, which will call the anywhere() function with the arguments when @Anywhere is ready:
twttr.anywhere(function(twitter) {
	// Actions when @Anywhere is ready
});
The parameter (twitter in this case) is the object we will use, similar to jQuery's $.
Next, we need to create an HTML library. Copy and paste the following code and place it inside the "body" tag.
<div id="main">
	<div class="post">
		<h2>My blog post</h2>
		<div class="content">
			<p>This is a test blog post testing @Anywhere by @twitter.</p>
			<p>If you enjoyed this tutorial, please <a href="http://twitter.com/faelazo" class="hovercard">follow me</a> and keep in touch with @NETTUTS for more awesomeness.</p>
		</div>
	</div>
	<div class="comments">
	<h3>Comments</h3>
	<ol>
		<li><span class="author">@corcholat</span> says:
			<p>Such a great tutorial! </p>
		</li>
		<li><span class="author">@faelazo</span> says:
			<p>You should also follow @smashingmag</p>
		</li>
	</ol>
	</div>
</div>
Now let’s delve deeper.
1. linkifyUsers: Convert @something to a link
@Anywhere allows us to convert @mentions into links. This feature is called linkifyUsers, and it's very simple: it sets the HTML elements you want to turn into links.
Since we want to convert all @mentions in the document into links, we simply call the linkifyUsers() function in the body element:
twttr.anywhere(function(twitter) {
	twitter("body").linkifyUsers();
});
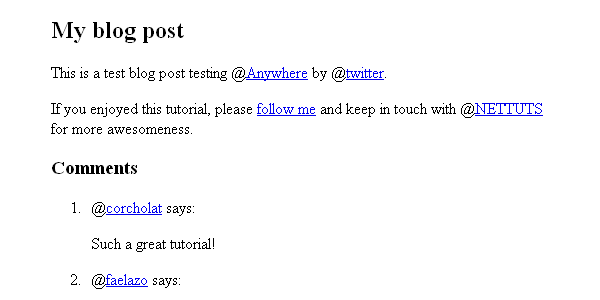
As mentioned earlier, the "twitter" parameter inside the callback function is much like jQuery's "$" alias; if we want to convert @mentions into links, but only within a specific section, we can use a CSS selector, As follows.
twttr.anywhere(function(twitter) {
	twitter(".post").linkifyUsers();
});
linkifyUsers() accepts an object as a parameter and has two properties: className and success. With className you can specify the class to apply when @mentions are found; so, for example, you could add an unsemantic "red" class and specify it in the CSS:
.red { color:#f00; }
Here is the code.
twttr.anywhere(function(twitter) {
	twitter("body").linkifyUsers({
		className:'red'
	});
});
2.hovercards: Display additional information on hover
mousecards() converts @mentions into links, but also loads a small popup tooltip on mouseover. Here is a basic example of its usage.
twttr.anywhere(function(twitter) {
	twitter.hovercards();
});
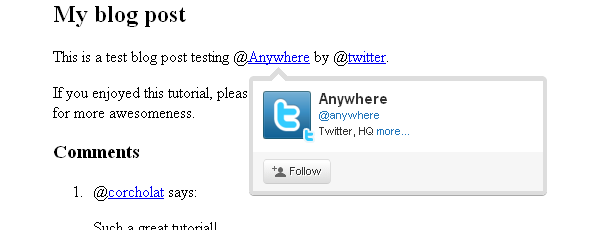
However, hovercards() is flexible enough to include certain elements even if they don't have a @mention in them. In the HTML, I linked "follow me" to http://twitter.com/faelazo;but @anywhere was smart enough to convert this link into a hover card. By adding the "hovercard" class to the anchor tag, Twitter will take care of the rest!
twttr.anywhere(function(twitter) {
    // Find the @mentions and linkify as usual
    twitter("body").hovercards();

    // Let's find the elements which has a hovercard class
    twitter(".hovercard").hovercards({
        username: function(node){
            var twitter_regexp = /twitter\.com\/([a-z0-9_]*)\/?(.*)?/gi;
            if(node.href.match(twitter_regexp) && (twitter_match = twitter_regexp.exec(node.href))){
                return twitter_match[1];
            }
            return '';
        }
    });
});
The username argument takes a function whose argument will be the found object (in this case node). Here's what happens line by line inside the function.
var twitter_regexp = /twitter\.com\/([a-z0-9_]*)/gi;
This is a regular expression. It will match the twitter.com/ string with an alphanumeric value and an underscore.
if(node.href.match(twitter_regexp) && (twitter_match = twitter_regexp.exec(node.href))){
If the regular expression matches the href attribute in the node element, the variable twitter_match is set to capture the value in the array.
return twitter_match[1];
It will return the found matches.
我们添加一个“return”,以防元素确实有一个类,但不引用 twitter.com;所以不会有匹配。如果它返回 false 或 NULL,则脚本会引发错误。使用空字符串时,它会显示一个悬停卡,但未找到用户。
现在,如果这有点太复杂,您可以随时简化过程,并将用户名添加为锚标记的标题属性。
<a href="http://twitter.com/faelazo" class="hovercard" title="faelazo">follow me</a>
只需返回 node 的 title 属性即可。容易多了,对吧?
twitter(".hovercard").hovercards({
    username: function(node){
        return node.title;
    }
});
“hovercards”可以应用于任何元素(甚至是 div),只要它指定用户名即可。
twitter("#main").hovercards({ username: function(){ return 'therrorcom'; }});
3. followButton:一键邀请关注
followButton() 将在先前指定的元素中的用户名参数后面附加一个按钮。
以下代码将在 #main div 中附加一个按钮以关注 Nettuts+。
twttr.anywhere(function(twitter) {
    twitter("#main").followButton("nettuts");
});

followButton() 需要一个参数:要跟随的用户名。够简单吧?
4. tweetBox:来自您网站的推文
tweetBox() 将附加一个框,用户可以在其中输入评论并通过您的网站发布推文。
tweetBox 可以接收一个对象作为参数,具有以下属性:
-
counter(布尔值,默认true)是否显示剩余字符的计数器。
-
height(整数,默认65)框的高度,以像素为单位。
-
width(整数,默认515)框的宽度,以像素为单位。
-
label(字符串,默认“发生了什么?”)框上方的文本。
-
defaultContent(字符串,默认无)您可以默认输入 URL、@mention、#hashtag 等。
-
onTweet(函数)按下推文按钮后调用。它接收两个参数:纯文本推文和 HTML 推文。
可以在带有注释类的元素之后调用默认的 tweetBox ,并使用以下代码片段。
twttr.anywhere(function(twitter) {
    twitter(".comments").tweetBox();
});
因此,如果您想要自定义标签、内容以及发送推文时的回调,请使用此代码。
twitter(".comments").tweetBox({
    label: 'What do you think about this article?',
    defaultContent: '#nettuts ',
    onTweet: function(plain, html){
        // Actions when tweet is sent
    }
});
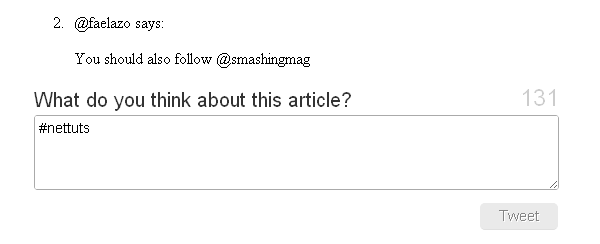
如果您计划用您正在使用的 CMS 替换默认评论区域,则 onTweet 可能会很有用。您仍然需要一个数据库和一个表格来显示评论,对吧?因此,您可以对 CMS 进行一些修改,并使用 onTweet 事件发出 AJAX 请求,以将推文插入数据库。
5. connect:将用户登录到您的应用程序
正如您可能看到的,最后两种方法需要确认才能向应用程序授予权限。 @Anywhere 有一个方法来检查用户是否使用应用程序登录(而不是在 Twitter 上)。您可以使用条件来决定是否显示某些元素。
此代码片段将在元素中附加带有注释类的连接按钮。
twttr.anywhere(function(twitter) {
	twitter(".comments").connectButton();
});

如果您需要不同大小的按钮,则可以传递具有属性大小和值小、中、大或 xlarge 的对象文字。请注意,“中”是默认值。
twttr.anywhere(function(twitter) {
	twitter(".comments").connectButton({ size: 'large' });
});
Twitter 对象包含一些额外的好处;一个是currentUser,它是一个对象;另一个是 isConnected(),这是一个返回布尔值的函数。从这里,我们可以创建一些条件语句。
twttr.anywhere(function(twitter) {
	if(twitter.isConnected()){
		alert('Welcome, you are connected');
	} else {
		twitter(".comments").connectButton();
	}
});
如果 isConnected() 返回 true,我们可以显示一些用户信息,例如用户名 (screen_name)、个人资料图片 (profile_image_url)、关注者或关注者。以下是应用程序可以访问的信息的列表。让我们看看最后综述中的 currentUser 对象。
6.最终综述:将它们混合在一起
我将使用 comments 类修改 div。
<div class="comments">
	<h3>Comments</h3>
	<ol>
		<li><span class="author">@corcholat</span> says:
			<p>Such a great tutorial! </p>
		</li>
		<li><span class="author">@faelazo</span> says:
			<p>You should also follow @smashingmag</p>
		</li>
	</ol>
	<div class="add">
		<h3>Add comment</h3>
		<div class="author"></div>
		<div class="box"></div>
	</div>
</div>
现在让我们加入 jQuery 以使事情变得更容易一些。在 和 之间插入以下代码:
<script src="http://ajax.googleapis.com/ajax/libs/jquery/1.4.2/jquery.min.js" type="text/javascript"></script>
现在我们有一个可以添加评论的空间。首先,如果用户未登录我们的应用程序,我们将使用 isConnected() 条件来显示一个按钮;该按钮将被附加到带有 "add" 类的元素。
if(twitter.isConnected()){
    twitter(".comments").connectButton();
}
现在让我们使用 Twitter 的 currentUser 对象。该对象可以使用 data() 方法检索信息。因此以下代码片段将检索用户的 screen_name。
twitter.currentUser.data('screen_name');
@Anywhere 让我们为 connectButton 功能指定回调函数。作为参数,它接受具有两个属性的对象: authComplete 和 signOut;两者都是函数,因此当调用 signOut 时,我们可以刷新页面。 authComplete 也是如此。让我们用以下代码片段替换 connectButton() 行:
twitter(".comments > .add").connectButton({
    authComplete: function(user) {
        location.reload();
    },
    signOut: function() {
        location.reload();
    }
});
这非常简单:我们传递一个对象作为参数,然后设置 signOut 和 authComplete 函数来重新加载页面。请注意,为了设置 signOut 事件,我删除了 isConnected() 条件的 else 子句。
接下来,让我们在条件中添加一个 tweetBox 。
if(twitter.isConnected()){
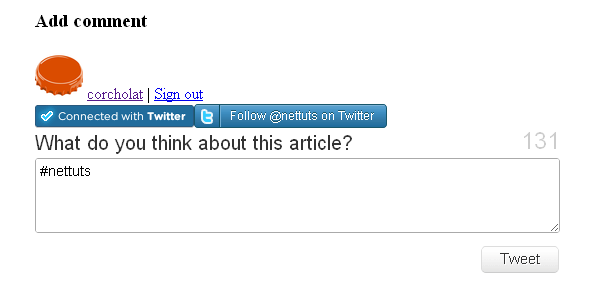
    $(".comments > .add > .author").html('<img src="'+ twitter.currentUser.data('profile_image_url') +'" /> <a href="http://twitter.com/'+ twitter.currentUser.data('screen_name') +'">'+ twitter.currentUser.data('screen_name') +'</a> | <a href="javascript:twttr.anywhere.signOut();">Sign out</a>');
    twitter(".comments > .add").tweetBox({
        label: 'What do you think about this article?',
        defaultContent: '#nettuts '
    });
}
如果用户已登录,则应该有一个关注按钮。同样,在条件语句中:
twitter(".comments > .add").followButton("nettuts");
这是完整的条件,汇总了所有 @Anywhere 功能。
if(twitter.isConnected()){
    $(".comments > .add > .author").html('<img src="'+ twitter.currentUser.data('profile_image_url') +'" /> <a href="http://twitter.com/'+ twitter.currentUser.data('screen_name') +'">'+ twitter.currentUser.data('screen_name') +'</a> | <a href="javascript:twttr.anywhere.signOut();">Sign out</a>');
    twitter(".comments > .add").tweetBox({
        label: 'What do you think about this article?',
        defaultContent: '#nettuts '
    });
    twitter(".comments > .add").followButton("nettuts");
}
结论
@Anywhere 显然是 Twitter 对 Facebook Connect 的回应。他们希望将这个平台带到尽可能多的网络网站上;虽然该服务还很年轻,而且文档肯定还有待改进,但它绝对是有前途的!请向我们展示您在自己的网站中使用@Anywhere 做了什么!
The above is the detailed content of 6 easy steps to use Twitter's @Anywhere service. For more information, please follow other related articles on the PHP Chinese website!

