


Magento Custom Module Development is a core part of any Magento development or Magento project as at any stage you may want to integrate your own functionality/modules into an existing Magento project.
In this series, I will cover the details of custom module development for Magento.
If you want to develop Magento further, check out the various useful Magento extensions on Envato Market.

In this series, I am referring to Magento Community Edition 1.7, albeit a custom version The module structure is the same in all versions of Magento. Before starting the actual module development, let’s quickly understand the basic structure of Magento.
Whenever you install a new Magento, you will notice the following Magento directory structure:

Magento MVC Structure Introduction
Like any other major framework like Joomla, CakePHP, CodeIgniter, etc., Magento also follows an MVC-based architecture, although this is slightly different from the core PHP MVC architecture. Here I will explain the differences in Magento architecture by comparing it with a simple PHP MVC architecture.
PHP MVC Architecture
In a typical MVC pattern, the flow of an application looks like this:
- There is one main entry point -
index.php- from which the entire application routing mechanism is determined. - Based on this routing mechanism and the requested URL pattern, the app will call the appropriate controller.
- The controller then calls the appropriate view.
- Finally, the view file collects data from the model file and displays the data.
Magento MVC Architecture
Magento’s MVC architecture adds several layers to the MVC pattern, but the basic control flow of the application is as follows:
- There is one main entry point -
index.php- from which the entire application will be initialized. - The appropriate controller will be called based on the requested URL.
- The controller defines pages and loads the layout files for these pages.
- The layout file tells the controller which block files to use.
- Block files collect data from model and helper files and pass it to template files.
- The template file receives the data and renders the html.
Initially, this may be difficult to understand as it contains some extra layers. To get more familiar with the control flow, let's develop a custom "Hello World" module.
Before you start using modules
- I assume you already have version 1.7 or a working copy of Magento 1.7 (otherwise the version doesn't matter at this stage)
- Disable caching. To disable caching, go to Magento Admin Panel > System > Cache Management > Select all cache types from the left checkbox > Select Action: Disable from the top right dropdown > Click Submit.
Magento module structure
Code Pool
Magento contains three types of code pools where all custom and core modules of Magento reside.
- The core pool contains all the core modules that come with Magento installation by default. These modules are written by Magento developers. It is recommended not to modify these modules because whenever you upgrade your Magento installation, all core modules will be overwritten and your modifications will be lost.
- The Community Pool contains all modules (i.e. custom modules) developed by third-party programmers and installed through Magento Connect. These modules typically extend the core modules and provide their own functionality, which can usually be used anywhere in Magento.
- The local pool contains all custom modules that will be used in a specific project but will not be read in Magento Connect
So we have two pool options: community pool or local pool. Since we are developing our own project, we will use a local pool, although there are no restrictions on using a community pool.
structure
Magento modules are composed of the following components:
- BlockContains functions for displaying data in the template.
- Model Contains the business logic of the module.
- Resource ModelContains functions for database interaction.
- Controller Define the page layout and block the file and load it when the URL is requested.
- etcContains a configuration file in XML format that tells Magento how many files the module has and how the module interacts.
- HelpersContains functions for defining common business logic (e.g. image resizing, validation). These functions can be used anywhere in your Magento application
- sqlContains SQL scripts for creating, modifying, or dropping SQL tables.
Module naming
We need to name our module. Generally speaking, Magento module names consist of two parts: <namespace></namespace> as the author or company name and <module></module> as the actual module name.
Based on these naming conventions, I gave our module the Chiragdodia_Mymodule name. We will refer to this name throughout this series.
Code setup and configuration
Let’s create a directory based on the above structure. Go to the Magento installation directory and navigate to app/code/local and create a directory as shown below.

Next, we will create the configuration file Chiragdodia_Mymodule.xml in app/etc/modules directory to configure and activate our module. This directory contains configuration files for all modules.
<?xml version="1.0"?>
<config>
    <modules>
        <Chiragdodia_Mymodule>
        <active>true</active>
        <codePool>local</codePool>
        </Chiragdodia_Mymodule>
    </modules>
</config>
This file will tell Magento the location of our module. In the active tag, we specify true to enable our module. If everything is correct so far, you will find your module in the Magento Admin Panel > System > Configuration > Advanced > Advanced > Disable Module Output list. From here you can enable and disable your module.
Getting Started: Development
Next we will create the module configuration file. This file will tell Magento all the information about our module. This includes how many files our module contains, what types of files (models, helpers, database classes), etc.
Go to app/code/local/Chiragdodia/Mymodule/etc and create a config.xml Will contain the following contents of the file
<?xml version="1.0"?>
<config>
    <modules>
        <Chiragdodia_Mymodule>
            <version>0.1.0</version>    <!-- Version number of your module -->
        </Chiragdodia_Mymodule>
    </modules>
    <frontend>
        <routers>
            <mymodule>
                <use>standard</use>
                <args>
                    <module>Chiragdodia_Mymodule</module>
                    <frontName>mymodule</frontName>
                </args>
            </mymodule>
        </routers>
    </frontend>
</config>
Let’s go through each tag line by line. Here, the first tag is <module></module> , which contains the name and version of our module. The version number is very important when updating modules.
<frontend></frontend> tag will tell Magento information about the scheduled controller. Inside the <frontend></frontend> tag, we define <routers></routers> which tells Magento how to access our controller through the routing mechanism.
In the <mymodule></mymodule> tag we are in <module></module> # Tags and frontend names in <frontname>#. We can access our module on the frontend by using the frontend name, for example </frontname>yoursitename.com/index.php/mymodule/index.
yoursitename.com/index.php/mymodule or yoursitename.com/index.php/mymodule/index Magento will look for the index action file for the module controller. Therefore, we need to create the controller file.
app/code/local/Chiragdodia/Mymodule/controllers and create the file IndexController.php Contains the following content.
<?php
class Chiragdodia_Mymodule_IndexController extends Mage_Core_Controller_Front_Action
{
    public function indexAction()
    {
        echo "Hello tuts+ World";
    }
}
Now open the URL yoursite.com/index.php/mymodule/index It will print "Hello tuts World". Awesome - we finally finished our first hello world module.
Here we extend the class
Mage_Core_Controller_Front_Action , which contains all methods used in URL routing. Magento class names reflect the location of the class files. Therefore, the class Mage_Core_Controller_Front_Action is located at location Mage > Core > Controller > Front > Action.php
Chiragdodia_Mymodule_IndexController. Magento controllers should be named in a manner that reflects (tag)_(Action Controllername)(keyword Controller).<module></module>
-
tag =
Chiragdodia_Mymodule (We have defined this tag inconfig.xml)b> Operation - Controller Name
= IndexOperation controller followed by - Controller
keyword
Chiragdodia_Mymodule_IndexController
Now view the URL pattern that follows the routing pattern yoursite.com/index.php/frontendname/actionControllername/actionmethod
- 前端名称 = mymodule
- actionControllername = 索引
- actionmethodname = 索引
根据此网址模式,我们模块的网址为 yoursite.com/index.php/mymodule/index/index。您还可以使用 yoursite.com/index.php/mymodule 访问它,因为只要您未指定 actionController 或 actionmethod 名称,Magento 就会加载默认情况下的索引控制器和索引操作。
现在让我们再创建一个操作:testAction 。
<?php
class Chiragdodia_Mymodule_IndexController extends Mage_Core_Controller_Front_Action
{
    public function indexAction()
    {
        echo "Hello tuts+ World";
    }
    public function testAction()
    {
        echo "test action";
    }
}
我们可以使用 URL yoursite.com/index.php/mymodule/index/test 访问 testAction。 如前所述
- 前端名称 = mymodule
- actionControllername = 索引
- actionmethodname = 测试
这就是控制器在 Magento 中的工作原理。
一开始,一次理解所有内容可能很困难,因此我已将所有源代码包含到此模块中,以便您可以在将其用作指南的同时查看它并实现自己的工作。
下一步是什么?
在下一部分中,我们将通过创建布局和块文件来填充模块中的一些布局。我们将了解布局文件在 Magento 中如何工作以及块在 Magento 上下文中扮演什么角色。
在此之前,请创建您自己的模块,并让我知道任何给您带来麻烦的事情。
The above is the detailed content of Develop custom modules for Magento. For more information, please follow other related articles on the PHP Chinese website!

 11 Best PHP URL Shortener Scripts (Free and Premium)Mar 03, 2025 am 10:49 AM
Long URLs, often cluttered with keywords and tracking parameters, can deter visitors. A URL shortening script offers a solution, creating concise links ideal for social media and other platforms. These scripts are valuable for individual websites a
 Working with Flash Session Data in LaravelMar 12, 2025 pm 05:08 PM
Laravel simplifies handling temporary session data using its intuitive flash methods. This is perfect for displaying brief messages, alerts, or notifications within your application. Data persists only for the subsequent request by default: $request-
 Build a React App With a Laravel Back End: Part 2, ReactMar 04, 2025 am 09:33 AM
This is the second and final part of the series on building a React application with a Laravel back-end. In the first part of the series, we created a RESTful API using Laravel for a basic product-listing application. In this tutorial, we will be dev
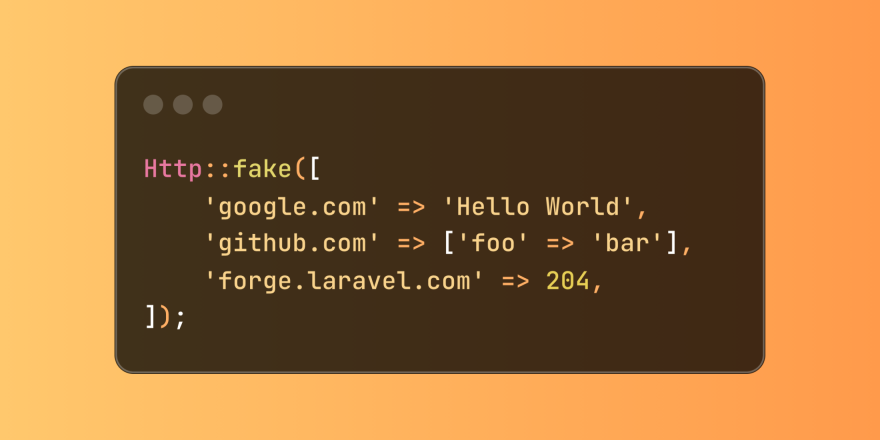 Simplified HTTP Response Mocking in Laravel TestsMar 12, 2025 pm 05:09 PM
Laravel provides concise HTTP response simulation syntax, simplifying HTTP interaction testing. This approach significantly reduces code redundancy while making your test simulation more intuitive. The basic implementation provides a variety of response type shortcuts: use Illuminate\Support\Facades\Http; Http::fake([ 'google.com' => 'Hello World', 'github.com' => ['foo' => 'bar'], 'forge.laravel.com' =>
 cURL in PHP: How to Use the PHP cURL Extension in REST APIsMar 14, 2025 am 11:42 AM
The PHP Client URL (cURL) extension is a powerful tool for developers, enabling seamless interaction with remote servers and REST APIs. By leveraging libcurl, a well-respected multi-protocol file transfer library, PHP cURL facilitates efficient execution of various network protocols, including HTTP, HTTPS, and FTP. This extension offers granular control over HTTP requests, supports multiple concurrent operations, and provides built-in security features.
 12 Best PHP Chat Scripts on CodeCanyonMar 13, 2025 pm 12:08 PM
Do you want to provide real-time, instant solutions to your customers' most pressing problems? Live chat lets you have real-time conversations with customers and resolve their problems instantly. It allows you to provide faster service to your custom
 Announcement of 2025 PHP Situation SurveyMar 03, 2025 pm 04:20 PM
The 2025 PHP Landscape Survey investigates current PHP development trends. It explores framework usage, deployment methods, and challenges, aiming to provide insights for developers and businesses. The survey anticipates growth in modern PHP versio
 Notifications in LaravelMar 04, 2025 am 09:22 AM
In this article, we're going to explore the notification system in the Laravel web framework. The notification system in Laravel allows you to send notifications to users over different channels. Today, we'll discuss how you can send notifications ov


Hot AI Tools

Undresser.AI Undress
AI-powered app for creating realistic nude photos

AI Clothes Remover
Online AI tool for removing clothes from photos.

Undress AI Tool
Undress images for free

Clothoff.io
AI clothes remover

AI Hentai Generator
Generate AI Hentai for free.

Hot Article
Hot Tools

Safe Exam Browser
Safe Exam Browser is a secure browser environment for taking online exams securely. This software turns any computer into a secure workstation. It controls access to any utility and prevents students from using unauthorized resources.

SublimeText3 Linux new version
SublimeText3 Linux latest version

SublimeText3 Chinese version
Chinese version, very easy to use

Notepad++7.3.1
Easy-to-use and free code editor

SublimeText3 Mac version
God-level code editing software (SublimeText3)

