 Web Front-end
 Vue.js
 How to implement picture-in-picture and multiple exposure of pictures in Vue?
How to implement picture-in-picture and multiple exposure of pictures in Vue?
Introduction:
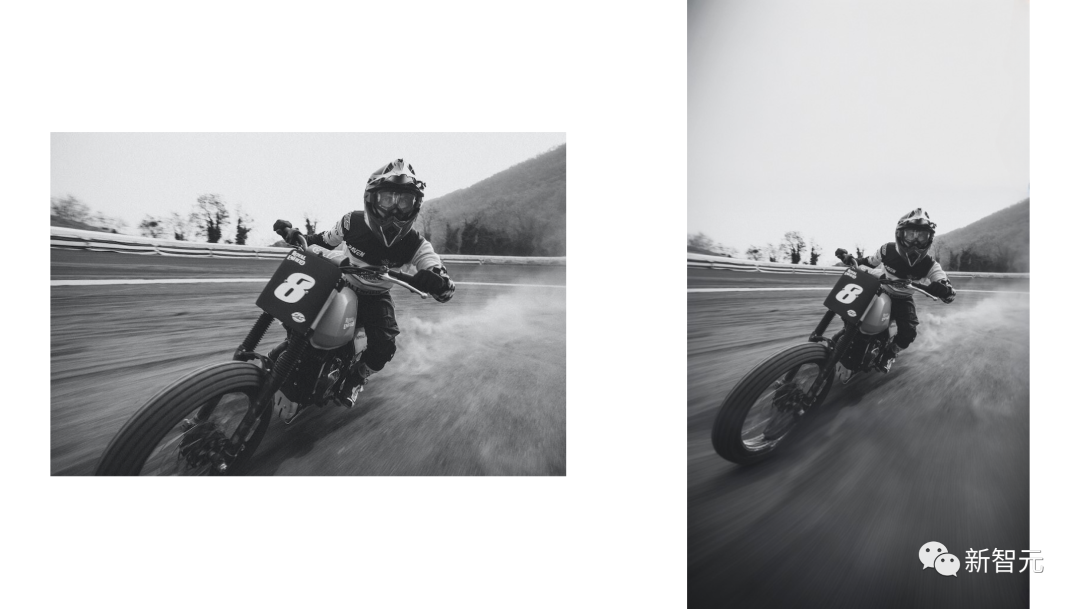
In modern web design, the display effect of pictures is a very important link. Picture-in-picture and multiple exposure are two common photo manipulation effects that can make pictures more vivid, unique and attractive. This article will introduce how to use the Vue framework to achieve these two effects and provide relevant code examples.
1. Implementation of picture-in-picture effect
Picture-in-picture is an effect in which a small-sized picture is nested in another large-sized picture. The key to achieving the picture-in-picture effect is to use the positioning and cascading functions of CSS. Below is a simple Vue component example to show how to achieve a picture-in-picture effect.
<template>
  <div class="picture-in-picture">
    <img class="background-image lazy"  src="/static/imghwm/default1.png"  data-src="backgroundImage"  : alt="Background Image">
    <div class="foreground-image">
      <img src="/static/imghwm/default1.png"  data-src="foregroundImage"  class="lazy"  : alt="Foreground Image">
    </div>
  </div>
</template>

<script>
export default {
  data() {
    return {
      backgroundImage: 'path/to/background-image.jpg',
      foregroundImage: 'path/to/foreground-image.jpg'
    };
  }
};
</script>

<style scoped>
.picture-in-picture {
  position: relative;
  width: 800px;
  height: 600px;
}

.background-image {
  position: absolute;
  top: 0;
  left: 0;
  width: 100%;
  height: 100%;
}

.foreground-image {
  position: absolute;
  top: 20px;
  left: 20px;
  width: 200px;
  height: 200px;
}
</style>
In the above code, we create a container named picture-in-picture, which contains a background image and a foreground image. In order to achieve the picture-in-picture effect, we use CSS to position the foreground image in the upper left corner of the background image and set its size. In this way, the foreground image will be displayed inside the background image, thereby achieving a picture-in-picture effect.
2. Implementation of Multiple Exposure Effect
Multiple exposure is an effect that overlaps two or more pictures together, thereby creating a blended and transparent effect. The way to achieve a multiple exposure effect is to use CSS blending modes. Below is an example of using Vue to achieve a multiple exposure effect.
<template>
  <div class="multiple-exposure">
    <img class="background-image lazy"  src="/static/imghwm/default1.png"  data-src="backgroundImage"  : alt="Background Image">
    <img class="overlay-image lazy"  src="/static/imghwm/default1.png"  data-src="overlayImage"  : alt="Overlay Image">
  </div>
</template>

<script>
export default {
  data() {
    return {
      backgroundImage: 'path/to/background-image.jpg',
      overlayImage: 'path/to/overlay-image.jpg'
    };
  }
};
</script>

<style scoped>
.multiple-exposure {
  position: relative;
  width: 800px;
  height: 600px;
}

.background-image,
.overlay-image {
  position: absolute;
  top: 0;
  left: 0;
  width: 100%;
  height: 100%;
  mix-blend-mode: overlay;
}
</style>
In the above code, we create a container named multiple-exposure, which contains a background image and an overlay image. By setting the mix-blend-mode property of CSS to overlay, we can mix the overlay image with the background image. In this way, the color and brightness of the overlay image interact with the background image to achieve a multiple exposure effect.
Conclusion:
Through the Vue framework, we can easily achieve picture-in-picture and multiple exposure effects of pictures. Just use CSS features such as positioning, cascading, and blending modes to create unique and vivid image display effects. The above sample code can be used as a reference to help you achieve these two effects in your Vue project.
The above is the detailed content of How to implement picture-in-picture and multiple exposure of pictures in Vue?. For more information, please follow other related articles on the PHP Chinese website!
 超简单!用 Python 为图片和 PDF 去掉水印Apr 12, 2023 pm 11:43 PM
网上下载的 pdf 学习资料有一些会带有水印,非常影响阅读。比如下面的图片就是在 pdf 文件上截取出来的,今天我们就来用Python解决这个问题。安装模块PIL:Python Imaging Library 是 python 上非常强大的图像处理标准库,但是只能支持 python 2.7,于是就有志愿者在 PIL 的基础上创建了支持 python 3的 pillow,并加入了一些新的特性。pip install pillow pymupdf 可以用 python 访问扩展名为*.pdf、
 PHP和GD库实现图片裁剪的方法Jul 14, 2023 am 08:57 AM
PHP和GD库实现图片裁剪的方法概述:图片裁剪是网页开发中常见的需求之一,它可以用于调整图片的尺寸,剪裁不需要的部分,以适应不同的页面布局和展示需求。在PHP开发中,我们可以借助GD库来实现图片裁剪的功能。GD库是一个强大的图形库,可提供一系列函数来处理和操控图像。代码示例:下面我们将详细介绍如何使用PHP和GD库来实现图片裁剪。首先,确保你的PHP环境已经
 如何使用 Vue 实现图片预加载?Jun 25, 2023 am 11:01 AM
在网页开发中,图片预载是一种常见的技术,可以提升用户的体验感。当用户浏览网页时,图片可以提前下载并加载,减少图片加载时的等待时间。在Vue框架中,我们可以通过一些简单的方法来实现图片预载。本文将介绍Vue中的图片预载技术,包括预载的原理、实现的方法和使用注意事项。一、预载的原理首先,我们来了解一下图片预载的原理。传统的图片加载方式是等到图片全部下载完成才显示
 PS AI修图免费平替来了!Stability AI又放大招,核弹级更新一键扩图Jun 12, 2023 pm 07:27 PM
此前,PS的重建图像功能就让人无比振奋,让无数人惊呼今天,StabilityAI又放大招了。它联合Clipdrop推出了UncropClipdrop——一个终极图像比例编辑器。从Uncrop这个名字上,我们就能看出它的用途。它是一个AI生成的「外画」工具,通过创建扩展背景,这个工具可以补充任何现有照片或图像,来更改任何图像的比例。敲黑板:通过Clipdrop网站,就可以免费试用这个工具了,无需登录!比例任意调,满意为止Uncrop基于StabilityAI的文本到图像模型StableDiffus
 vue报错找不到图片怎么办Nov 19, 2022 pm 05:01 PM
vue报错找不到图片的解决办法:1、修改配置文件,将绝对路径改为相对路径;2、将图片作为模块加载进去,并将图片放到static目录下;3、将imageUrls引入响应的vue文件中,解析引用即可。
 如何在uniapp中实现图片滤镜效果Jul 04, 2023 am 11:05 AM
如何在uniapp中实现图片滤镜效果在移动应用开发中,图片滤镜效果是一种常见且受用户喜爱的功能之一。而在uniapp中,实现图片滤镜效果也并不复杂。本文将为大家介绍如何通过uniapp实现图片滤镜效果,并附上相关代码示例。导入图片首先,我们需要在uniapp项目中导入一张图片,以供后续滤镜效果的处理。可以在项目的资源文件夹中放置一张命名为“filter.jp
 php写图片不显示不出来怎么办Nov 14, 2022 am 10:17 AM
php写图片不显示不出来的解决办法:1、找到并打开php.ini文件;2、找到“extension=php_gd2.dll”,并将前面的分号去掉;3、重新启动服务器;4、在绘图前清一下缓存即可。
 AI去除马赛克,可还行?Apr 09, 2023 pm 07:11 PM
哈喽,大家好。你有没有想过用 AI 技术去除马赛克?仔细想想这个问题还挺难的,因为我们之前使用的 AI 技术,不管是人脸识别还是OCR识别,起码人工能识别出来。但如果给你一张打上马赛克的图片,你能把它复原吗?显然是很难的。如果人都无法复原,又怎能教会计算机去复原呢?还记得前几天我写的一篇《用AI生成头像》文章吗。在那篇文章中,我们训练了一个DCGAN模型,它可以从任意随机数生成一个图像。随机数作为像素生成的噪声图模型从随机数生成正常头像DCGAN包含生成器模型和判别器模型两个模型组成,生成


Hot AI Tools

Undresser.AI Undress
AI-powered app for creating realistic nude photos

AI Clothes Remover
Online AI tool for removing clothes from photos.

Undress AI Tool
Undress images for free

Clothoff.io
AI clothes remover

AI Hentai Generator
Generate AI Hentai for free.

Hot Article

Hot Tools

Dreamweaver CS6
Visual web development tools

Dreamweaver Mac version
Visual web development tools

mPDF
mPDF is a PHP library that can generate PDF files from UTF-8 encoded HTML. The original author, Ian Back, wrote mPDF to output PDF files "on the fly" from his website and handle different languages. It is slower than original scripts like HTML2FPDF and produces larger files when using Unicode fonts, but supports CSS styles etc. and has a lot of enhancements. Supports almost all languages, including RTL (Arabic and Hebrew) and CJK (Chinese, Japanese and Korean). Supports nested block-level elements (such as P, DIV),

Notepad++7.3.1
Easy-to-use and free code editor

Zend Studio 13.0.1
Powerful PHP integrated development environment


