In today's rapidly evolving digital age, protecting your digital memories, work files or important documents has never been more important. Using Apple's Time Machine to back up your Mac regularly can play a vital role in this process. The necessity of backup is twofold; first, it protects your data from unforeseen circumstances such as system crashes, hardware failures, or malware attacks.
Secondly, it gives you peace of mind as you can fully recover your data, eliminating the fear of losing important files. So, backing up your Mac isn't just an option, it's a digital necessity for anyone aiming to keep their data safe.
Apple Time Machine
If you want to learn how to use Apple's Time Machine to back up your Mac, this quick guide will take you through the essentials of using Apple's backup system. Time Machine is an integral part of macOS, allowing automatic and regular backup of data to an external drive or NAS. Below, you'll find a detailed guide on the different devices compatible with Time Machine and how to use them to back up your valuable data.
First of all, Time Machine is compatible with a range of storage devices. Notable among these are external drives connected directly to your Mac, Network Attached Storage (NAS) devices that support Time Machine via SMB, or even another Mac that can be used as a Time Machine backup destination. The built-in hardware of AirPort Time Capsules also works perfectly with Time Machine on the network.
How to Back Up a Mac
If you choose to connect an external drive directly to your Mac, you'll need to connect via a USB, Thunderbolt, or FireWire port. Time Machine is smart enough that it will prompt you to erase the disk if it's not in the required format, so you don't have to worry about double-checking it.
NAS Backup Drive for Mac Backup
NAS devices are another excellent option, especially for those who prefer network storage to physical disks. Multiple third-party NAS devices support Time Machine via SMB, providing a seamless backup experience. You can confirm whether your specific NAS device is compatible by referring to its documentation.
Using an Old or Used Mac
The icing on the cake, however, is the ability to use another Mac as a Time Machine backup destination. You just need to follow the set of steps on your Mac that you want to use as your backup destination. The steps include navigating to System Settings, activating File Sharing, adding a folder under the Shared Folders list, and finally enabling the Share as Time Machine backup destination option. Once completed, other Macs on the network should be able to use the shared folder as a backup disk.
Time Machine is also compatible with external USB drives connected to an AirPort Extreme Base Station (802.11ac model) or AirPort Time Capsule. In order to set this up, you must follow a series of instructions, including erasing the drive using Disk Utility, connecting it to an AirPort base station, and adjusting settings in AirPort Utility.
Backup Settings
Before we delve into the details of backup settings, there is a small warning. You should always create a backup password to encrypt your Time Machine backups. This additional layer of security ensures that no one but you can access your backups. But keep in mind that if you lose or forget your password and you don't have iCloud Keychain enabled, you won't be able to recover or recover your data.
Once your backup device is ready and connected, you can set up Time Machine through System Settings. Here you can add a backup disk or switch to a different disk, as well as modify other settings. Please note that Time Machine cannot back up to disks formatted for Windows. If you connect a Windows-formatted disk, you must reformat it (removing all data in the process) to Mac file system format before using it as a backup disk.
Also, during setup, if you are asked to erase the disk, do so only if the files on the disk are no longer needed or have been copied to another disk. Remember that erasing permanently deletes all files on the disk.
Finally, if you are prompted for an administrator name and password, you should enter them to verify that you are a user with administrator privileges. If you don't have this information, ask the person who set up your Mac. Understanding the backup process and configuring it correctly ensures a safety net for your important data. Armed with this knowledge, you can now rest easy knowing that your Mac data is securely backed up using Time Machine.
The above is the detailed content of Instructions on how to use Apple Time Machine to back up your Mac. For more information, please follow other related articles on the PHP Chinese website!
 如何在 Windows 11 中备份和恢复任务栏上的固定项目Apr 18, 2023 pm 11:16 PM
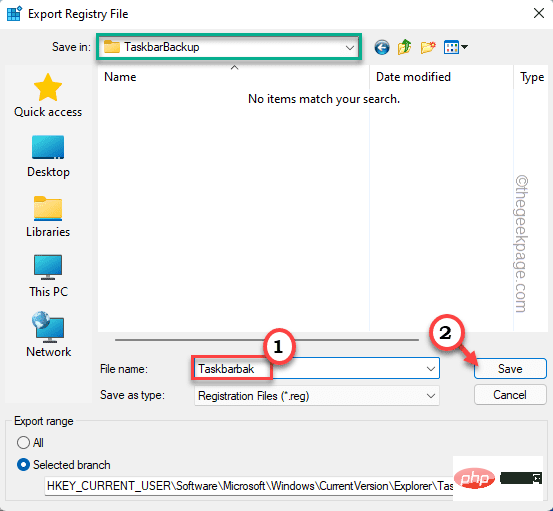
Windows系统上的任务栏是全球所有Windows用户最常用的功能。您可以轻松地将您最喜欢和最常用的应用程序固定在任务栏中,自定义其大小和颜色。在本文中,我们将讨论如何备份任务栏上的固定项目以及如何根据需要恢复它们。如何在Windows11中备份和恢复任务栏上的固定项目有两种方法可以备份和恢复固定的项目。有一种手动方法,您必须在安全文件夹中创建固定项目的备份及其关联的注册表文件。除此之外,还有另一种自动方法可用于自动化备份固定项目的整个过程。手动备份这个过程有两个不同的部分。第1步-
 如何在麒麟操作系统上进行系统备份和恢复?Aug 07, 2023 pm 02:22 PM
如何在麒麟操作系统上进行系统备份和恢复?麒麟操作系统是中国自主研发的开源操作系统,广泛应用于各种场景中。在使用麒麟操作系统时,系统备份和恢复是非常重要的一项任务。备份系统可以防止因故障或误操作导致数据丢失,而系统恢复则可以在系统崩溃时快速恢复正常功能。本文将详细介绍如何在麒麟操作系统上进行系统备份和恢复,并附上相关代码示例。备份系统为了备份整个系统,我们可以
 win11改win10系统教程的详细介绍Jul 08, 2023 pm 09:21 PM
微软6月24号正式公布了win11系统,可以看到用户界面、开始菜单等和Windows10X中发现的非常相似。有的朋友在使用预览版的时候发现用的不习惯,想要改win10系统开使用,那么我们要如何操作呢,下面我们就来看看win11改win10系统教程,一起来学习一下吧。1、第一步是从Windows11打开新设置。在这里,您需要转到图像中显示的系统设置。2、在系统设置下,选择“恢复”选项。在这里,您将能够看到“以前版本的窗口”选项。您还可以在它旁边看到一个“返回”按钮,单击此按钮。3、您可以指定要返回
 Linux系统中的数据备份和恢复方法Jun 18, 2023 pm 11:40 PM
随着互联网技术和大数据时代的到来,越来越多的企业开始依赖于数据来决策和推动业务发展。而数据备份和恢复作为数据管理的重要环节,其重要性不言而喻。在Linux系统中,数据备份和恢复也是必不可少的。下面将详细介绍Linux系统中的数据备份和恢复方法。一、备份tar命令tar命令是Linux系统中最基本的备份命令,可以将文件或目录打包成一个文件。它的基本语法如下:t
 如何在麒麟操作系统上进行系统的备份和还原?Aug 06, 2023 am 11:37 AM
如何在麒麟操作系统上进行系统的备份和还原?麒麟操作系统是一款基于Linux的开源操作系统,因其稳定性和安全性而受到广泛关注和应用。在日常使用中,系统备份和还原是非常重要的操作,可以保护系统数据免受意外损坏或丢失。下面将介绍在麒麟操作系统上如何进行系统备份和还原的方法。一、系统备份在麒麟操作系统中,系统备份可以使用rsync命令来完成。rsync是一款用于数据
 MySQL和Oracle:对于备份和恢复的速度和可靠性比较Jul 12, 2023 am 10:16 AM
MySQL和Oracle:对于备份和恢复的速度和可靠性比较导言:MySQL和Oracle是两个常见的关系型数据库管理系统(RDBMS),它们在数据备份和恢复方面有着不同的机制和性能表现。本文将重点比较MySQL和Oracle在备份和恢复方面的速度和可靠性,并附上一些代码示例,以便更好地理解它们之间的差异和优劣势。备份性能比较:在备份方面,MySQL和Orac
 如何在麒麟操作系统上进行文件管理和备份?Aug 04, 2023 pm 06:25 PM
如何在麒麟操作系统上进行文件管理和备份?麒麟操作系统是一款基于Linux的操作系统,广泛应用于中国政府和教育领域。在麒麟操作系统上进行文件管理和备份是一项重要的任务,它能够帮助我们更好地管理和维护重要的文件和数据。本文将为您介绍如何在麒麟操作系统上进行文件管理和备份,并附带代码示例。一、文件管理创建文件夹:在麒麟操作系统中,我们可以使用mkdir命令来创建文
 MySQL中如何执行数据备份和还原?Jul 30, 2023 pm 10:47 PM
MySQL是一个常用的关系型数据库管理系统,用于管理和存储大量的数据。在使用MySQL时,数据备份和还原非常重要,以确保数据的安全性和完整性。本文将介绍如何在MySQL中执行数据备份和还原,并提供代码示例。数据备份是指将数据库中的数据复制到另一个位置,以防止数据丢失或损坏。数据还原是指将备份的数据恢复到数据库中,以重新建立原始的数据库状态。一、数据备份:使用

Hot AI Tools

Undresser.AI Undress
AI-powered app for creating realistic nude photos

AI Clothes Remover
Online AI tool for removing clothes from photos.

Undress AI Tool
Undress images for free

Clothoff.io
AI clothes remover

AI Hentai Generator
Generate AI Hentai for free.

Hot Article

Hot Tools

EditPlus Chinese cracked version
Small size, syntax highlighting, does not support code prompt function

Dreamweaver CS6
Visual web development tools

WebStorm Mac version
Useful JavaScript development tools

SublimeText3 Mac version
God-level code editing software (SublimeText3)

DVWA
Damn Vulnerable Web App (DVWA) is a PHP/MySQL web application that is very vulnerable. Its main goals are to be an aid for security professionals to test their skills and tools in a legal environment, to help web developers better understand the process of securing web applications, and to help teachers/students teach/learn in a classroom environment Web application security. The goal of DVWA is to practice some of the most common web vulnerabilities through a simple and straightforward interface, with varying degrees of difficulty. Please note that this software


