

How to use Nginx for reverse proxy caching of HTTP requests

How to use Nginx for reverse proxy caching of HTTP requests
Nginx is a high-performance open source web server software. In addition to serving as a web server to handle static resource requests, Nginx can also perform HTTP requests. reverse proxy. Reverse proxy can help us forward client requests to multiple back-end servers for processing, and can improve response speed through caching. This article will introduce how to configure reverse proxy cache in Nginx.
-
Install Nginx
First, we need to install the Nginx server. In a Linux environment, it can be installed through the package manager. Taking Debian/Ubuntu as an example, execute the following command:sudo apt update sudo apt install nginx
- Configure reverse proxy cache
After the installation is completed, we need to edit the Nginx configuration file to configure the reverse proxy cache. The default configuration file is located at/etc/nginx/nginx.conf. Open the file with a text editor and find thehttp{}block.
Add the following configuration in the http{} block:
proxy_cache_path /path/to/cache levels=1:2 keys_zone=my_cache:10m max_size=10g inactive=60m;
Where, /path/to/cache is the cache path, It can be modified according to the actual situation. levels=1:2Indicates the level of the cache directory. keys_zone=my_cache:10m means allocating 10M of memory for the cache to store cache metadata. max_size=10gIndicates that the maximum size of the cache is 10G. inactive=60m means that the cache file will be considered expired if it is not accessed for 60 minutes.
Then, add the following configuration within the server{} block:
proxy_cache my_cache;
proxy_cache_valid 200 302 1h;
proxy_cache_valid 301 404 10m;
proxy_cache_use_stale error timeout updating http_500 http_503;
Among them, proxy_cache my_cache means enabling the name my_cache cache. proxy_cache_valid is used to configure the cache validity period of different status codes. For example, the request cache validity period of 200 and 302 status codes is 1 hour. proxy_cache_use_stale Used to specify whether to use an expired cache as a response when an error or timeout occurs on the backend server.
-
Configuring the reverse proxy
After completing the cache configuration, we need to configure the reverse proxy. Within theserver{}block, add the following configuration:location / { proxy_pass http://backend_server; proxy_set_header Host $host; proxy_cache_bypass $http_cache_control; proxy_cache_key $uri$is_args$args; }where
proxy_passspecifies the address of the backend server.proxy_set_headeris used to set the header information in the proxy request. Here, thehostheader of the request is set to the current host.proxy_cache_bypassis used to specify which requests do not use the cache. This is determined based on thecache-controlin the request header.proxy_cache_keyUsed to generate the cache key, here is a combination of the requested URI and parameters. -
Restart Nginx and test
After completing the above configuration, save and exit the configuration file. Then, restart the Nginx service through the following command:sudo systemctl restart nginx
Next, send a request through the browser or command line tool to observe the working of the Nginx cache.
Summary
Through the above steps, we successfully configured Nginx’s reverse proxy cache function. By using caching, the response speed of requests can be significantly improved and the load on the back-end server can be reduced. At the same time, Nginx also provides flexible configuration options that can be adjusted and optimized according to actual needs.
I hope this article will help you understand and use Nginx's reverse proxy cache function. If you have any questions or doubts, please leave a message in the comment area and I will try my best to answer them.
The above is the detailed content of How to use Nginx for reverse proxy caching of HTTP requests. For more information, please follow other related articles on the PHP Chinese website!

 Lei Jun shares his New Year's wishes: deliver 300,000 cars and 100 check-in times in the gymApr 13, 2025 pm 11:54 PM
At the beginning of the new year, Lei Jun shared three New Year's wishes for 2025 at the beginning of the new year, and this four and a half hours-long live broadcast attracted a lot of attention. Lei Jun’s three major wishes are: First, achieve the delivery target of 300,000 vehicles, alleviate the pressure, and no longer be caught up by progress. Second, have more travel time, enjoy the beautiful scenery from all over the world, taste special food, and conduct car testing in combination with work. Third, stick to fitness and plan to check in 100 times in the gym to strengthen your body. Lei Jun admitted in the live broadcast that he traveled around in 2024, with a compact schedule, so he often only stayed for a short time, making it difficult to experience the local culture in depth. For example, at the New North Speedway in Germany, he stayed for only 8 hours. Therefore, in the new year, he hopes to be able to better balance work and life and travel
 Annual reputation masterpiece! No.9 Company's micro-film 'Memory Travel' won many authoritative awardsApr 13, 2025 pm 11:51 PM
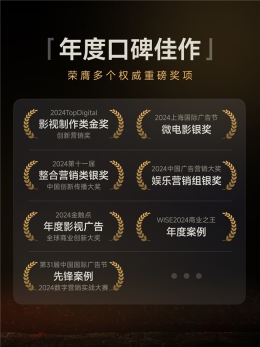
The micro-film "Memory Travel" created by No. 9 and brand spokesperson Yi Yang Qianxi won several authoritative media awards in 2024 and became a masterpiece of the year. This work has won high praise from the industry for its unique narrative style, exquisite production and sincere emotions. 2024 Awards and Honors: 2024 Gold Touch Global Business Innovation Award - Annual Film and Television Advertising 2024 China Advertising Marketing Award - Entertainment Marketing Group Silver Award 2024 Top Digital Innovation Marketing Award - Film and Television Production Gold Award 2024 Shanghai International Advertising Festival - Microfilm Silver Award 2024 The 11th China Innovation Communication Award - Integrated Marketing Silver Award WISE 2024 King of Business - Annual Case 31st China International Advertising Festival 2024 Digital Marketing Practical Big
 Lead innovation and win another honor! AGON won the PConline2024 Zhizhen Technology AwardApr 13, 2025 pm 11:48 PM
Recently, the PConline2024 Zhizhen Technology Award was officially announced, and AGON Aidong QD-OLED e-sports display AG326UD won the "Technical Innovation of the Year" award. This honor not only represents the industry's high recognition of its technological advantages and market performance, but also fully reflects AGON's innovative capabilities and outstanding achievements in the field of e-sports display technology. 01. Looking at the future of technology, the authoritative value of the PConline Zhizhen Technology Award is the weather vane of the technology industry. The PConline Zhizhen Technology Award has successfully won wide industry recognition with its rigorous evaluation system and in-depth industry analysis. The award has always been committed to commending outstanding products and brands that promote the development of the technology industry, covering technology
 Sony confirms the possibility of using special GPUs on PS5 Pro to develop AI with AMDApr 13, 2025 pm 11:45 PM
Mark Cerny, chief architect of SonyInteractiveEntertainment (SIE, Sony Interactive Entertainment), has released more hardware details of next-generation host PlayStation5Pro (PS5Pro), including a performance upgraded AMDRDNA2.x architecture GPU, and a machine learning/artificial intelligence program code-named "Amethylst" with AMD. The focus of PS5Pro performance improvement is still on three pillars, including a more powerful GPU, advanced ray tracing and AI-powered PSSR super-resolution function. GPU adopts a customized AMDRDNA2 architecture, which Sony named RDNA2.x, and it has some RDNA3 architecture.
 Finally changed! Microsoft Windows search function will usher in a new updateApr 13, 2025 pm 11:42 PM
Microsoft's improvements to Windows search functions have been tested on some Windows Insider channels in the EU. Previously, the integrated Windows search function was criticized by users and had poor experience. This update splits the search function into two parts: local search and Bing-based web search to improve user experience. The new version of the search interface performs local file search by default. If you need to search online, you need to click the "Microsoft BingWebSearch" tab to switch. After switching, the search bar will display "Microsoft BingWebSearch:", where users can enter keywords. This move effectively avoids the mixing of local search results with Bing search results
 Grilled skillfully! Monster Hunter launches 20th anniversary barbecue timer and kettleApr 13, 2025 pm 11:39 PM
To celebrate the 20th anniversary of Capcom's "Monster Hunter" series, Baodao Club launched a unique magazine set - "Monster Hunter" themed barbecue timer and accompanying cup. The set will be available at home convenience stores nationwide in Japan on December 27, and will be priced at 3,498 yen. The biggest highlight of this magazine set is its interactive barbecue timer, which perfectly replicates the classic barbecue scenes in the series of games. The timer is designed with an old version of the barbecue tool, equipped with LED flame light effects and game BGM, allowing you to experience the fun of hunting during the actual barbecue process. The rotating handle simulates flipped barbecue. After successfully baking, the voice prompt of "Baked!" will be played. The timer size is about 9.5cm (height) x 10.7cm (width) x 8cm (deep), built-in L
 I understand users very much! Xiaomi SU7 owners can get Are U OK valve core cap for freeApr 13, 2025 pm 11:36 PM
Xiaomi Auto’s first anniversary celebration will give car owners a New Year gift! After the delivery volume exceeded 130,000 vehicles last year, Xiaomi Auto’s official Weibo announced that it will give Lei Jun’s classic quotation “AreyouOK?” to every Xiaomi SU7 owner and prospective owner. The number is limited and free to receive it! Activity time: 4 pm on December 28, 2024 to 23:59:59 on January 20, 2025. Users who purchase a car or complete an order before 23:59:59 on December 31, 2024 can get a set of four-piece "AreyouOK?" valve core caps for free. This valve core cap was first released in September this year and is made of bright yellow PVC and brass material. The brass core is directly embedded to ensure safe driving and not easy to fall off. Widely used,
 The HDMI 2.2 standard is expected to be announced on the eve of 2025! 8K resolution is coming soonApr 13, 2025 pm 11:33 PM
It is reported that the HDMI2.2 standard is expected to be officially released on the eve of the 2025 CES exhibition. HDMIForum plans to announce this new generation of video signal transmission protocol specifications on January 6. The HDMI2.1 standard released in 2017 has a maximum bandwidth of 48Gbps, supports 4K144Hz and 8K30Hz video transmission, and can be up to 10K120Hz with DSC technology. HDMI2.2 is expected to significantly increase bandwidth, support higher resolution and refresh rate, and adopt new wires. Although the specific specifications have not been disclosed yet, HDMI2.2 will inevitably surpass the 48Gbps bandwidth and 10240*4320 resolution limit of HDMI2.1. Given that DisplayPort2.1 is at 20


Hot AI Tools

Undresser.AI Undress
AI-powered app for creating realistic nude photos

AI Clothes Remover
Online AI tool for removing clothes from photos.

Undress AI Tool
Undress images for free

Clothoff.io
AI clothes remover

AI Hentai Generator
Generate AI Hentai for free.

Hot Article
Hot Tools

PhpStorm Mac version
The latest (2018.2.1) professional PHP integrated development tool

Zend Studio 13.0.1
Powerful PHP integrated development environment

SAP NetWeaver Server Adapter for Eclipse
Integrate Eclipse with SAP NetWeaver application server.

SublimeText3 Mac version
God-level code editing software (SublimeText3)

VSCode Windows 64-bit Download
A free and powerful IDE editor launched by Microsoft

