 Backend Development
 PHP Tutorial
 PHP code implements camera calling function: making your application more interactive
PHP code to implement the camera calling function: Make your application more interactive
The camera calling function is becoming more and more common in today's Internet applications. By calling the camera on the user's device, we can implement functions such as face recognition, photography, and video chat, providing users with a richer interactive experience. This article will introduce how to use PHP code to implement the camera calling function and give corresponding code examples.
First of all, we need to understand the implementation principle of the camera calling function. Normally, we call the camera by calling the API provided by the browser. In modern browsers, there is an API specifically designed to handle multimedia, namely the Media Capture API. Through this API, we can access and control the camera on the user's device.
After understanding the principle, we can start writing PHP code to implement the camera calling function. Here is a simple code example:
<!DOCTYPE html>
<html>
<head>
    <title>摄像头调用功能示例</title>
</head>
<body>

    <h1 id="摄像头调用功能示例">摄像头调用功能示例</h1>

    <?php
        if(isset($_POST['submit'])){
            // 保存照片的文件夹路径
            $uploadDir = 'photos/';

            // 生成一个独一无二的文件名
            $fileName = uniqid() . '.jpg';

            // 图片的全路径
            $uploadFile = $uploadDir . $fileName;

            // 将拍摄的照片保存到服务器
            move_uploaded_file($_FILES['photo']['tmp_name'], $uploadFile);

            echo '<img src="/static/imghwm/default1.png"  data-src="'.$uploadFile.'"  class="lazy".$uploadFile.'" alt="拍摄照片">';
        }
    ?>

    <form method="POST" enctype="multipart/form-data">
        <input type="file" name="photo" accept="image/*" capture>
        <br>
        <input type="submit" name="submit" value="拍照">
    </form>

</body>
</html>
In the above code, we first create a simple HTML form through which the user can select and upload photos. The type attribute of the form's input element is set to "file" so that the user can select local photos to upload.
In the input element of the form, we also set the accept attribute to "image/*" so that the user can only select image files to upload. At the same time, we also set the capture attribute to "true" so that users can take photos through the camera.
When the user clicks the "Photo" button, the form data will be submitted to the server. On the server side, we first specify the folder path where the photos are saved, and then save the taken photos to the server through the move_uploaded_file function. After that, we use the img tag to display the photo in the web page.
This is just a simple example of the camera calling function. In practical applications, we can use the camera to call functions to achieve more complex functions, such as face recognition, video chat, etc. But no matter how complex the function is, the principle is similar. We only need to use the media capture API provided by the browser to implement the camera call through PHP code.
To summarize, by using PHP code to implement the camera calling function, we can add more interactivity to the application and provide a richer user experience. Using the media capture API, we can easily achieve access and control of the camera. I hope this article is helpful to everyone and can bring more interactivity to your application.
The above is the detailed content of PHP code implements camera calling function: making your application more interactive. For more information, please follow other related articles on the PHP Chinese website!
 利用PHP控制摄像头:从连接到拍摄的全过程解析Jul 30, 2023 pm 03:21 PM
利用PHP控制摄像头:从连接到拍摄的全过程解析摄像头的应用越来越广泛,例如视频通话、监控系统等。而在Web应用中,我们常常需要通过PHP来控制和操作摄像头。本文将介绍如何利用PHP来实现从摄像头连接到拍摄的全过程。确认摄像头的连接状态在开始操作摄像头之前,我们首先需要确认摄像头的连接状态。PHP提供了扩展库video来实现对摄像头的操作。我们可以通过以下代码
 摄像头已离线什么意思Dec 07, 2023 pm 04:05 PM
摄像头已离线指摄像头无法再进行正常的视频传输,即无法实时监控。这通常是由于摄像头与主机之间的连接已断开,或者摄像头本身出现了故障。可能导致摄像头离线的原因:1、网络问题;2、电源问题;3、信号线路问题;4、摄像头故障;5、软件问题。摄像头已离线需要检查网络连接、电源、信号线路、软件等方面的问题,找到原因并进行解决,同时还需要注意保护个人隐私和数据安全的问题。
 win10监控摄像头打开照片的方法Jul 10, 2023 pm 09:41 PM
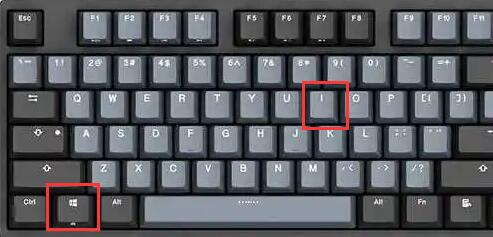
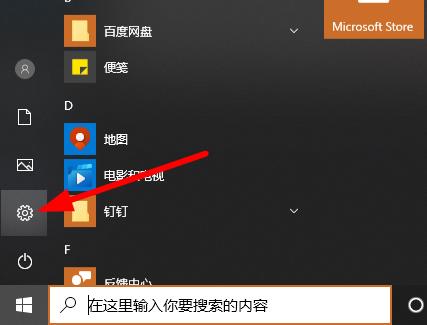
如果我们手头没有手机,只有电脑,但我们必须拍照,我们可以使用电脑内置的监控摄像头拍照,那么如何打开win10监控摄像头,事实上,我们只需要下载一个相机应用程序。打开win10监控摄像头的具体方法。win10监控摄像头打开照片的方法:1.首先,盘快捷键Win+i打开设置。2.打开后,进入个人隐私设置。3.然后在相机手机权限下打开访问限制。4.打开后,您只需打开相机应用软件。(如果没有,可以去微软店下载一个)5.打开后,如果计算机内置监控摄像头或组装了外部监控摄像头,则可以拍照。(因为人们没有安装摄
 PHP操作摄像头:实现拍照、录像和图像处理的完整教程Jul 29, 2023 pm 02:05 PM
PHP操作摄像头:实现拍照、录像和图像处理的完整教程摄像头在计算机视觉和图像处理领域具有广泛的应用。本文将介绍如何使用PHP来操作摄像头,并实现拍照、录像和图像处理的功能。我们将使用OpenCV库来实现这些功能,OpenCV是一个开源的计算机视觉库,提供了丰富的图像处理算法和工具。步骤一:安装OpenCV和PHP扩展首先,我们需要安装OpenCV库和PHP扩
 如何利用PHP调用摄像头进行二维码扫描Jul 30, 2023 pm 12:53 PM
如何利用PHP调用摄像头进行二维码扫描摄像头扫描二维码在现代应用中越来越常见,能够提供方便快捷的信息传递和交互方式。在Web应用中,我们可以使用PHP调用摄像头进行二维码扫描,并将扫描到的信息用于后续的处理和展示。本文将介绍如何使用PHP调用摄像头进行二维码扫描,并提供相应的代码示例。准备工作在开始之前,我们需要为PHP环境配置相应的扩展库和功能。首先,确保
 联想win10摄像头启动后画面无法显示Dec 25, 2023 pm 12:52 PM
我们日常使用笔记本的时候免不了会打开摄像头,但是很多小伙伴发现打开的时候显示黑屏,现在不管是笔记本还是台式电脑都有这个功能,使用也是很方便的,今天小编带来了详细的解决步骤,具体的一起来看看吧。联想win10摄像头打开黑屏的解决方法1、打开“控制面板”,找到“硬件和声音”2、打开“硬件和声音”,找到“设备管理器”3、打开“设备管理器”,找到“照相机EasyCamera”(可能是其他文字但是图标就是这个小摄像头)4、选择“驱动程序”下属“更新驱动程序”5、点击“浏览我的计算机以查找驱动程序软件”6、
 PHP摄像头调用技巧:如何实现多摄像头切换Aug 04, 2023 pm 07:07 PM
PHP摄像头调用技巧:如何实现多摄像头切换摄像头应用已经成为许多Web应用的重要组成部分,例如视频会议、实时监控等等。在PHP中,我们可以使用各种技术来实现对摄像头的调用和操作。本文将重点介绍如何实现多摄像头的切换,并提供一些示例代码来帮助读者更好地理解。摄像头调用基础在PHP中,我们可以通过调用JavaScript的API来实现摄像头的调用。具体来说,我们
 win10学信网摄像头无法打开解决方案Jul 07, 2023 pm 04:25 PM
小伙伴们在应用计算机的过程中都是必须摄像头来实现面部核查尤其是学信网,可是近期许多同学们都说学信网的摄像头打不开,下边就为你们产生了解决方案一起看看吧。win10学信网摄像头无法打开该怎么办:1、点击左下方开始,挑选“设置”。2、在windows设定中点击“个人隐私”。3、接着下降左边任务栏图标点击“照相机”。4、将“容许运用浏览你的照相机”下的电源开关开启。5、最终再将相对应的使用后的电源开关打开就可以。在设定中打开相机相对应管理权限就可以,就可以去开展解决了哟。


Hot AI Tools

Undresser.AI Undress
AI-powered app for creating realistic nude photos

AI Clothes Remover
Online AI tool for removing clothes from photos.

Undress AI Tool
Undress images for free

Clothoff.io
AI clothes remover

AI Hentai Generator
Generate AI Hentai for free.

Hot Article

Hot Tools

Safe Exam Browser
Safe Exam Browser is a secure browser environment for taking online exams securely. This software turns any computer into a secure workstation. It controls access to any utility and prevents students from using unauthorized resources.

PhpStorm Mac version
The latest (2018.2.1) professional PHP integrated development tool

MinGW - Minimalist GNU for Windows
This project is in the process of being migrated to osdn.net/projects/mingw, you can continue to follow us there. MinGW: A native Windows port of the GNU Compiler Collection (GCC), freely distributable import libraries and header files for building native Windows applications; includes extensions to the MSVC runtime to support C99 functionality. All MinGW software can run on 64-bit Windows platforms.

WebStorm Mac version
Useful JavaScript development tools

mPDF
mPDF is a PHP library that can generate PDF files from UTF-8 encoded HTML. The original author, Ian Back, wrote mPDF to output PDF files "on the fly" from his website and handle different languages. It is slower than original scripts like HTML2FPDF and produces larger files when using Unicode fonts, but supports CSS styles etc. and has a lot of enhancements. Supports almost all languages, including RTL (Arabic and Hebrew) and CJK (Chinese, Japanese and Korean). Supports nested block-level elements (such as P, DIV),


