How to remove the border of the text box: 1. Open the document in Word; 2. Select "Insert" in the menu bar, then select "Text Box" in the toolbar, and then select horizontal or vertical or It is multi-line text; 3. After selecting, move the mouse to the page and a " " symbol will appear, then left-click and move the mouse to draw a text box, and then enter the content; 4. Select the text box, and then right-click , select "Format Object"; 5. Then the property bar will appear on the right, select the line option, click the small triangle in the lower right corner, and then click "No Line".

I believe many netizens still don’t know how to remove the border of the text box. Today I have brought you a relevant tutorial. I hope it can help you. Helps.
Steps to remove the border of the text box:
1. Open the document with Word.

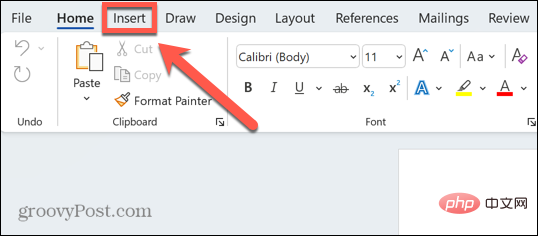
2. Select "Insert" in the menu bar, then select "Text Box" in the toolbar, and then select horizontal or vertical or multi-line text.

3. After selecting, move the mouse to the page and a " " symbol will appear. Then left-click and move the mouse to draw a text box and enter the content. .

#4. Select the text box, then right-click and select "Format Object".

#5. Then the property bar will appear on the right, select the line option, click the small triangle in the lower right corner, and then click "No Line".

#6. At this time, the text box border is gone.

The above is the detailed content of How to remove the border of the text box. For more information, please follow other related articles on the PHP Chinese website!
 OneNote如何设置图片为背景May 14, 2023 am 11:16 AM
Onenote是Microsoft提供的最好的笔记工具之一。结合Outlook和MSTeams,Onenote可以成为提高工作和个人创意工作效率的强大组合。我们必须以不同的格式做笔记,这可能不仅仅是把事情写下来。有时我们需要从不同来源复制图像并在日常工作中进行一些编辑。如果知道如何应用更改,则粘贴在Onenote上的图像可以发挥很大作用。您在使用Onenote时是否遇到过粘贴在Onenote上的图像无法让您轻松工作的问题?本文将着眼于在Onenote上有效地使用图像。我们可
 如何隐藏文本直到在 Powerpoint 中单击Apr 14, 2023 pm 04:40 PM
如何在 PowerPoint 中的任何点击之前隐藏文本如果您希望在单击 PowerPoint 幻灯片上的任意位置时显示文本,那么设置起来既快速又容易。要在 PowerPoint 中单击任何按钮之前隐藏文本:打开您的 PowerPoint 文档,然后单击“插入 ”菜单。单击新幻灯片。选择空白或其他预设之一。仍然在插入菜单中,单击文本框。在幻灯片上拖出一个文本框。单击文本框并输入您
 如何在 Word 中制作日历Apr 25, 2023 pm 02:34 PM
如何使用表格在Word中制作日历如果您想创建一个完全符合您的规范的日历,您可以使用Word中的表格从头开始做所有事情。这使您可以为日历设计所需的确切布局。在Word中使用表格创建日历:打开一个新的Word文档。按Enter几次,将光标向下移动到页面。单击插入 菜单。在功能区中,单击表格图标。单击并按住左上角的方块并拖出一个7×6的表格。在第一行填写星期几。使用另一个日历作为参考填写月份中的日期。突出显示当前月份之外的任何日期。在主菜单中,单击文本颜色图标并选择灰色。对当前月份以
 html文本框类型有哪些Oct 12, 2023 pm 05:38 PM
html文本框类型有单行文本框、密码文本框、数字文本框、日期文本框、时间文本框、文件上传文本框、多行文本框等等。详细介绍:1、单行文本框是最常见的文本框类型,用于接受单行文本输入,用户可以在文本框中输入任意文本,例如用户名、密码、电子邮件地址等;2、密码文本框用于接受密码输入,用户在输入密码时,文本框中的内容会被隐藏,以保护用户的隐私;3、数字文本框等等。
 如何在HTML文本框中添加换行符?Sep 04, 2023 am 11:05 AM
要向HTML文本区域添加换行符,我们可以使用HTML换行符标签在任意位置插入换行符。或者,我们也可以使用CSS属性“white-space:pre-wrap”自动为文本添加换行符。当在文本区域中显示预先格式化的文本时,这特别有用。因此,我们来讨论一下添加换行符的方法。方法在HTML中创建一个文本区域并为其分配一个id。创建一个按钮,单击该按钮将使用换行符分割文本区域的文本。现在创建将文本分成换行符的函数。该函数的代码为-functionreplacePeriodsWithLineBreaks()
 如何编写HTML滚动条文本框代码Feb 19, 2024 pm 07:38 PM
标题:如何编写带滚动条的HTML文本框代码HTML中的文本框是常用的用户输入控件之一,在某些情况下,文本内容过长时会导致文本框显示不完整。这时,我们可以通过添加滚动条来让文本框支持滚动查看。本文将详细介绍如何编写带滚动条效果的HTML文本框代码,并给出具体的代码示例。一、使用textarea元素创建文本框在HTML中,我们使用textarea元素来创建文本框
 文本框边框怎么设置颜色Jul 28, 2023 am 10:08 AM
设置文本框边框颜色的方法:1、选中要添加边框的文本或段落;2、在“开始”选项卡的“段落”或“字体”组中,单击“边框”按钮;3、从下拉菜单中选择一个边框样式;4、单击“边框颜色”按钮,在弹出的菜单中选择您想要的颜色;5、单击“确定”按钮以应用边框样式和颜色。
 html怎么对齐文本框Mar 27, 2024 pm 04:33 PM
html对齐文本框的方法:1、文本对齐;2、使用Flexbox布局对齐;3、使用Grid布局对齐;4、使用margin或position进行微调。

Hot AI Tools

Undresser.AI Undress
AI-powered app for creating realistic nude photos

AI Clothes Remover
Online AI tool for removing clothes from photos.

Undress AI Tool
Undress images for free

Clothoff.io
AI clothes remover

AI Hentai Generator
Generate AI Hentai for free.

Hot Article

Hot Tools

Safe Exam Browser
Safe Exam Browser is a secure browser environment for taking online exams securely. This software turns any computer into a secure workstation. It controls access to any utility and prevents students from using unauthorized resources.

SublimeText3 Linux new version
SublimeText3 Linux latest version

SublimeText3 Chinese version
Chinese version, very easy to use

Notepad++7.3.1
Easy-to-use and free code editor

SublimeText3 Mac version
God-level code editing software (SublimeText3)


