Home >Common Problem >Step-by-step tutorial on disk cleaning in win10 computer
Step-by-step tutorial on disk cleaning in win10 computer
- PHPzforward
- 2023-07-23 17:09:312392browse
Recently, some Win10 users have reported that the computer is running slower and slower. I heard that defragmenting the disk can improve the overall performance and running speed of the computer, so I want to try it, but I don’t know. Where is the disk defragmentation and how to defragment it? I am very troubled by this. Next, the editor will introduce you step by step the steps of win10 disk cleanup.
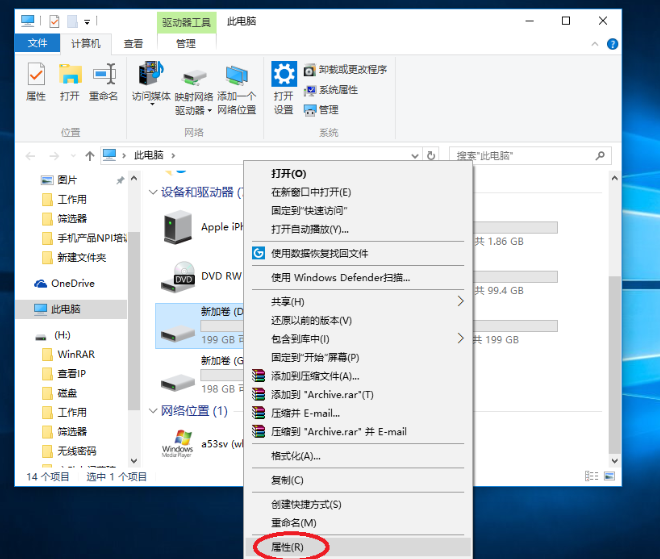
1. Press the Win E key combination to open the resource manager, select the corresponding drive letter, for example: D drive, right-click and select "Properties" in the menu.

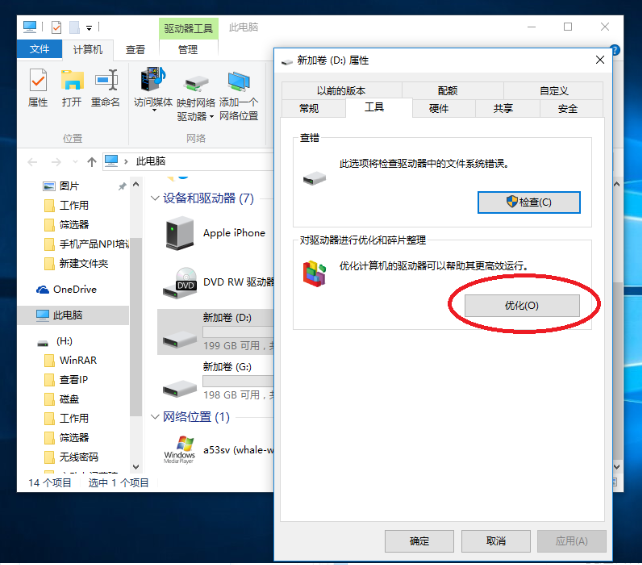
2. In the local disk (D:) property interface, click the "Tools" tab and find and click the "Optimize and Defragment the Drive" item. "optimization".

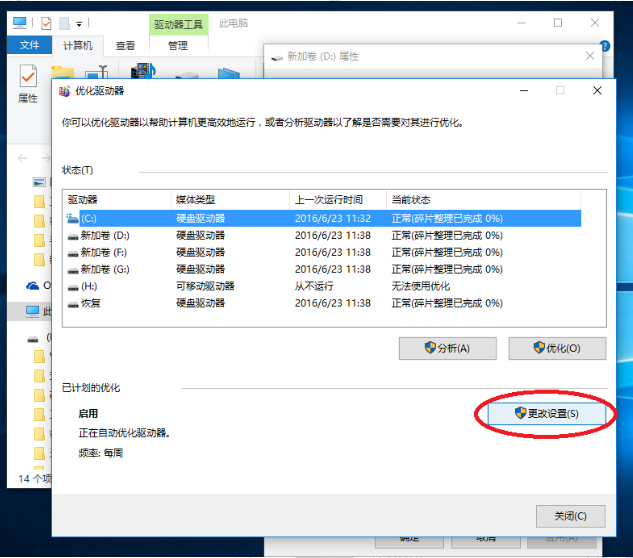
#3. In the drive optimization interface, find and click "Change Settings" in the activated optimization project.

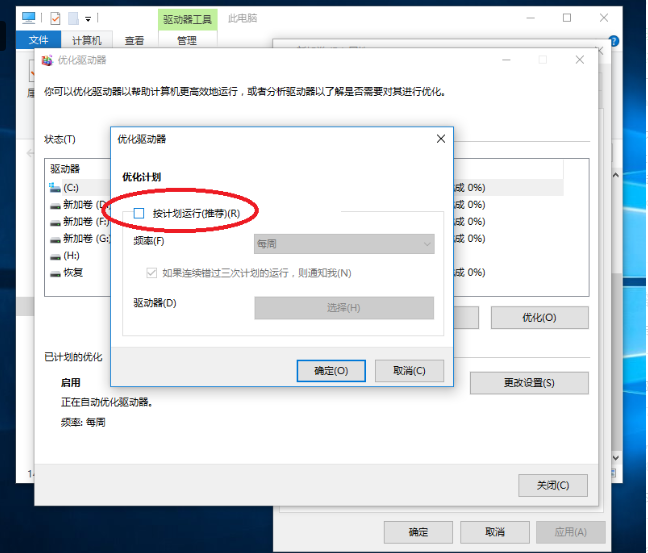
4. In the "Optimize Drive" interface that appears subsequently, remove the check in front of "Run as scheduled" and click OK

The above is the step-by-step tutorial on win10 disk cleanup. I hope it can help everyone.
The above is the detailed content of Step-by-step tutorial on disk cleaning in win10 computer. For more information, please follow other related articles on the PHP Chinese website!

