
Home >Common Problem >Downloaded the tutorial on how to install win7 Rain Forest Wind System
Downloaded the tutorial on how to install win7 Rain Forest Wind System

- PHPzforward
- 2023-07-23 14:01:132577browse
How to install win7 Rain Forest Wind System after downloading it? Win7 Rain Forest Wind has attracted everyone's attention, with stable operation, good compatibility, enhanced system function performance, high operating efficiency, safe system operation, and unique user-friendly design of Rain Forest Wind. Let’s take a look at how to install the Windows 7 Rainforest Wind System.
1. Preparation for the installation of win7 32-bit ultimate system:
1. First of all, you need to know whether the system you want to install is Win7 32-bit or Win7 64-bit. Because everyone now basically has 4G of memory, the editor recommends that you install a 64-bit win7 system so that you can better experience the operating efficiency of the win7 system.
2. Next, you need to download the corresponding Win7 32-bit or Win7 64-bit system image. Download Yulin Mufeng 32-bit win7 system and Yulin Mufeng ghost system: http://www.windows7en.com/ylmfwin7/
3. Since we are using hard disk installation here, you need to confirm your computer Is there any decompression software installed in it, such as WinRAR or Haozhi?
4. It is necessary to install computers or laptops and other equipment.
2. The specific steps to install the hard disk of YuLinMuFeng Win7 system:
1. Systems downloaded from Windows 7 Home are generally in ISO image format. At this point, we need to decompress the downloaded Win7 system image. Right-click the image file and select "Extract to Ylmf_baidu_Win7_x64_2015_0400027" in the pop-up right-click menu bar. In this way, the system files will be decompressed to the disk where the current system image is located.
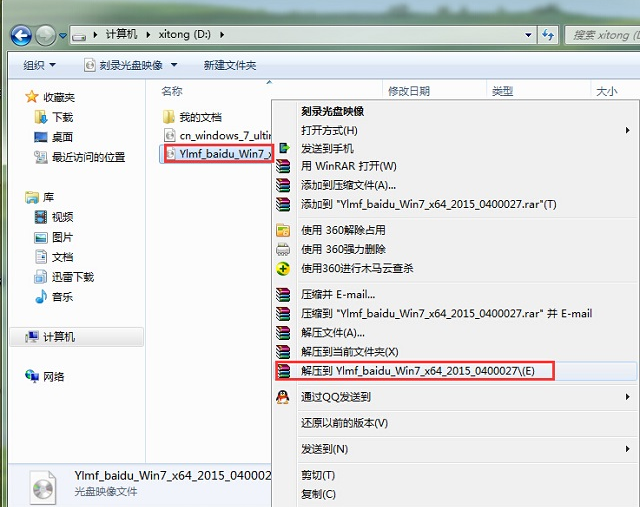
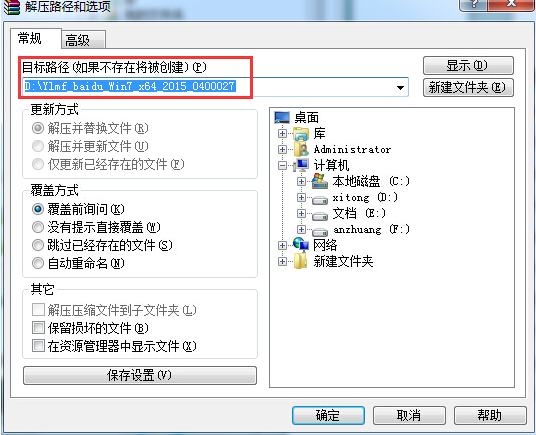
If the hard disk space where your system image is located is not enough, we can also right-click the mouse to select the image file. At this time, select "Extract File" and select the path where you need to unzip it. file location.
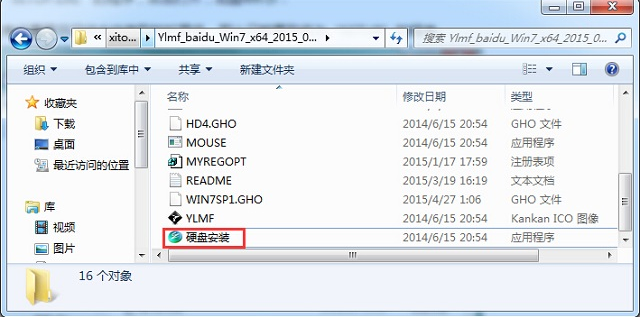
#2. When the win7 image file is decompressed, a corresponding YuLinMuFeng win7 64-bit system folder will be generated.
3. Now we open the folder, find the "Hard Disk Installation" program inside, and click to install it.
Note: Here, we can also click on the "AUTORUN" application to install it, if this program is included in the image you downloaded.
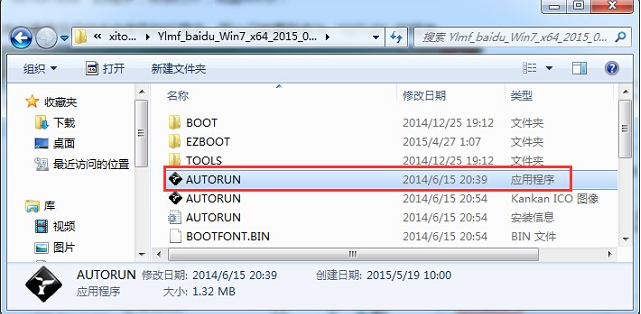
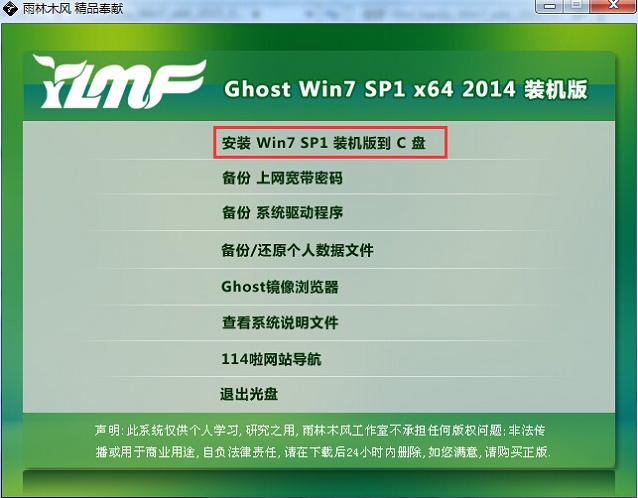
Click "AUTORUN", and the YuLinMuFeng win7 installation interface will appear. You can select "Install Win7 SP1 installed version to C drive".
#PS, if the download you download does not have "hard disk installation" or "AUTORUN", but you can see the "setup" application, you can also install the win7 system.
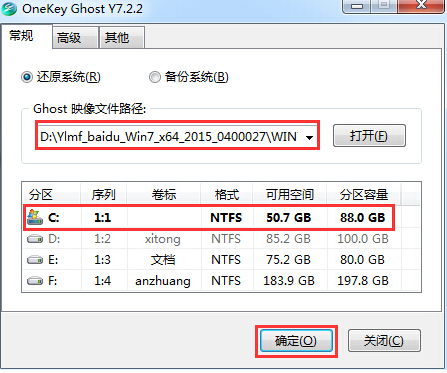
4. For the above operations, a "OneKey Ghost" window will appear after clicking to view GHO WIM Whether the ISO image path is correct, generally when the window is opened, the corresponding GHO image file will be automatically identified, or you can change the image file to be installed by pressing the "Open" button → select the disk where the system will be stored. Then confirm that you want to install (restore) Rain Forest Wind win7 For 64-bit systems, click OK.
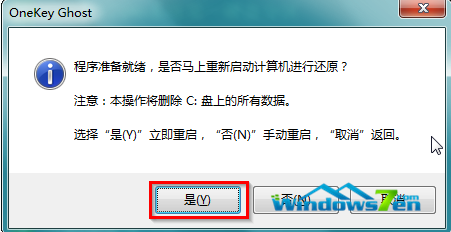
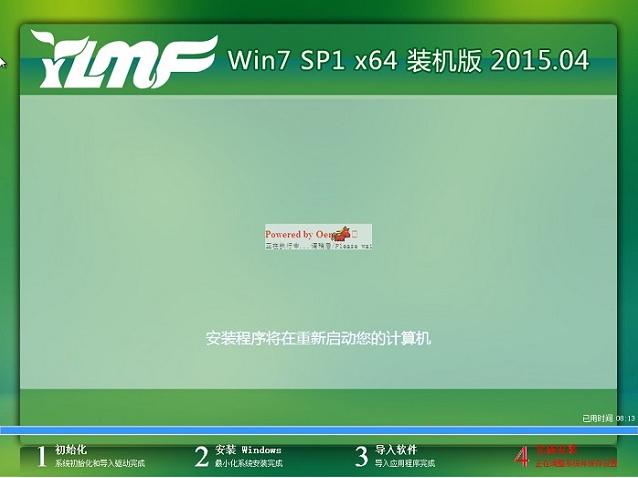
#5. Then select "Yes" on the prompt interface that appears, and the computer will immediately start to restart for restoration. As shown in the figure below:
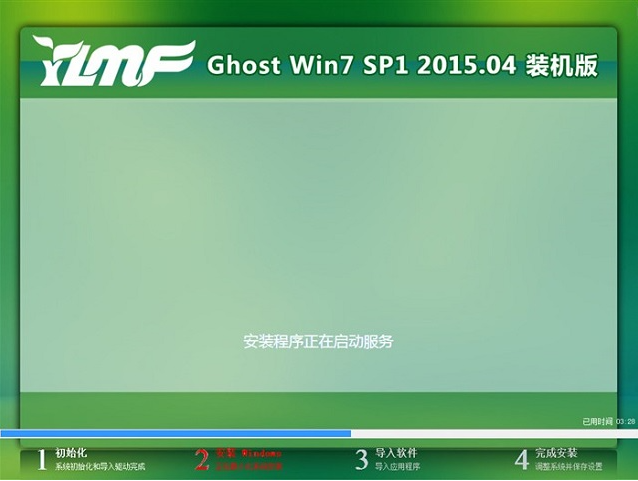
#6. After restarting, you will enter the system restore. You can check the restore progress by looking at the restore progress bar.
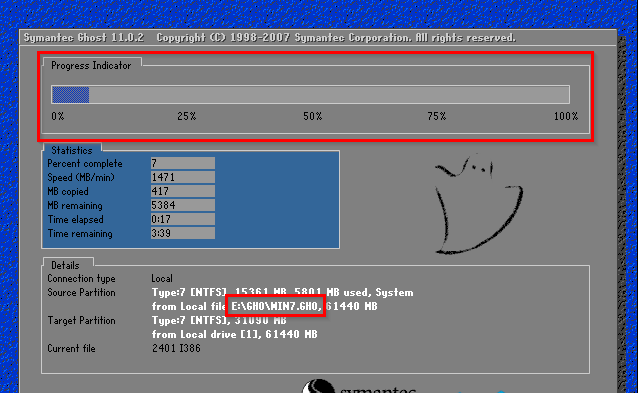
7. When the progress bar reaches 100% and the restoration is completed, the system will automatically enter the fully automatic installation. At this time, we are looking forward to the quick installation of our YuLinMuFeng win7 installed version.
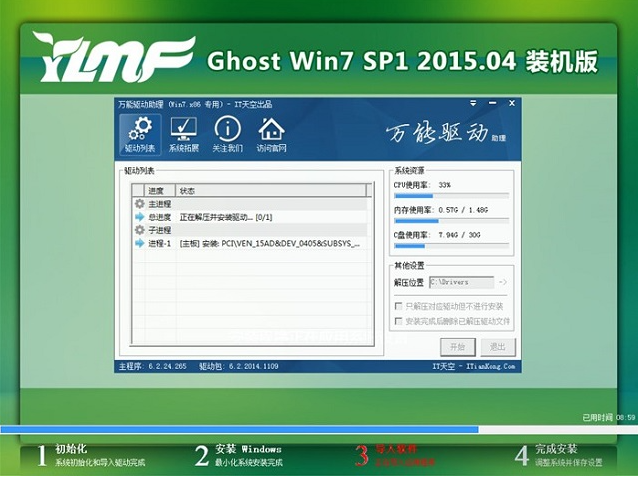
#8. During the installation process of this YuLinMuFeng win7 system, the program will automatically install and recognize it. Don’t worry about where to find the corresponding hardware driver.
9, At the same time, during the installation process, the YuLinMuFeng win7 system we installed will also be automatically activated. If the win7 system you downloaded does not have automatic activation, you can also find various activation tools in windows7 for activation: http://www.windows7en.com/Win7/16542.html
10. The final installed Rainforest Woodwind win7 ghost system screen is as follows:

In summary, this is the win7 Rainforest Woodwind system downloaded online Here is the installation tutorial. The Windows 7 Ultimate Edition system of YuLinMuFeng is very popular recently. The editor of Windows 7 Home also uses this system. Many netizens have downloaded this system out of curiosity and many of them cannot install it, so you can follow the editor’s method. Give it a try and easily solve your system installation problems.
The above is the detailed content of Downloaded the tutorial on how to install win7 Rain Forest Wind System. For more information, please follow other related articles on the PHP Chinese website!