Home >Common Problem >Step tutorial for connecting to wifi in win7 system
Step tutorial for connecting to wifi in win7 system
- PHPzforward
- 2023-07-20 14:21:229265browse
Wi-Fi technology can wirelessly connect personal computers, handheld devices and other terminals. We can set up the wireless network card routing of the win7 system to achieve wifi shared Internet access. The following is a tutorial on connecting to wifi in windows7. Come and take a look.
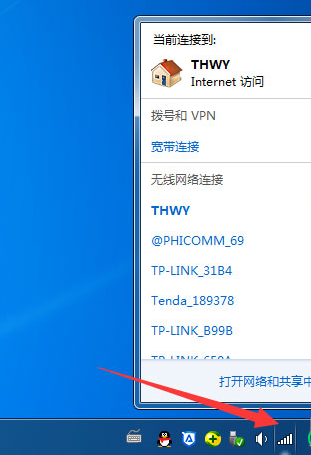
1. If it is a laptop, click the WiFi icon in the lower right corner to select the wireless connection you want to connect to, and enter the password to connect directly without setting up.
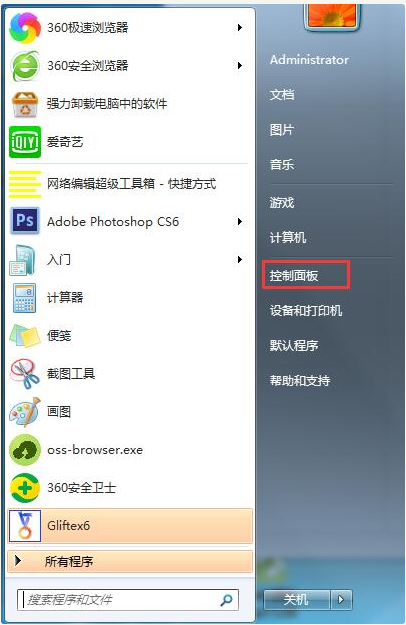
#2. If a desktop computer is connected to WiFi, you need to install the wireless network card and driver, and then set it up to connect to WiFi. First open the Control Panel;
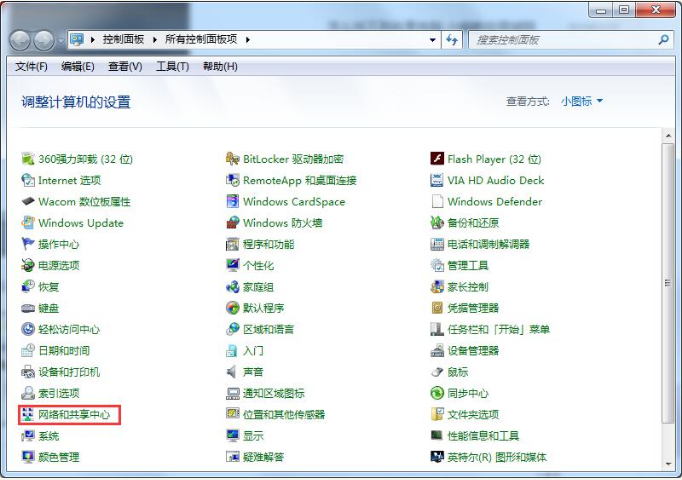
3. Change the view mode to small icons and select Network and Sharing Center;
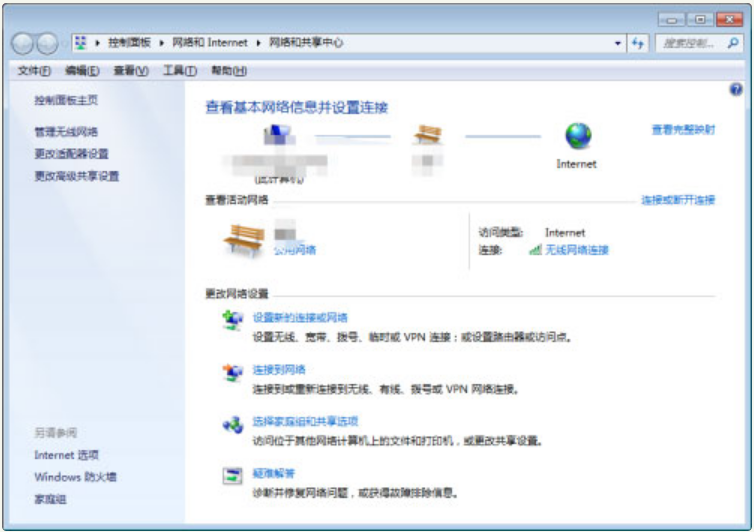
4. Click Manage Wireless Networks on the left;
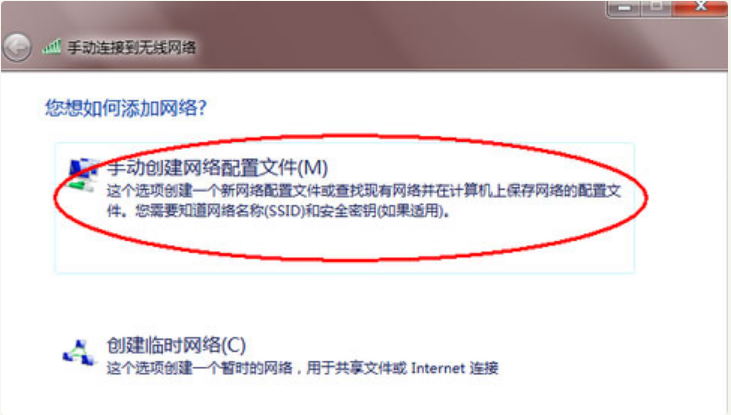
5. Click Add, a window to manually connect to a wireless network will pop up, select the first one to create manually;
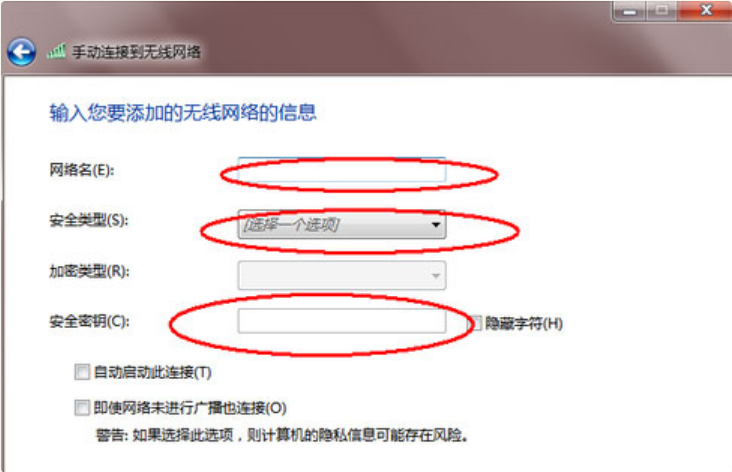
6. Enter the wireless you want to add and it’s OK.
#The above is the step-by-step tutorial on connecting to wifi in win7. I hope it can help everyone.
The above is the detailed content of Step tutorial for connecting to wifi in win7 system. For more information, please follow other related articles on the PHP Chinese website!

