


Many offices today have implemented computer network sharing, allowing files and printers to be shared. Some friends don’t know much about the network sharing settings of win10 system. The editor below will teach you how to set up network sharing in win10.
The specific steps are as follows:
1. Click the "Windows" button in the lower left corner of the desktop and click "File Explorer" from its extension panel.

2. After opening the "File Explorer" window, expand the "Network" list. At this time, all computers in the LAN will be displayed on the right side, and the prompt "File Sharing is turned off, network computers and devices cannot be seen, click Change".

#3. Click this status prompt and select the "Enable network discovery and file sharing" item from its extended menu to turn on the file sharing function.

#4. Next, find the folder you want to share, right-click and select the "Properties" item to enter.

5. From the opened "Properties" window, switch to the "Sharing" tab and click "Sharing" in the "Network File and Folder Sharing" column.

6. After the "File Sharing" window opens, click the "Permission Level" drop-down list on the right side of the corresponding account to set the permissions for shared files and folders, and click "shared".

7. At this time, you will be prompted "Your folder has been shared", and then you can send it to your friends through "email" or "shared address" to achieve file sharing. Function.

#8. We can also make more advanced settings for the shared files or folders, click "Advanced Sharing".

9. From the "Advanced Sharing" window that opens, you can set "User Data Limits for Simultaneous Sharing" and "Permissions".

10. If you want to set "password protection" for the shared files or folders, click the "Network Sharing Center" button to enter.

11. From the "Advanced Sharing Settings" interface that opens, expand the "Public Network Sharing" list, check the "Enable Password Protected Sharing" item, and click "Save Changes" ” item.


The above is the method for setting up network sharing in win10. Friends who need it can refer to the tutorial.
The above is the detailed content of Teach you how to set up win10 network sharing. For more information, please follow other related articles on the PHP Chinese website!

 deepseek web version official entranceMar 12, 2025 pm 01:42 PM
The domestic AI dark horse DeepSeek has risen strongly, shocking the global AI industry! This Chinese artificial intelligence company, which has only been established for a year and a half, has won wide praise from global users for its free and open source mockups, DeepSeek-V3 and DeepSeek-R1. DeepSeek-R1 is now fully launched, with performance comparable to the official version of OpenAIo1! You can experience its powerful functions on the web page, APP and API interface. Download method: Supports iOS and Android systems, users can download it through the app store; the web version has also been officially opened! DeepSeek web version official entrance: ht
 In-depth search deepseek official website entranceMar 12, 2025 pm 01:33 PM
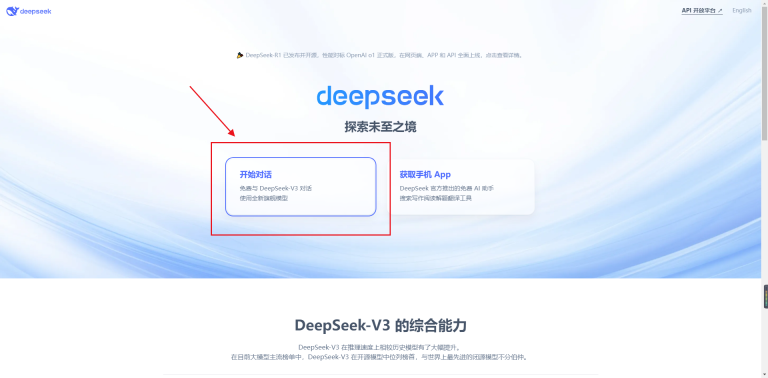
At the beginning of 2025, domestic AI "deepseek" made a stunning debut! This free and open source AI model has a performance comparable to the official version of OpenAI's o1, and has been fully launched on the web side, APP and API, supporting multi-terminal use of iOS, Android and web versions. In-depth search of deepseek official website and usage guide: official website address: https://www.deepseek.com/Using steps for web version: Click the link above to enter deepseek official website. Click the "Start Conversation" button on the homepage. For the first use, you need to log in with your mobile phone verification code. After logging in, you can enter the dialogue interface. deepseek is powerful, can write code, read file, and create code
 How to solve the problem of busy servers for deepseekMar 12, 2025 pm 01:39 PM
DeepSeek: How to deal with the popular AI that is congested with servers? As a hot AI in 2025, DeepSeek is free and open source and has a performance comparable to the official version of OpenAIo1, which shows its popularity. However, high concurrency also brings the problem of server busyness. This article will analyze the reasons and provide coping strategies. DeepSeek web version entrance: https://www.deepseek.com/DeepSeek server busy reason: High concurrent access: DeepSeek's free and powerful features attract a large number of users to use at the same time, resulting in excessive server load. Cyber Attack: It is reported that DeepSeek has an impact on the US financial industry.

Hot AI Tools

Undresser.AI Undress
AI-powered app for creating realistic nude photos

AI Clothes Remover
Online AI tool for removing clothes from photos.

Undress AI Tool
Undress images for free

Clothoff.io
AI clothes remover

AI Hentai Generator
Generate AI Hentai for free.

Hot Article
Hot Tools

EditPlus Chinese cracked version
Small size, syntax highlighting, does not support code prompt function

Safe Exam Browser
Safe Exam Browser is a secure browser environment for taking online exams securely. This software turns any computer into a secure workstation. It controls access to any utility and prevents students from using unauthorized resources.

Dreamweaver CS6
Visual web development tools

SublimeText3 Linux new version
SublimeText3 Linux latest version

mPDF
mPDF is a PHP library that can generate PDF files from UTF-8 encoded HTML. The original author, Ian Back, wrote mPDF to output PDF files "on the fly" from his website and handle different languages. It is slower than original scripts like HTML2FPDF and produces larger files when using Unicode fonts, but supports CSS styles etc. and has a lot of enhancements. Supports almost all languages, including RTL (Arabic and Hebrew) and CJK (Chinese, Japanese and Korean). Supports nested block-level elements (such as P, DIV),

