We are known as the missing gateway and it is the default option for devices connecting subnets to external networks. Not long ago, a friend mentioned that he wanted to create a network gateway but was confused about where to place the computer and how to set it up. The following small series will bring you the default gateway setting method of Win7 flagship version.
How to set the default gateway for Win7 Ultimate Edition:
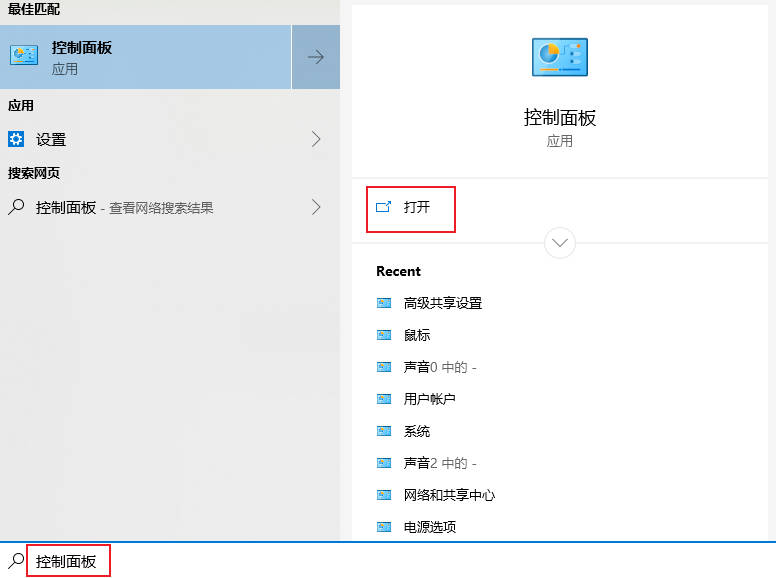
1. Click the Start menu, find and open the Control Panel, and then click Network and Sharing Center.

#2. Then find and click on the replacement adapter device.

3. Next, in the window that opens, right-click the local area connection and click Properties.

4. After opening, find the Internet Protocol version (TCP/IPV4), and then double-click to open it.

5. Then check Use the following IP address in the opened Internet Protocol version (TCP/IPv4) properties, then enter the IP address and subnet mask, and then enter the default gateway address, and finally click Confirm.

6. Finally test the gateway. First open the operation window, enter CMD and click OK. After opening, enter the command ping192.168.1.1-t. If the information shows that data is received successfully, the default gateway is configured successfully.

The above is the detailed content of How to set the default gateway of Win7 Ultimate Edition. For more information, please follow other related articles on the PHP Chinese website!
 如何查看手机上的默认网关(简单了解和设置手机的默认网关)May 06, 2024 pm 06:28 PM
以便进行网络设置和故障排除,在使用手机上网时,我们经常需要了解手机的默认网关。并帮助读者了解相关知识和操作,本文将介绍如何查看手机上的默认网关。1.什么是默认网关?它负责将数据包从本地网络发送到目标网络或设备,默认网关是连接本地网络和外部网络的通道。2.默认网关的重要性它决定了数据包如何进入和离开手机,默认网关在手机上的作用类似于家庭的门口。3.打开手机设置在手机主屏幕上找到“设置”并点击进入设置页面、应用程序图标。4.进入网络设置滑动屏幕并找到,在设置页面中“网络与互联网”点击进入,选项。5.
 抖音直播伴侣怎么设置画面和声音-抖音直播伴侣设置画面和声音的方法Mar 04, 2024 pm 02:10 PM
想必在座的用户都很喜欢使用抖音直播伴侣软件,不过你们知道抖音直播伴侣怎么设置画面和声音吗?下面这篇文章就为大伙带来了抖音直播伴侣设置画面和声音的方法,让我们一起来下文看看吧。首先,点击右上角的“齿轮”图标进入设置选项。接下来,小编将会逐一介绍“画质设置”和“高级设置”,请看下方示意图。2、画质设置功能可以帮助用户调节直播时的画质、码率、帧率与分辨率,软件已经根据用户本身的电脑配置,已经对设置进行过调节了,大多数情况下是无需更改的,如下图所示:3、而高级设置功能相对来说可更改的内容更多,包括音效设
 如何解决默认网关自动消失的问题Feb 24, 2024 pm 04:18 PM
默认网关自动消失怎么解决在现代社会中,互联网已经成为人们生活中不可或缺的一部分。无论是工作还是娱乐,我们都需要稳定的网络连接来完成各种任务。而默认网关是连接本地网络与外部互联网的关键要素之一。然而,有时我们可能会遇到默认网关自动消失的问题,导致无法上网。那么,当默认网关消失时,我们应该如何解决这个问题呢?首先,我们应该明确默认网关的概念。默认网关是一个网络路
 OPPO11锁屏密码设置方法Mar 22, 2024 am 11:06 AM
标题:OPPO11锁屏密码设置方法现代手机如今早已不再只是通讯工具,更是我们日常生活中不可或缺的重要设备。为了保护手机内的隐私信息和数据安全,设置一个安全可靠的锁屏密码变得至关重要。而对于使用OPPO11手机的用户来说,如何正确设置锁屏密码成为了一项必备的技能。以下将介绍OPPO11锁屏密码的设置方法,帮助您保护手机隐私和数据安全。首先,打开OPPO11手机
 如何查找默认网关Feb 19, 2024 pm 02:39 PM
默认网关在哪里看默认网关(DefaultGateway)是一个网络术语,用于指代计算机或其他网络设备连接到的主要网络的出口点。它扮演着将网络请求转发到其他网络的角色。默认网关通常由网络管理员或Internet服务提供商(ISP)进行配置,并且对于计算机来说非常重要。当我们需要链接到互联网时,我们需要知道默认网关的IP地址。那么,默认网关的IP地址在哪里查找
 2 种超级简单的方法更改 Windows 11 上的默认网关May 04, 2023 pm 12:16 PM
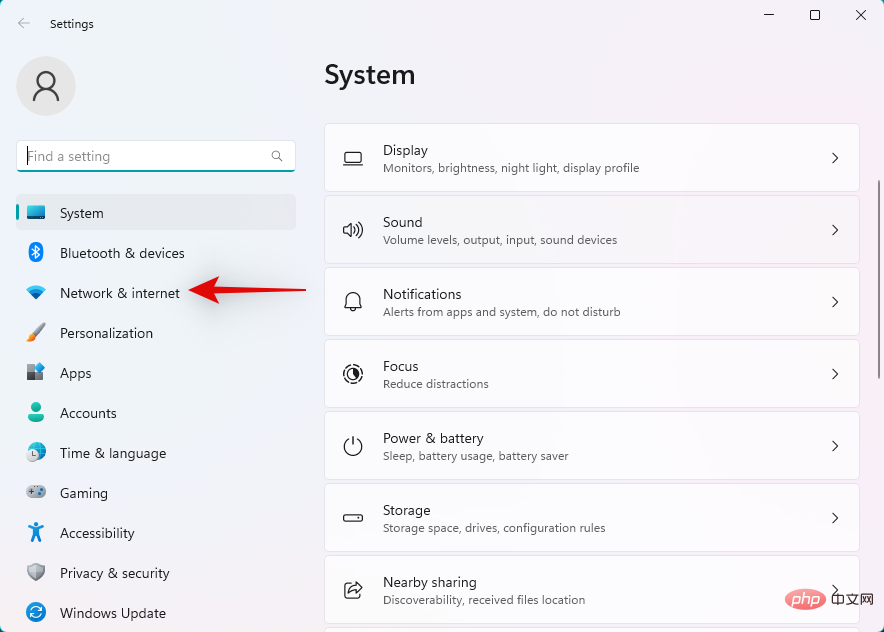
Windows11已经发布了一段时间,微软自发布以来引入了许多变化。许多设置现在已从控制面板移至设置应用程序,这可能会使您很难找到常规设置。如果您希望更改Windows11上的默认网关IP地址,那么您可以从这里开始。如何更改Windows11上的默认网关您可以使用“设置”应用或使用CMD更改Windows11中的默认网关。根据您当前的需求和要求,按照以下任一部分帮助您完成该过程。让我们开始吧。方法一:使用设置按下Windows+i键盘以打开“设置”应用。单击网络和互
 如何在桌面上显示Win7日历Dec 25, 2023 pm 11:49 PM
我们在使用win7系统的时候,为了方便看日期,会把日历放在桌面上,这个该如何操作呢?今天小编教你们如何在设置里把日历放在桌面上,非常的方便快捷,一起来看看吧。win7日历显示在桌面上的方法1、单机电脑左下角“开始”,然后单击“控制面板”2、在挑出来的窗口单击“外观和个性化”。3、选中桌面小工具下面的“向桌面添加小工具”。4、鼠标左键双击你所需要添加的小工具,然后就会自动的加载到电脑桌面。
 Win10电脑怎么设置默认网关_Win10电脑在哪设置默认网关Mar 22, 2024 pm 04:41 PM
Win10电脑怎么设置默认网关?下面给大家介绍具体的操作方法,希望对大家有所帮助。1、点击电脑左下角的“搜索”按钮,搜索“控制面板”并点击“打开”。2、在弹出的窗口中打开网络和Internet,然后点击“网络和共享中心”。在页面的左上角,点击“更改适配器设置”3、鼠标右键点击“WLAN”,在弹出的菜单中选择“属性”。双击打开“I

Hot AI Tools

Undresser.AI Undress
AI-powered app for creating realistic nude photos

AI Clothes Remover
Online AI tool for removing clothes from photos.

Undress AI Tool
Undress images for free

Clothoff.io
AI clothes remover

AI Hentai Generator
Generate AI Hentai for free.

Hot Article

Hot Tools

Safe Exam Browser
Safe Exam Browser is a secure browser environment for taking online exams securely. This software turns any computer into a secure workstation. It controls access to any utility and prevents students from using unauthorized resources.

PhpStorm Mac version
The latest (2018.2.1) professional PHP integrated development tool

MinGW - Minimalist GNU for Windows
This project is in the process of being migrated to osdn.net/projects/mingw, you can continue to follow us there. MinGW: A native Windows port of the GNU Compiler Collection (GCC), freely distributable import libraries and header files for building native Windows applications; includes extensions to the MSVC runtime to support C99 functionality. All MinGW software can run on 64-bit Windows platforms.

WebStorm Mac version
Useful JavaScript development tools

mPDF
mPDF is a PHP library that can generate PDF files from UTF-8 encoded HTML. The original author, Ian Back, wrote mPDF to output PDF files "on the fly" from his website and handle different languages. It is slower than original scripts like HTML2FPDF and produces larger files when using Unicode fonts, but supports CSS styles etc. and has a lot of enhancements. Supports almost all languages, including RTL (Arabic and Hebrew) and CJK (Chinese, Japanese and Korean). Supports nested block-level elements (such as P, DIV),


