Home >Common Problem >Win11 Academy: How to enable Dev Drive in Windows 11 25905 preview
Win11 Academy: How to enable Dev Drive in Windows 11 25905 preview
- PHPzforward
- 2023-07-14 13:09:381696browse
News on July 13, Microsoft today released the Win11 Build 25905 preview update and integrated many new functions/features from the Dev channel, one of which is Dev Drive.

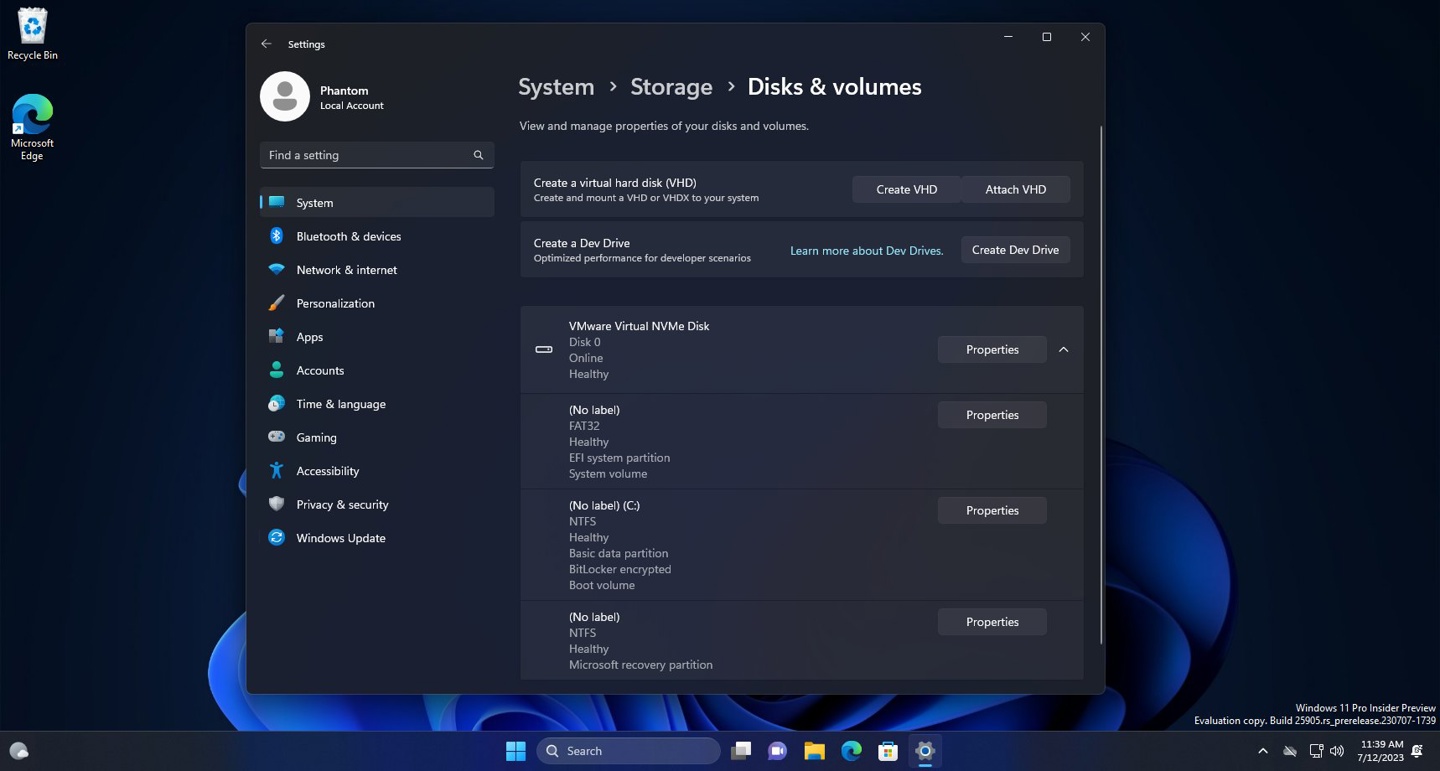
Dev Drive is a new form of storage volume that can be used to improve the performance of critical workloads, built on Resilient File System (ReFS) and includes file system optimizations and features , enabling developers to better manage their performance and security profiles. It is designed to meet the needs of developers to host project source code, working folders and package cache.
To set up a Dev Drive, you can create a VHD/VHDX in the available space of an existing drive or create a new VHD/VHDX through "System" > "Storage" > "Advanced Storage Settings" > ;Settings under Disks and Volumes or via the command line.
According to reports, the Dev Drive must have at least 50GB or higher capacity, and Microsoft also recommends 8GB or higher memory.
IT Home users can enable the above new functions and features through the ViveTool tool:
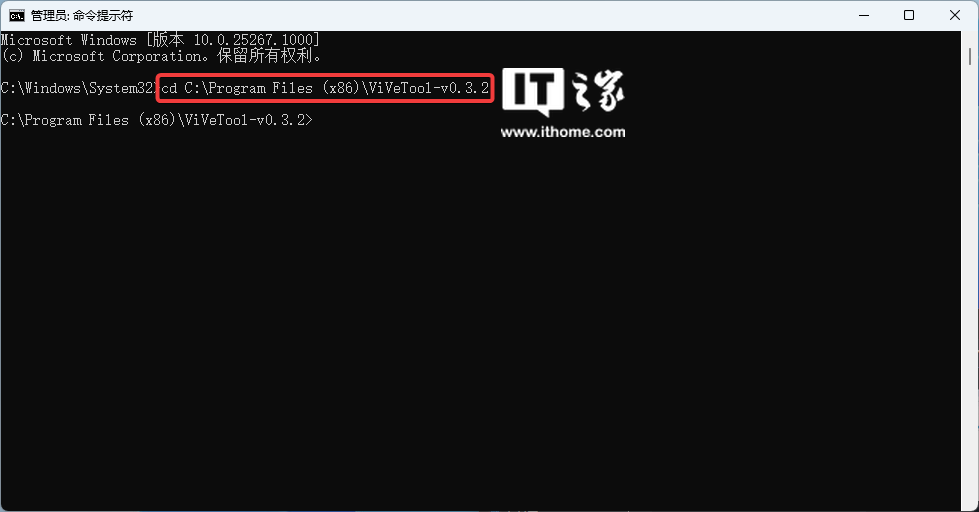
1. Download the Vivetool tool from the GitHub page, and then unzip it to any folder, but you need to remember The folder path (for example, C:\Program Files (x86)\ViVeTool-v0.3.2).
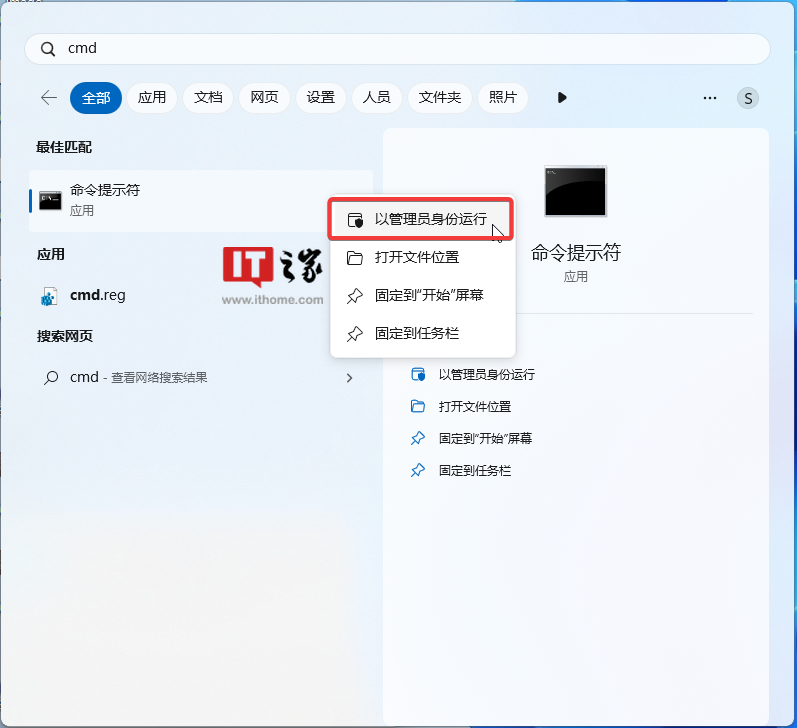
2. Press the Win key (or use the mouse) to open the Start menu, enter "cmd", and then select "Open the command prompt with administrator privileges".

3. Use the cd command to jump to the ViveTool folder, for example "cd C:\Program Files (x86)\ViVeTool-v0.3.2".

4. Then enter vivetool /enable /id:40347509,42401084,42866187,43217407,44715077 and press Enter.
5. Restart the computer.
The above is the detailed content of Win11 Academy: How to enable Dev Drive in Windows 11 25905 preview. For more information, please follow other related articles on the PHP Chinese website!

