Home >Common Problem >Introduction to setting the win10 start menu to win7 style
Introduction to setting the win10 start menu to win7 style
- 王林forward
- 2023-07-12 15:49:232561browse
Although many people praise the performance of the Win10 system, they do not like its interface. They have no idea how to switch the win10 interface to the easy-to-operate win7 interface. After detailed exploration and experiments, the editor found that it is actually possible to achieve full compatibility between the win10 interface and the win7 interface. Below is the operation tutorial, come and take a look.
1. Open Security Guard on the win10 system and click on the function directory, as shown in the following figure:

2. After entering the function directory interface, search for " Win10 Settings", after searching for it, click on win10 settings, as shown in the following figure:

3. After entering the win10 setting interface, you can perform one-click settings to start win10 The menu is set to win7 style, as shown in the following picture:

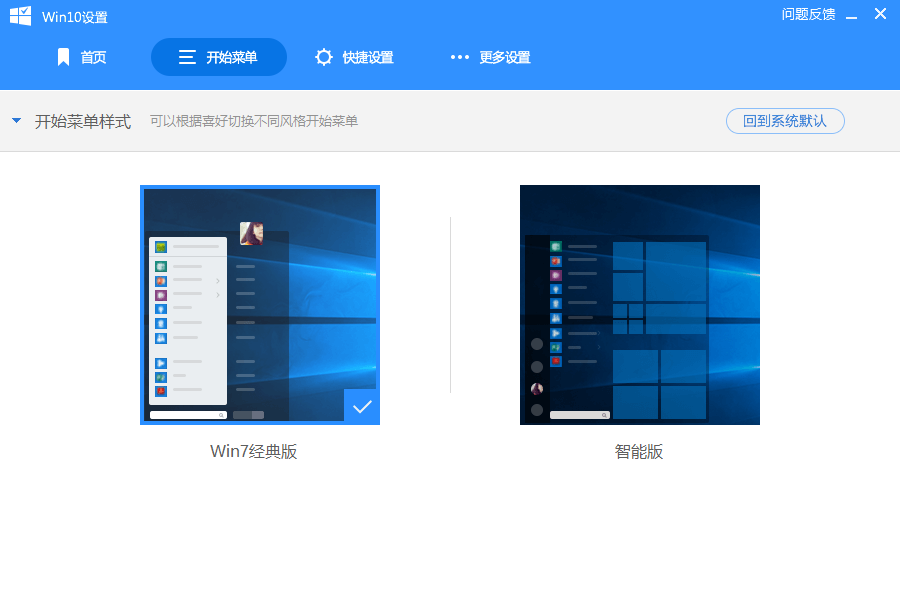
4. We can also click on the start menu and check "Win7 Classic Edition", as shown in the following picture:

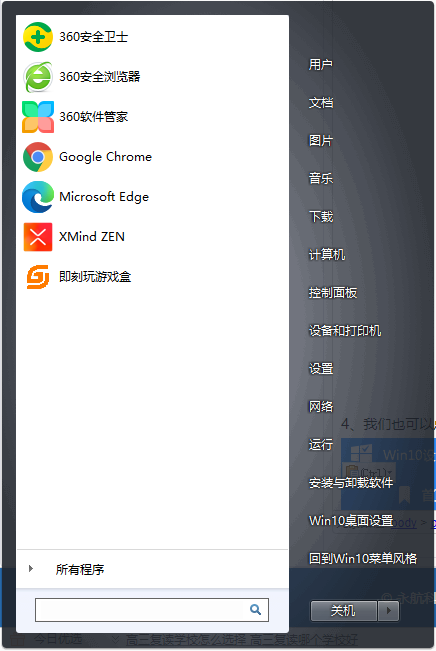
5. After checking "Win7 Classic Edition", you can see that the start menu of the win10 system has changed to win7 style, as shown in the figure below:

The above is the step-by-step tutorial on setting win7 mode in the win10 start menu. I hope it can help everyone.
The above is the detailed content of Introduction to setting the win10 start menu to win7 style. For more information, please follow other related articles on the PHP Chinese website!

