Home >Common Problem >How to use the win7 screenshot tool that comes with your computer
How to use the win7 screenshot tool that comes with your computer
- 王林forward
- 2023-07-11 16:41:474967browse
There are many ways to take computer screenshots. In win7 system, we can also use the system’s own tools to take screenshots. Let’s teach you how to use win7’s own screenshot tools.
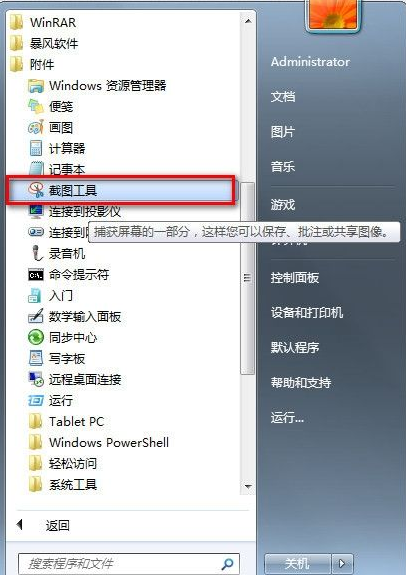
1. Click on the start menu and find attachments.

#2. Find the “Snipping Tool” in “Attachments”.
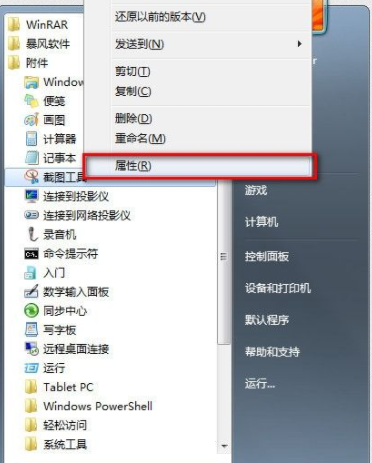
3. Let’s right-click “Snipping Tool” and select “Properties”.
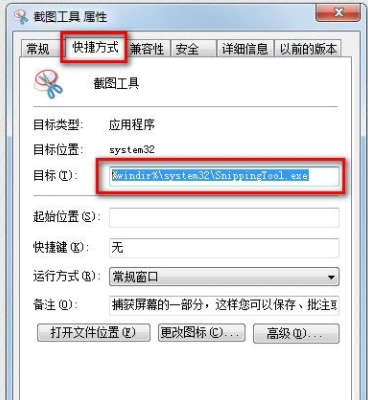
#4. The "Properties" dialog box pops up. We find the "Shortcut" and right-click the "Target" address to copy it.
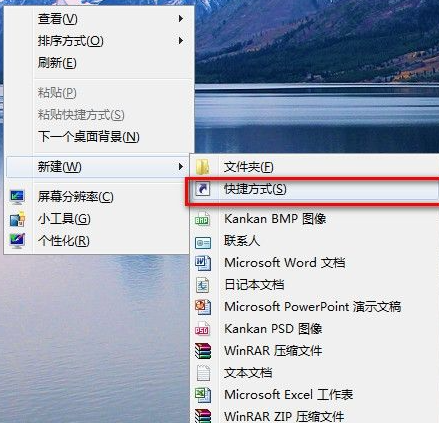
#5. Now we return to the desktop, right-click on the desktop and select New shortcut, as shown in the figure.
#6. The New Shortcut Wizard pops up, and we paste the path of the "Snipping Tool" we just copied. Next step.
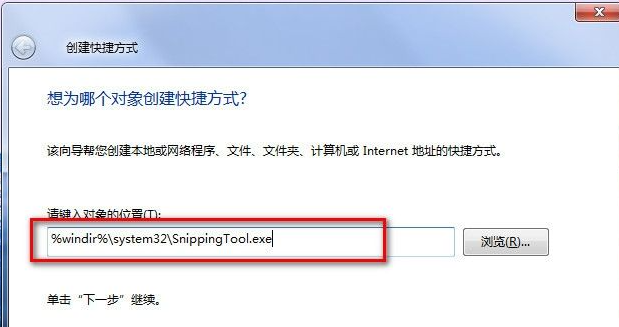
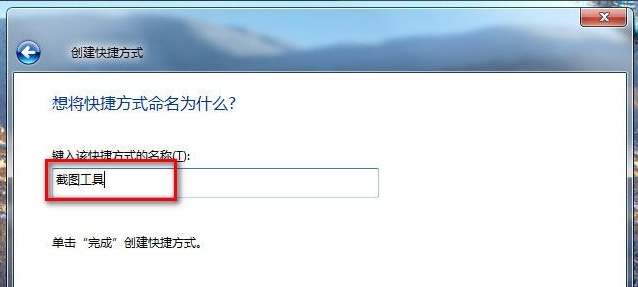
# 7. Just give it a name and click “Snipping Tool” to complete it.
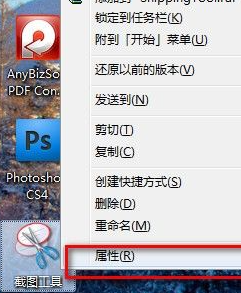
#8. Now let’s make the final settings. Right-click the “Snipping Tool” shortcut on the desktop and select Properties.
#9. The properties dialog box pops up, as shown in the picture. We are in the "Shortcut Key" column. We just press the shortcut key we want to set on the keyboard. As shown in the picture, we press CTRL ALT S. Click OK to save.
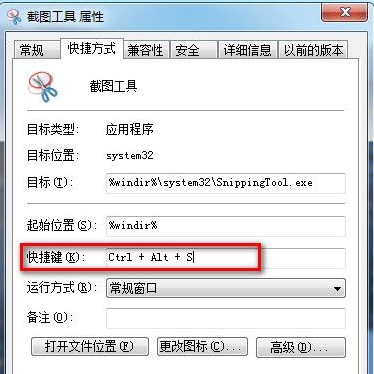
10. When we want to take a screenshot in the future, just press CTRL ALT S to quickly call up the screenshot tool that comes with WIN7. You can also double-click the screenshot directly on the desktop. Tool shortcut to open.
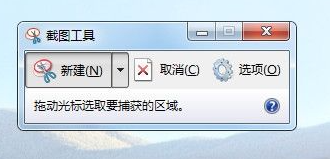
The method of using the Windows 7 system screenshot tool ends here. This tool is very convenient for taking screenshots. You can try it yourself later.
The above is the detailed content of How to use the win7 screenshot tool that comes with your computer. For more information, please follow other related articles on the PHP Chinese website!

