Home >Common Problem >How to solve the problem of expired email account settings in Win10?
How to solve the problem of expired email account settings in Win10?
- WBOYWBOYWBOYWBOYWBOYWBOYWBOYWBOYWBOYWBOYWBOYWBOYWBforward
- 2023-07-10 15:05:102586browse
The built-in mailbox of Win10 is very easy to use. Many friends will directly log in to the account and use it directly. However, recently some users have encountered the problem of account setting expiration. What should they do? For this problem, let’s take a look at the complete solution below.
Email account setting expiration method:
1. Log in to the corresponding email URL. Different email URLs have different entry and setting methods, but the content to be set is the same.
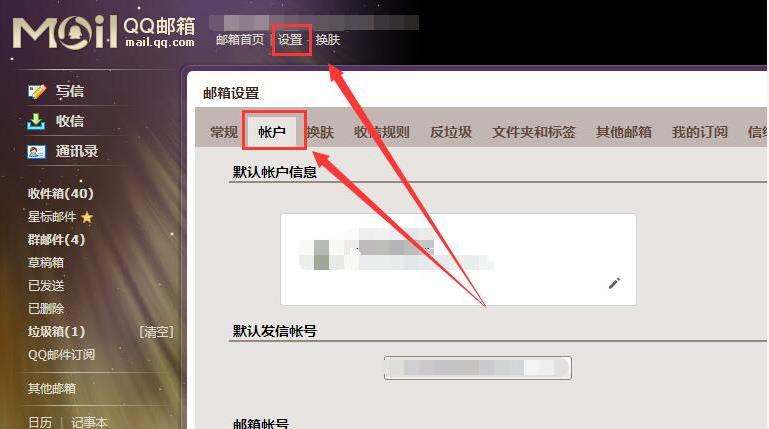
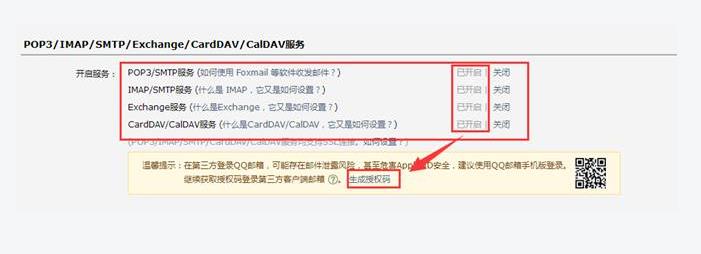
Take qq mail as an example, click: Settings--Account--POP3/IMAP/SMTP/Exchange/CardDAV/CalDAV service.

Enable service:
POP3/SMTP service (How to use mobile software such as Foxmail to receive and send emails?)
Enabled| Turn off the
IMAP/SMTP service (what is IMAP and how is it set up?)
is turned on | turn off the
Exchange service (what is Exchange and how is it set up?) How to set it?)
ON|OFF
2. Change the first two items from off and click on to on.

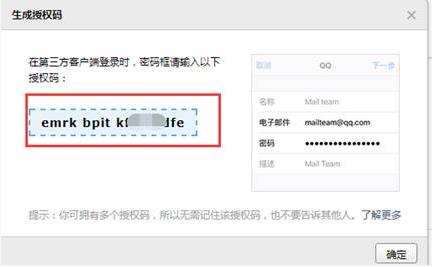
#3. The following is about the primary and secondary information. It will remind you to set an independent login password. Please follow the reminder to set it. The settings on the email address are completed.

#4. Finally, enter the corresponding account and password on the built-in email software of Win10, and synchronize the update a few times before the synchronization is successful.
Note: Different email address setting methods are different. The key is to enable pop3h and IMAP in the POP3/IMAP/SMTP/Exchange/CardDAV/CalDAV service.
The above is the detailed content of How to solve the problem of expired email account settings in Win10?. For more information, please follow other related articles on the PHP Chinese website!

