Home >Common Problem >How to turn on system protection in genuine win7 system
How to turn on system protection in genuine win7 system
- 王林forward
- 2023-07-08 17:02:043004browse
Sometimes we need to restore the system to solve the problem of computer system failure. Let me tell you how to turn on the system protection to restore the win7 system. Don’t miss it if you don’t know how.
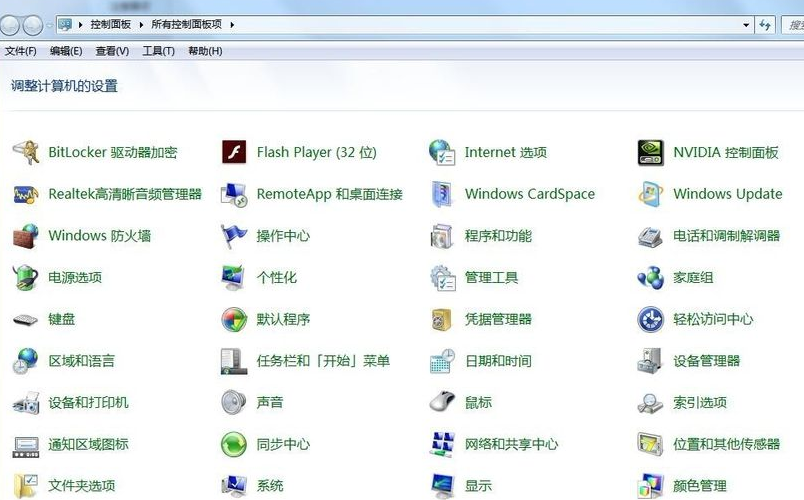
1. Turn on the computer, click the Start menu, and then click Control Panel to enter the main interface of the win7 system control panel.
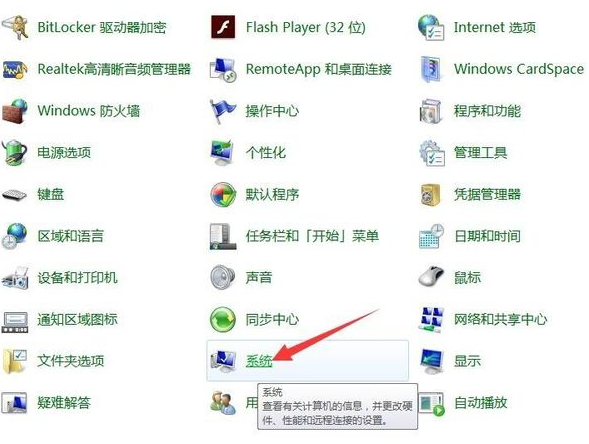
#2. Click [System] to enter the main system settings interface of the win7 system.
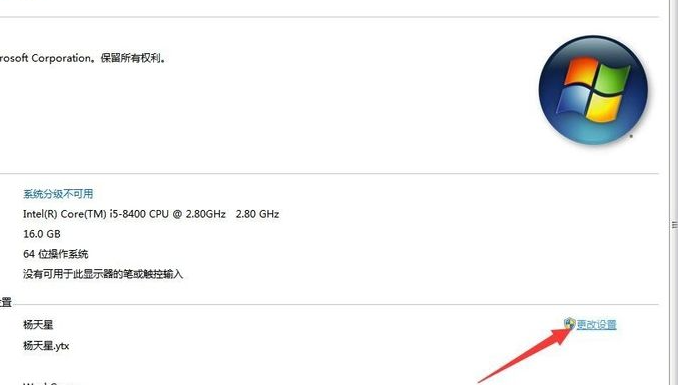
#3. Click [Change Settings] on the lower right to enter the main interface of win7 system property settings.
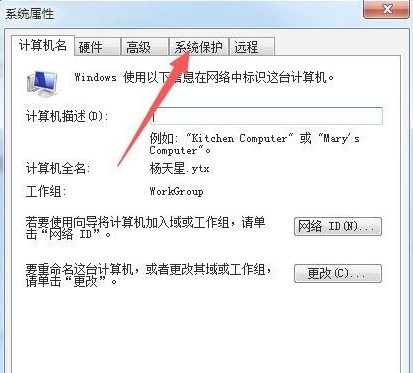
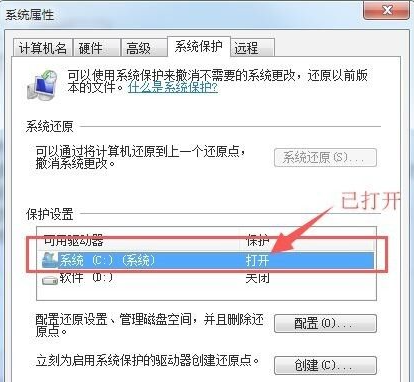
#4. Click [System Protection] in the upper tab to enter the main interface of win7 system property settings and system protection settings.
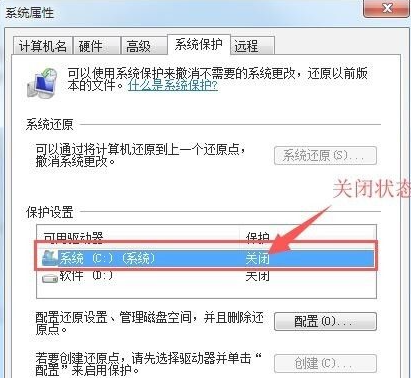
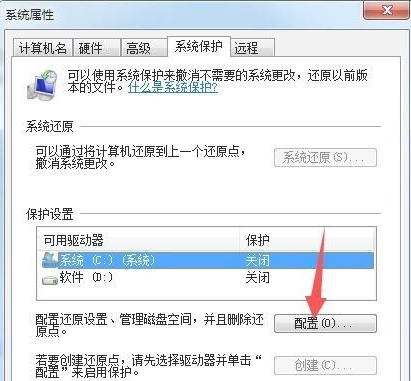
#5. In the protection settings column, click to select the system disk (generally the default is c drive). At this time, we find that its protection status is closed. At this time, click below [Configuration] to enter the main interface of the win7 system protection system.
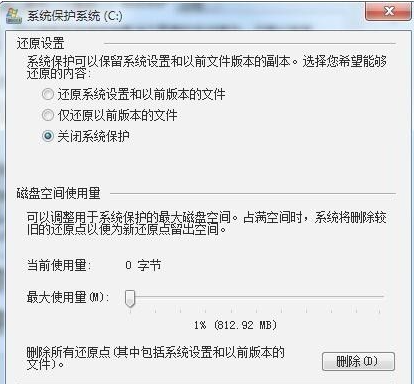
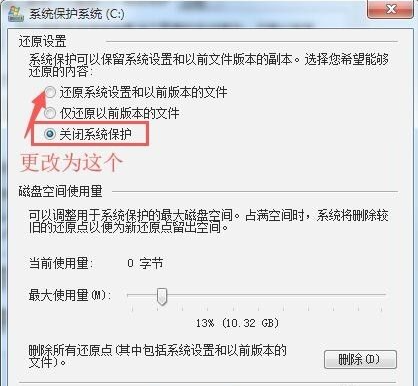
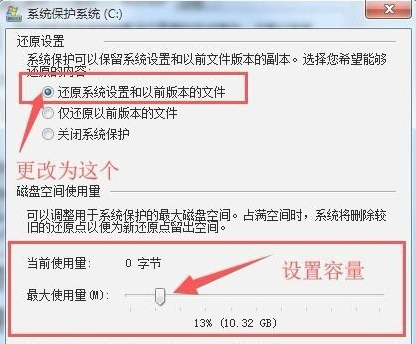
6. In the restore settings column, change [Turn off system protection] to [Restore system] Settings and files of previous versions], and set the disk space required for public system protection below. After the settings are completed, click the Apply and OK buttons in the lower right corner. This will return to the main interface of win7 system property settings system protection settings. This At that time, we found that the protection status of the system disk (generally the default is the c drive) has changed to the open state. At this time, the task of turning on the system protection of the win7 system has been completed.
The above is the method to turn on the system protection in the genuine win7 system. I hope this method will be helpful to everyone. helpful.
The above is the detailed content of How to turn on system protection in genuine win7 system. For more information, please follow other related articles on the PHP Chinese website!

