Home >Common Problem >What should I do if the network cable is plugged in but the network cannot be recognized?
What should I do if the network cable is plugged in but the network cannot be recognized?
- zbtOriginal
- 2023-07-05 15:47:5144437browse
The network cable is plugged in but it shows that the network cannot be recognized. There are three solutions: 1. Unplug the network cable and restart the router; 2. Press Win X, select Settings, click Network and Internet, select Ethernet and click To change the adapter options, click Local Connection to disable and then click again to enable; 3. Click Status in the Network and Internet interface, then select Network Reset in the pop-up interface, click Reset Now, and the computer will restart within 5 minutes to complete the reset. Just set it.

The operating environment of this tutorial: Windows 10 system, DELL G3 computer.
In modern society, whether it is a family or a business, the Internet has become an indispensable part of life and work. However, sometimes we may encounter a situation where even though our network cable is plugged into the computer, we cannot connect to the Internet, and an error message "Network not recognized" is displayed. This problem can be frustrating, but luckily we can solve it with some simple steps. Let’s take a look at it below.

1. Reconnect
When the user appears with the prompt “Unable to recognize the network” when using the computer, don’t rush to follow the network tutorial to repair it first. Unplug the network cable, restart the router, then restart the computer, and then plug in the network cable again. As shown below:
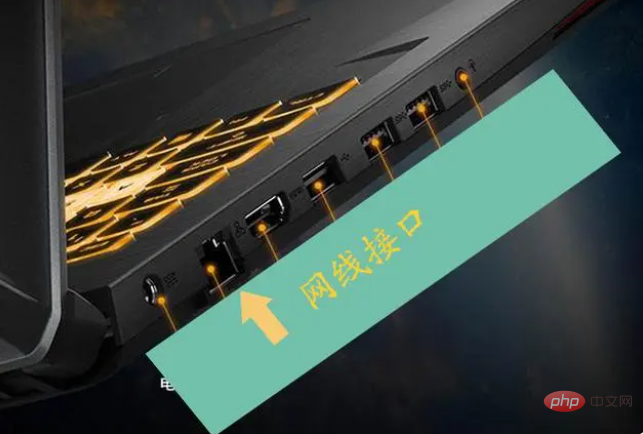
Sometimes it is not a problem with the network cable or device, but during the process of connecting and identifying the network, you will encounter some unknown errors, unplug the network cable, and then restart After the router and computer are restarted and the network cable is plugged in, they will return to normal.
2. Re-enable the device
If the problem still exists after trying the first method, you can press the "Win X" key combination on the keyboard to bring up the menu and select "Settings". As shown below:

#After entering the system "Settings" interface, select the "Network and Internet" option. As shown below: 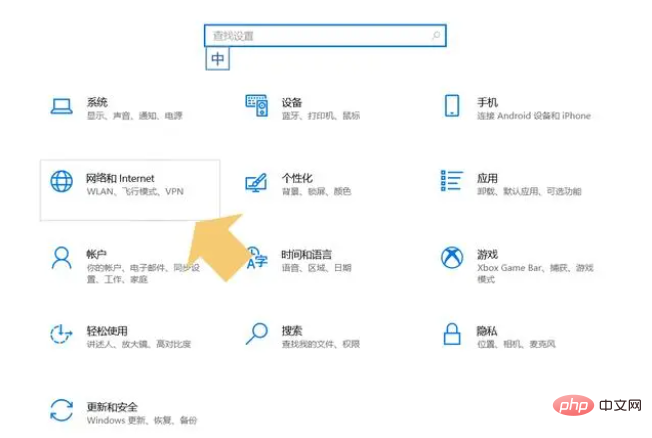
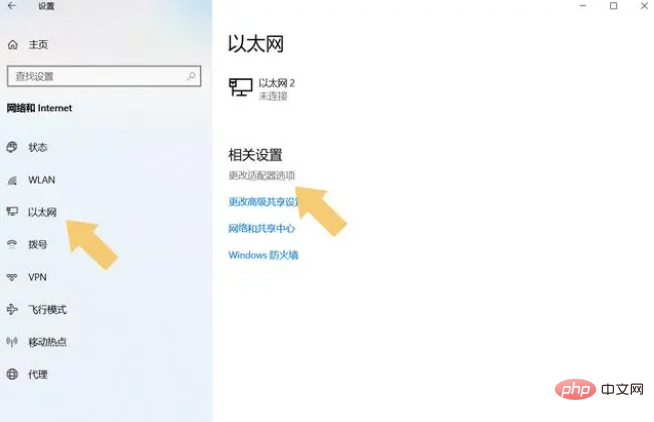
Click to enter the "Network and Internet" option, select "Ethernet" in the left menu bar, and then click "Change Adapter Options" in the pop-up interface. As shown below:
# After entering "Change Adapter Options", right-click "Local Area Connection" and select "Disable". As shown below:
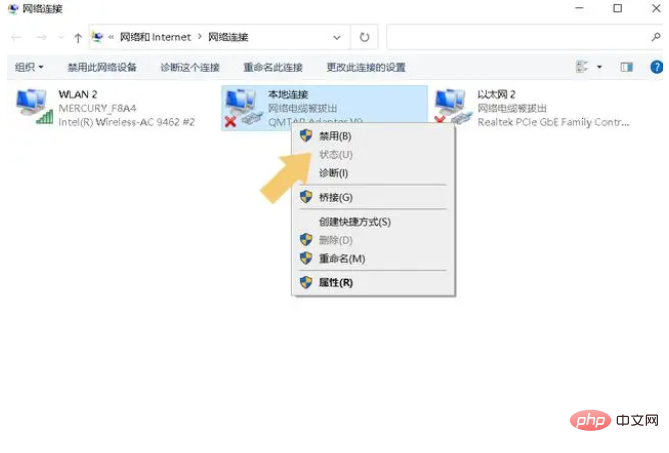
#After selecting "Disable", right-click the icon again and select "Enable". As shown below:
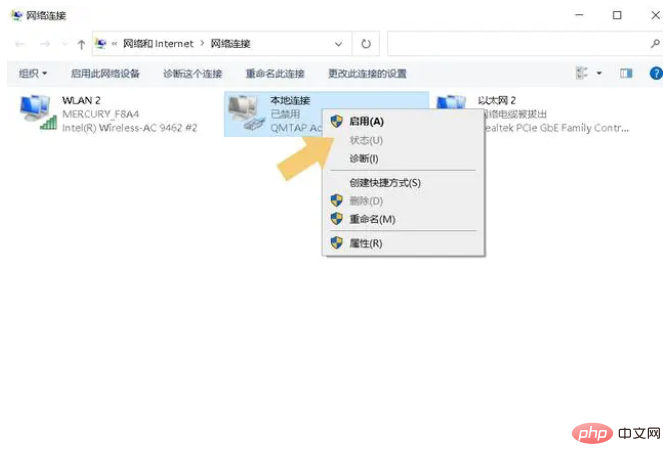
#After the device is activated, the user can connect to the Internet normally, and the "network not recognized" prompt will no longer appear.
3. Reset the network
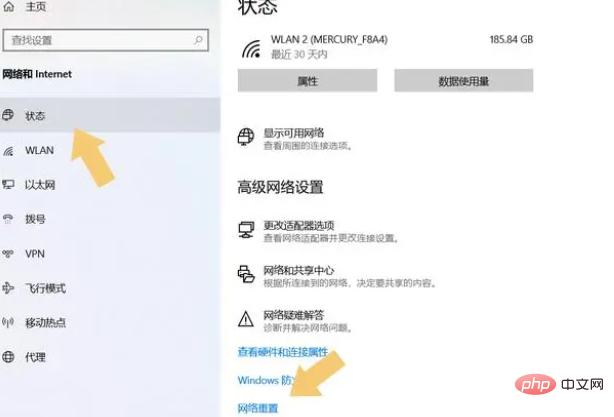
After reaching the second step, don’t rush to close the interface. If it still doesn’t work after disabling and enabling it, then click on the “Network and Internet” interface "Status" and then select "Network Reset" in the pop-up interface. As shown below:
#After selecting the "Network Reset" option, click "Reset Now". As shown below:
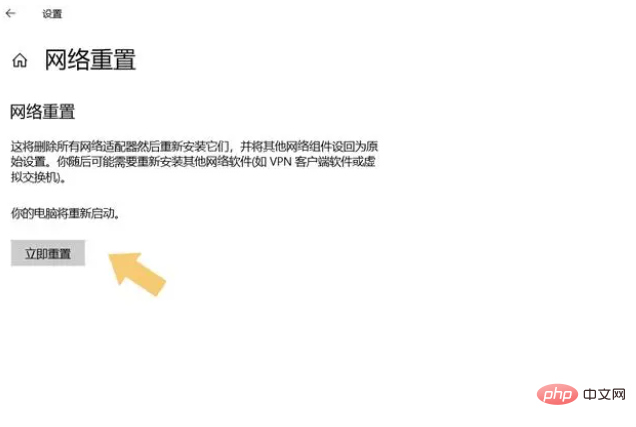
After clicking the "Reset Now" option, the computer will restart within 5 minutes and reset all network-related programs, drivers and devices. After the setup is completed, connect to the Internet again, and this prompt will not appear.
The above is the detailed content of What should I do if the network cable is plugged in but the network cannot be recognized?. For more information, please follow other related articles on the PHP Chinese website!

