Home >Common Problem >How to solve win11Hypervisor error
How to solve win11Hypervisor error
- 王林forward
- 2023-06-29 14:25:232349browse
How to solve win11Hypervisor error? I believe everyone has encountered their own computer problems, so how to solve win11 Hypervisor errors? In fact, this problem is not difficult. Many friends don’t know how to operate it. The editor has compiled the win11 Hypervisor solution below. If you are interested, follow the editor to take a look below!
 pc29yIOmUmeivr aAjuS5iOino WGsw=="title="How to solve win11Hypervisor error">
Win11Hypervisor solution
1. Check whether your CPU supports virtualization and Enable it BIOS
Open the Settings app and go to the System section.
Under Device Specifications, check the details that correspond to your processor.
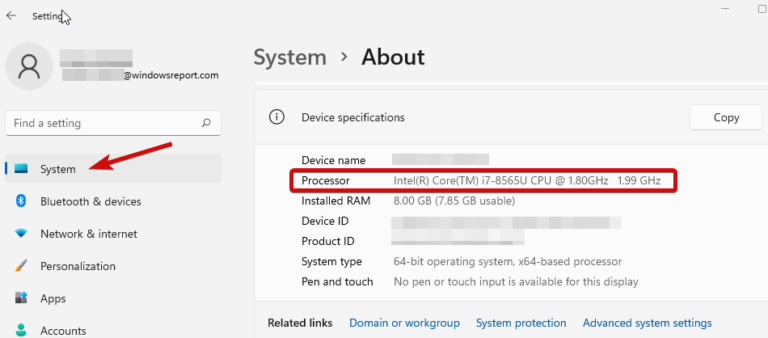
Next, visit the manufacturer's site and check if your CPU supports virtualization (using the exact details you got in the previous step). If so, you need Make sure virtualization is enabled in your BIOS.
To do this, access your BIOS (if you need help, here's how to enter the BIOS on a Windows PC).
Single Click Advanced Mode and go to the Advanced tab.
Select CPU Setup/Configuration and set Intel R Virtualization Technology (for Intel) or SVM Mode (for AMD) to Enabled.
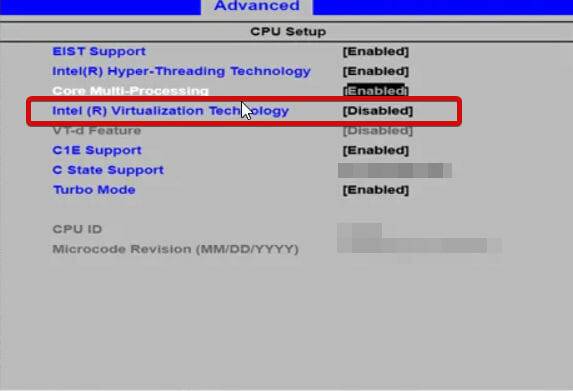 Make sure to save changes before exiting this screen.
2. Update your drivers
Missing or otherwise faulty drivers are associated with system errors And it's notorious. It's crucial to keep the version of Windows you're currently running in good condition, no matter which version it is.
Now, there are multiple ways to update your drivers in Windows 11, But we think there's nothing better than an automated tool that does the job for you. It's faster, more accurate, and can save you a lot of trouble.
Various errors are driver faults In this case, you may need to completely update or reinstall this specific component. Given that the process is not straightforward, we recommend using automated tools to implement this task. Here's how to do it:
Download and install DriverFix.
Launch the application.
Wait for the software to detect all faulty drivers.
You will now see all faulty drivers list, you just need to select the driver you want to fix.
Wait for DriverFix to download and install the latest driver.
Restart your PC for the changes to take effect.
 Driver Repair
Install and use DriverFix now to protect your Windows from any type of errors caused by corrupted drivers!
3. Restart the corresponding service
Press and hold the Windows key and type R to open the "Run" dialog box.
Enter services.msc and click Enter.
In the list, find Hyper-V Virtual Machine Management.
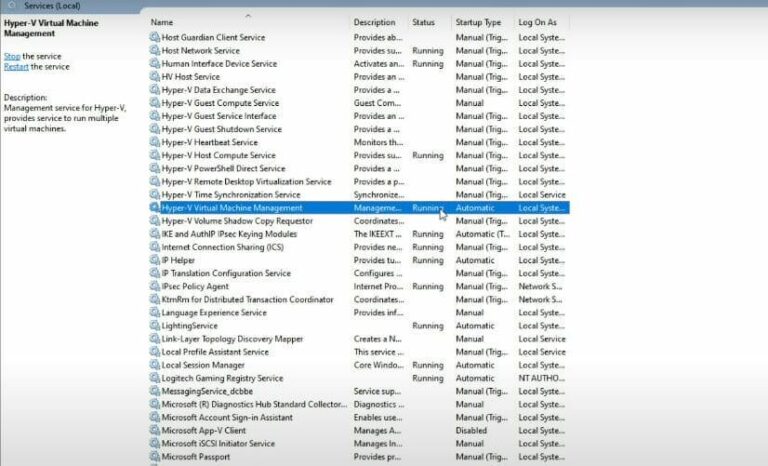 Right-click this entry and select Stop if it is running.
Finally, restart the service and check if it helps resolve Windows 11 Hypervisor errors.
4. Use the command prompt
Use administrative rights to open the command prompt.
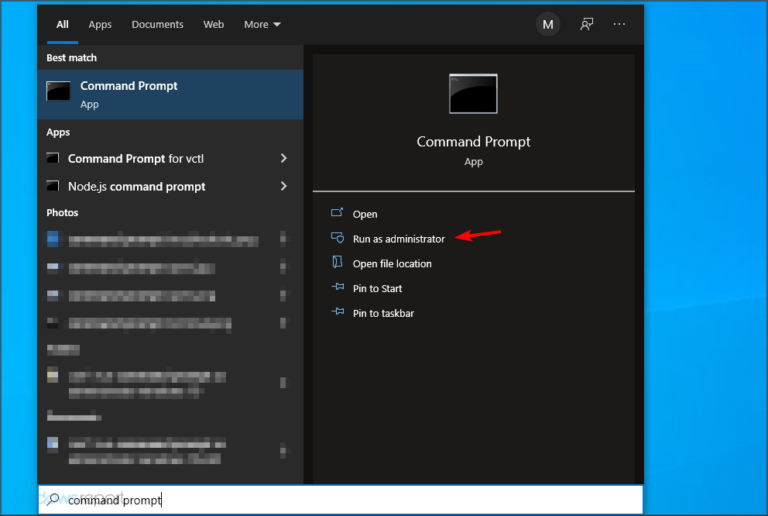 In the new window, type the following command and press Enter: bcdedit /set hypervisorlaunchtype auto
 Reboot and Check if it is working properly.
5. Other methods you can try
Reinstall Hyper-V Features from Windows Features
Install the latest Windows updates, or vice versa, if it appears after doing this Hypervisor error, uninstall the offending update (Here's how to easily uninstall updates in Windows 11)
Update your BIOS (If you need help, we've prepared a step-by-step guide to show you how to Entering and updating your BIOS in Windows 11 Previous status
The above is the entire content of [How to solve win11Hypervisor errors-win11Hypervisor solutions], more exciting tutorials are on this site!
The above is the detailed content of How to solve win11Hypervisor error. For more information, please follow other related articles on the PHP Chinese website!

