 Backend Development
 Python Tutorial
 Python server programming: developing GUI programs using PySide2
Python has become a very popular programming language, and many developers take advantage of Python's simplicity and flexibility to create a variety of applications. Among them, Python is also used to develop server-side applications, and PySide2 is one of the most important tools in this process.
PySide2 is a binding for the Python programming language for the Qt framework. This tool allows Python programmers to write programs that use GUI structures. Because PySide2 is a cross-platform tool that runs on all major operating systems, it is particularly suitable for developing server-side programs.
In this article, we will discuss how to develop GUI programs using PySide2 and Python server programming. We'll start with simple PySide2 applications, show how to add functionality and event handlers to them, and discuss how to create GUI programs with complex features such as UI controls and animations.
1. Install PySide2
First, we need to install PySide2. PySide2 runs on different operating systems, so install accordingly depending on your operating system.
On Linux, we can install PySide2 through pip using the following command:
pip install PySide2
On Windows systems, we can use the same command in the command prompt to install PySide2.
After the installation is complete, we can start writing our first PySide2 application.
2. Develop a simple PySide2 application
We will start with a very simple PySide2 application that only creates a window and a tab. In order to create this application, we need to import the PySide2.QtWidgets and sys modules:
import sys
from PySide2.QtWidgets import QApplication, QLabel, QWidget
Next, we need to create a QApplication and QWidget object. We will use QWidget objects to create our GUI:
app = QApplication(sys.argv)

widget = QWidget()
widget.setWindowTitle('My First PySide2 Application')
widget.setGeometry(300, 300, 250, 150)

label = QLabel('Hello World', widget)
label.move(100, 50)

widget.show()

sys.exit(app.exec_())
This code snippet will create a QWidget object and set its position and size. It will also create a label and add it to the QWidget object. Labels are created using the QLabel class. Finally, we use the show method to display the GUI and exit the application.
3. Add event handlers to the application
Now, we have created a simple PySide2 application, but it can't do anything yet. To make our application react to events, we need to add event handlers.
In PySide2, we can use slots to define event handlers. Slots are a method for receiving GUI events and handling them. In this example, we will create a new class that will inherit QWidget and define a slot method.
The code snippet below will create a button and add it to the QWidget object. This button will trigger the PushButtonClicked event. This event will be fired whenever the button is clicked. We will define a slot method in our application that will handle the PushButtonClicked event and display a message on the console:
import sys
from PySide2.QtCore import Slot
from PySide2.QtWidgets import QApplication, QPushButton, QWidget

class MyWidget(QWidget):

    def __init__(self):
        super().__init__()

        self.initUI()

    def initUI(self):

        button = QPushButton('Click me', self)
        button.setToolTip('Click this button')
        button.move(100, 70)

        button.clicked.connect(self.on_pushButton_clicked)

        self.setGeometry(300, 300, 250, 150)
        self.setWindowTitle('My Second PySide2 Application')
        self.show()

    @Slot()
    def on_pushButton_clicked(self):
        print('Button clicked.')
Now when we click the button, the program will display it on the console "Button clicked" message. Note that the @Slot() decorator is used in front of the method. This tells the program that this method is a PySide2 slot to be called.
4. Create a GUI program with UI controls and animations
Now we can create a simple PySide2 application with buttons and event handlers. Next, let's add more controls and animations to the program.
In this example, we will create a new class that will inherit the QDialog class. QDialog is a class in PySide2 used to display dialog boxes. In this class, we will create a new tag for the sunflower to track the light source, and use PySide2's animation framework to create a small sun. We will also add a button to control the movement of the sun.
import sys
from PySide2.QtCore import QPropertyAnimation, QRect
from PySide2.QtGui import QPainter, QColor
from PySide2.QtWidgets import QApplication, QDialog, QLabel, QPushButton
from PySide2 import QtGui

class Sun(QWidget):
    def __init__(self):
        super().__init__()

        self.initUI()

    def initUI(self):
        self.setFixedSize(100, 100)
        self.color = QColor(255, 255, 0)

    def paintEvent(self, event):
        painter = QPainter(self)
        painter.setBrush(QtGui.QBrush(self.color))
        painter.drawEllipse(0, 0, self.width(), self.height())

class FollowSunDialog(QDialog):
    def __init__(self):
        super().__init__()

        self.initUI()

    def initUI(self):
        self.setWindowTitle('Follow the Sun')
        self.setGeometry(100, 100, 400, 400)

        sun_label = QLabel(self)
        sun_label.setFixedSize(50, 50)
        pixmap = QtGui.QPixmap('sun.png')
        sun_label.setPixmap(pixmap)

        self.sun = Sun()
        self.sun.move(50, 150)

        self.button = QPushButton('Start', self)
        self.button.move(50, 300)
        self.button.clicked.connect(self.onClick)

    def onClick(self):
        animator = QPropertyAnimation(self.sun, b'geometry')
        animator.setDuration(3000)
        animator.setStartValue(QRect(50, 150, 100, 100))
        animator.setEndValue(QRect(200, 50, 50, 50))

        animator.start()

if __name__ == '__main__':
    app = QApplication(sys.argv)

    dialog = FollowSunDialog()
    dialog.show()

    sys.exit(app.exec_())
In this code snippet, we define two classes, the Sun class and the FollowSunDialog class. The Sun class is a subclass of QWidget and is used to draw images of the sun. The FollowSunDialog class is a subclass of QDialog and is used to display dialog boxes and control the movement of the sun.
We also added a sun image for drawing the small sun, which is a sun.png file stored in the same directory as the program file. We created a QPushButton that when pressed will start the animation of the sun widget moving towards the upper right corner.
The animation is created using the PySide2 animation framework. When the button is pressed, we define a QPropertyAnimation object that uses the startValue and endValue properties to define the starting and ending positions of the sun widget. It also defines the timing of the animation.
Conclusion:
This article introduces the combination of PySide2 and Python server programming. We created a simple PySide2 application, added event handlers to the application, and created a UI GUI program for controls and animations. PySide2 is a very powerful tool for creating Python applications with GUI structure. For server-side developers, PySide2 can reduce development time and increase application interactivity and ease of use.
The above is the detailed content of Python server programming: developing GUI programs using PySide2. For more information, please follow other related articles on the PHP Chinese website!
 如何在 RHEL 9 上配置 DHCP 服务器Jun 08, 2023 pm 07:02 PM
DHCP是“动态主机配置协议DynamicHostConfigurationProtocol”的首字母缩写词,它是一种网络协议,可自动为计算机网络中的客户端系统分配IP地址。它从DHCP池或在其配置中指定的IP地址范围分配客户端。虽然你可以手动为客户端系统分配静态IP,但DHCP服务器简化了这一过程,并为网络上的客户端系统动态分配IP地址。在本文中,我们将演示如何在RHEL9/RockyLinux9上安装和配置DHCP服务器。先决条件预装RHEL9或RockyLinux9具有sudo管理权限的普
 在容器中怎么使用nginx搭建上传下载的文件服务器May 15, 2023 pm 11:49 PM
一、安装nginx容器为了让nginx支持文件上传,需要下载并运行带有nginx-upload-module模块的容器:sudopodmanpulldocker.io/dimka2014/nginx-upload-with-progress-modules:latestsudopodman-d--namenginx-p83:80docker.io/dimka2014/nginx-upload-with-progress-modules该容器同时带有nginx-upload-module模块和ng
 服务器怎么使用Nginx部署Springboot项目May 14, 2023 pm 01:55 PM
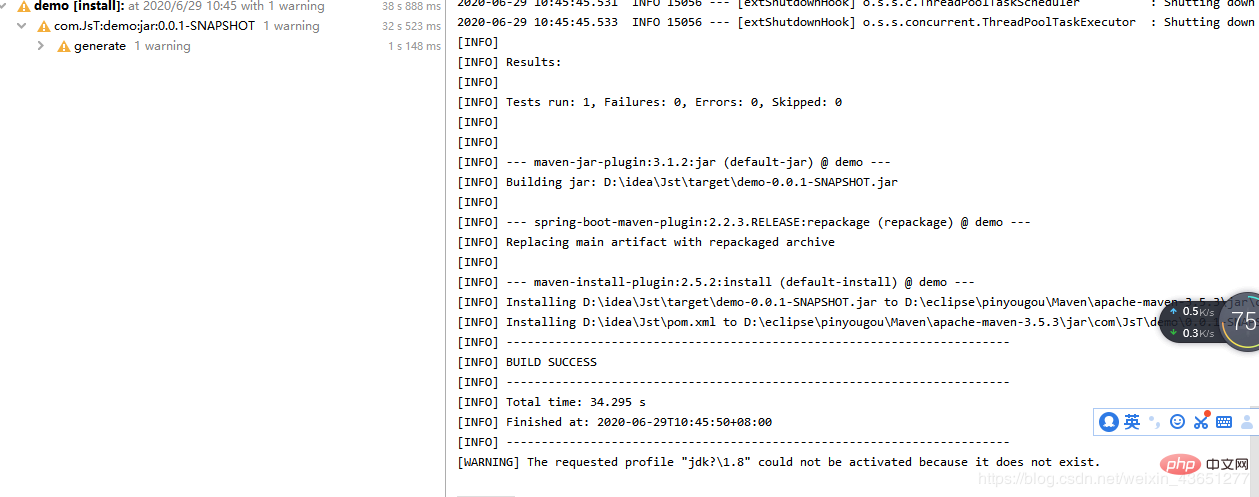
1,将java项目打成jar包这里我用到的是maven工具这里有两个项目,打包完成后一个为demo.jar,另一个为jst.jar2.准备工具1.服务器2.域名(注:经过备案)3.xshell用于连接服务器4.winscp(注:视图工具,用于传输jar)3.将jar包传入服务器直接拖动即可3.使用xshell运行jar包注:(服务器的java环境以及maven环境,各位请自行配置,这里不做描述。)cd到jar包路径下执行:nohupjava-jardemo.jar>temp.txt&
 vue3项目打包发布到服务器后访问页面显示空白怎么解决May 17, 2023 am 08:19 AM
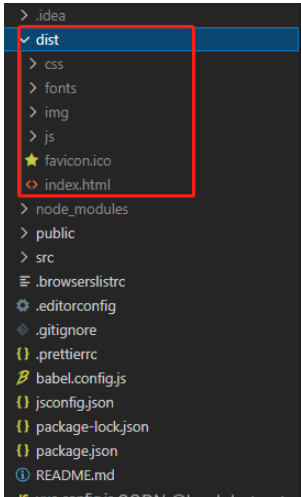
vue3项目打包发布到服务器后访问页面显示空白1、处理vue.config.js文件中的publicPath处理如下:const{defineConfig}=require('@vue/cli-service')module.exports=defineConfig({publicPath:process.env.NODE_ENV==='production'?'./':'/&
 python中怎么使用TCP实现对话客户端和服务器May 17, 2023 pm 03:40 PM
TCP客户端一个使用TCP协议实现可连续对话的客户端示例代码:importsocket#客户端配置HOST='localhost'PORT=12345#创建TCP套接字并连接服务器client_socket=socket.socket(socket.AF_INET,socket.SOCK_STREAM)client_socket.connect((HOST,PORT))whileTrue:#获取用户输入message=input("请输入要发送的消息:&
 Linux怎么在两个服务器直接传文件May 14, 2023 am 09:46 AM
scp是securecopy的简写,是linux系统下基于ssh登陆进行安全的远程文件拷贝命令。scp是加密的,rcp是不加密的,scp是rcp的加强版。因为scp传输是加密的,可能会稍微影响一下速度。另外,scp还非常不占资源,不会提高多少系统负荷,在这一点上,rsync就远远不及它了。虽然rsync比scp会快一点,但当小文件众多的情况下,rsync会导致硬盘I/O非常高,而scp基本不影响系统正常使用。场景:假设我现在有两台服务器(这里的公网ip和内网ip相互传都可以,当然用内网ip相互传
 如何使用psutil模块获取服务器的CPU、内存和磁盘使用率?May 07, 2023 pm 10:28 PM
psutil是一个跨平台的Python库,它允许你获取有关系统进程和系统资源使用情况的信息。它支持Windows、Linux、OSX、FreeBSD、OpenBSD和NetBSD等操作系统,并提供了一些非常有用的功能,如:获取系统CPU使用率、内存使用率、磁盘使用率等信息。获取进程列表、进程状态、进程CPU使用率、进程内存使用率、进程IO信息等。杀死进程、发送信号给进程、挂起进程、恢复进程等操作。使用psutil,可以很方便地监控系统的运行状况,诊断问题和优化性能。以下是一个简单的示例,演示如何
 怎么在同一台服务器上安装多个MySQLMay 29, 2023 pm 12:10 PM
一、安装前的准备工作在进行MySQL多实例的安装前,需要进行以下准备工作:准备多个MySQL的安装包,可以从MySQL官网下载适合自己环境的版本进行下载:https://dev.mysql.com/downloads/准备多个MySQL数据目录,可以通过创建不同的目录来支持不同的MySQL实例,例如:/data/mysql1、/data/mysql2等。针对每个MySQL实例,配置一个独立的MySQL用户,该用户拥有对应的MySQL安装路径和数据目录的权限。二、基于二进制包安装多个MySQL实例


Hot AI Tools

Undresser.AI Undress
AI-powered app for creating realistic nude photos

AI Clothes Remover
Online AI tool for removing clothes from photos.

Undress AI Tool
Undress images for free

Clothoff.io
AI clothes remover

AI Hentai Generator
Generate AI Hentai for free.

Hot Article

Hot Tools

Zend Studio 13.0.1
Powerful PHP integrated development environment

SublimeText3 English version
Recommended: Win version, supports code prompts!

Dreamweaver Mac version
Visual web development tools

ZendStudio 13.5.1 Mac
Powerful PHP integrated development environment

Dreamweaver CS6
Visual web development tools


