1. Build database and tables
1. Database demo1 puts a user table
SET FOREIGN_KEY_CHECKS=0;
-- ----------------------------
-- Table structure for user
-- ----------------------------
DROP TABLE IF EXISTS `user`;
CREATE TABLE `user` (
`id` int(11) NOT NULL,
`name` varchar(255) DEFAULT NULL,
PRIMARY KEY (`id`)
) ENGINE=InnoDB DEFAULT CHARSET=utf8;

-- ----------------------------
-- Records of user
-- ----------------------------
INSERT INTO `user` VALUES ('1', 'aa');
INSERT INTO `user` VALUES ('2', 'bb');
2. Database demo2 Put a role table
SET FOREIGN_KEY_CHECKS=0;
-- ----------------------------
-- Table structure for role
-- ----------------------------
DROP TABLE IF EXISTS `role`;
CREATE TABLE `role` (
`id` int(11) NOT NULL,
`name` varchar(255) DEFAULT NULL,
PRIMARY KEY (`id`)
) ENGINE=InnoDB DEFAULT CHARSET=utf8;
-- ----------------------------
-- Records of role
-- ----------------------------
INSERT INTO `role` VALUES ('1', 'CC');
INSERT INTO `role` VALUES ('2', 'DD');
2. Pom.xml introduces the package
<dependency>
<groupid>org.springframework.boot</groupid>
<artifactid>spring-boot-starter-web</artifactid>
</dependency>
<dependency>
<groupid>org.springframework.boot</groupid>
<artifactid>spring-boot-starter-test</artifactid>
<scope>test</scope>
</dependency>
<dependency>
<groupid>org.springframework.boot</groupid>
<artifactid>spring-boot-starter-thymeleaf</artifactid>
</dependency>
<dependency>
<groupid>mysql</groupid>
<artifactid>mysql-connector-java</artifactid>
<scope>runtime</scope>
</dependency>
<dependency>
<groupid>mysql</groupid>
<artifactid>mysql-connector-java</artifactid>
</dependency>
<dependency>
<groupid>org.springframework.boot</groupid>
<artifactid>spring-boot-starter-jdbc</artifactid>
</dependency>
<dependency>
<groupid>org.mybatis.spring.boot</groupid>
<artifactid>mybatis-spring-boot-starter</artifactid>
<version>2.0.1</version>
</dependency>
<!-- aop -->
<dependency>
<groupid>org.aspectj</groupid>
<artifactid>aspectjweaver</artifactid>
</dependency>
<!-- alibaba druid-->
<dependency>
<groupid>com.alibaba</groupid>
<artifactid>druid-spring-boot-starter</artifactid>
<version>1.1.10</version>
</dependency>
<!-- dynamic-->
<dependency>
<groupid>com.typesafe.dynamicdatasource</groupid>
<artifactid>dynamic-data-source_2.11</artifactid>
</dependency>
3. Use the generator plug-in to generate Entity classes of user and role tables, mapper.java, mapper.xml
User.java
Role.java
UserMapper.java
RoleMapper.java
UserMapper.xml
RoleMapper.xml
4. Configure application.yml
server:
port: 8088
mybatis:
mapper-locations: classpath:mapper/*.xml
spring:
datasource:
db1:
url: jdbc:mysql://localhost:3306/demo1?useUnicode=true&characterEncoding=utf8&serverTimezone=GMT
username: root
password: root
type: com.alibaba.druid.pool.DruidDataSource
#驱动包
driver-class-name: com.mysql.cj.jdbc.Driver
#初始连接数
initial-size: 5
#最小空闲数
min-idle: 5
#最大活动数
max-active: 20
#等待超时时间
max-wait: 60000
#配置间隔多久才进行一次检测,检测需要关闭的空闲连接,单位是毫秒
time-between-eviction-runs-millis: 60000
# 配置一个连接在池中最小生存的时间,单位是毫秒
min-evictable-idle-time-millis: 300000
#验证数据库连接的查询语句,MYSQL是select 1
validation-query: SELECT 1 FROM DUAL
#空闲时测试,testOnBorrow和testOnReturn在生产环境一般是不开启的,主要是性能考虑。失效连接主要通过testWhileIdle保证
test-while-idle: true
test-on-borrow: false
test-on-return: false
#打开PSCache,并指定每个链接上的PSCache大小
pool-prepared-statements: true
max-pool-prepared-statement-per-connection-size: 20
#配置监控统计拦截的filters,去掉后监控界面sql无法统计,‘wall'用于防火墙,此处是filter修改的地方
filters: stat,wall
#通过connectproperties属性来打开mergesql功能:慢sql记录
connection-properties: druid.stat.mergeSql=true;druid.stat.slowSqlMillis=5000
#合并多个DruidDataSource
useGlobalDataSourceStat: true
db2:
url: jdbc:mysql://localhost:3306/demo2?useUnicode=true&characterEncoding=utf8&serverTimezone=GMT
username: root
password: root
type: com.alibaba.druid.pool.DruidDataSource
#驱动包
driver-class-name: com.mysql.cj.jdbc.Driver
#初始连接数
initial-size: 5
#最小空闲数
min-idle: 5
#最大活动数
max-active: 20
#等待超时时间
max-wait: 60000
#配置间隔多久才进行一次检测,检测需要关闭的空闲连接,单位是毫秒
time-between-eviction-runs-millis: 60000
# 配置一个连接在池中最小生存的时间,单位是毫秒
min-evictable-idle-time-millis: 300000
#验证数据库连接的查询语句,MYSQL是select 1
validation-query: SELECT 1 FROM DUAL
#空闲时测试,testOnBorrow和testOnReturn在生产环境一般是不开启的,主要是性能考虑。失效连接主要通过testWhileIdle保证
test-while-idle: true
test-on-borrow: false
test-on-return: false
#打开PSCache,并指定每个链接上的PSCache大小
pool-prepared-statements: true
max-pool-prepared-statement-per-connection-size: 20
#配置监控统计拦截的filters,去掉后监控界面sql无法统计,‘wall'用于防火墙,此处是filter修改的地方
filters: stat,wall
#通过connectproperties属性来打开mergesql功能:慢sql记录
connection-properties: druid.stat.mergeSql=true;druid.stat.slowSqlMillis=5000
#合并多个DruidDataSource
useGlobalDataSourceStat: true
5. Start class scanning mapper.java file
@SpringBootApplication
@MapperScan("com.example.demo.dao")
public class DemoApplication {
public static void main(String[] args) {
SpringApplication.run(DemoApplication.class, args);
}
}
6. Define DataSourceConfig, import the configuration in application.yml into DataSource, and inject it into the bean
@Configuration
public class DataSourceConfig {
//从配置文件配置数据源
@Primary
@Bean(name="datasource1")
@ConfigurationProperties("spring.datasource.db1")
public DataSource dataSource1(){
return new DruidDataSource();
}
//从配置文件配置数据源
@Bean(name="datasource2")
@ConfigurationProperties("spring.datasource.db2")
public DataSource dataSource2(){
return new DruidDataSource();
}
//动态数据源 进行数据源切换
@Bean(name="dynamicDataSource")
public DataSource dynamicDataSource(){
DynamicDataSource dynamicDatasource=new DynamicDataSource();
//设置默认数据源
dynamicDatasource.setDefaultTargetDataSource(dataSource1());
//配置多数据源
Map<object> dsMap=new HashMap();
dsMap.put("datasource1",dataSource1());
dsMap.put("datasource2",dataSource2());
//将多数据源放到数据源池中
dynamicDatasource.setTargetDataSources(dsMap);
return dynamicDatasource;
}
}</object>
7. Define the dynamic data source switching class DynamicDataSourceContextHolder
public class DynamicDataSourceContextHolder {
private static final ThreadLocal<string> contextHolder=new ThreadLocal();
//设置数据源名称
public static void setDB(String dbType){
contextHolder.set(dbType);
}
//获取数据源名称
public static String getDB(){
return contextHolder.get();
}
//清除数据源名
public static void clearDB(){
contextHolder.remove();
}
}</string>
8. Define the dynamic data source class DynamicDataSource
public class DynamicDataSource extends AbstractRoutingDataSource {
@Override
protected Object determineCurrentLookupKey() {
return DynamicDataSourceContextHolder.getDB();
}
}
9. Define the mybatis configuration class and put DynamicDataSource into SqlSessionFactoryBean
@EnableTransactionManagement
@Configuration
public class MyBatisConfig {
@Resource(name = "dynamicDataSource")
private DataSource dynamicDataSource;
@Bean
public SqlSessionFactory sqlSessionFactory() throws Exception {
SqlSessionFactoryBean sqlSessionFactoryBean = new SqlSessionFactoryBean();
sqlSessionFactoryBean.setDataSource(dynamicDataSource);//将动态数据源bean配置到sqlsessionfactory
sqlSessionFactoryBean.setMapperLocations(new PathMatchingResourcePatternResolver().getResources("classpath:mapper/*.xml"));
return sqlSessionFactoryBean.getObject();
}
@Bean
public PlatformTransactionManager platformTransactionManager() {
return new DataSourceTransactionManager(dynamicDataSource);
}
}
10. Define for Switch the annotation TargetDataSource of the data source
@Target({ElementType.METHOD,ElementType.TYPE})
@Retention(RetentionPolicy.RUNTIME)
@Documented
public @interface TargetDataSource {
String value() default "datasource1";
}
11. Define the aspect DynamicDataSourceAspect, which is used to intercept the annotation and perform the data source switching function
@Aspect
@Component
public class DynamicDataSourceAspect {
@Before("@annotation(targetDataSource)")
public void beforeSwitchDS(JoinPoint point,TargetDataSource targetDataSource){
DynamicDataSourceContextHolder.setDB(targetDataSource.value());
}
@After("@annotation(targetDataSource)")
public void afterSwitchDS(JoinPoint point,TargetDataSource targetDataSource){
DynamicDataSourceContextHolder.clearDB();
}
}
12. Test class Test
@RestController
public class Test {
@Autowired
private RoleMapper roleMapper;
@Autowired
private UserMapper userMapper;
//未使用TargetDataSource注解,则使用默认数据源,即datasource1
@RequestMapping("/ds1")
public String selectDataSource1(){
return userMapper.selectByPrimaryKey(1).toString();
}
//使用了注解,则数据源为注解中指定的datasource2
@RequestMapping("/ds2")
@TargetDataSource("datasource2")
public String selectDataSource2(){
return roleMapper.selectByPrimaryKey(1).toString();
}
}
Test
1. Enter
http://localhost:8088/ds1
Return
↓

##2. Enter
http://localhost:8088/ds2
↓

The above is the detailed content of How to use mybatis+druid to configure dynamic data sources in springboot. For more information, please follow other related articles on the PHP Chinese website!
 怎么使用SpringBoot+Canal实现数据库实时监控May 10, 2023 pm 06:25 PM
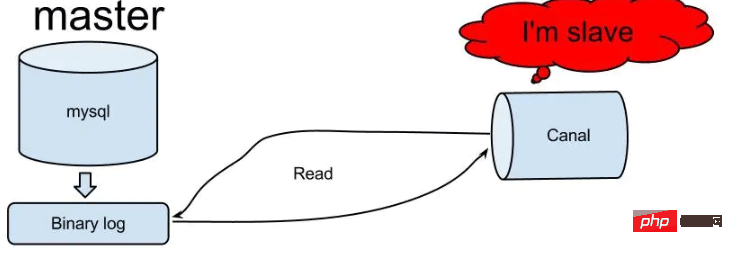
Canal工作原理Canal模拟MySQLslave的交互协议,伪装自己为MySQLslave,向MySQLmaster发送dump协议MySQLmaster收到dump请求,开始推送binarylog给slave(也就是Canal)Canal解析binarylog对象(原始为byte流)MySQL打开binlog模式在MySQL配置文件my.cnf设置如下信息:[mysqld]#打开binloglog-bin=mysql-bin#选择ROW(行)模式binlog-format=ROW#配置My
 Spring Boot怎么使用SSE方式向前端推送数据May 10, 2023 pm 05:31 PM
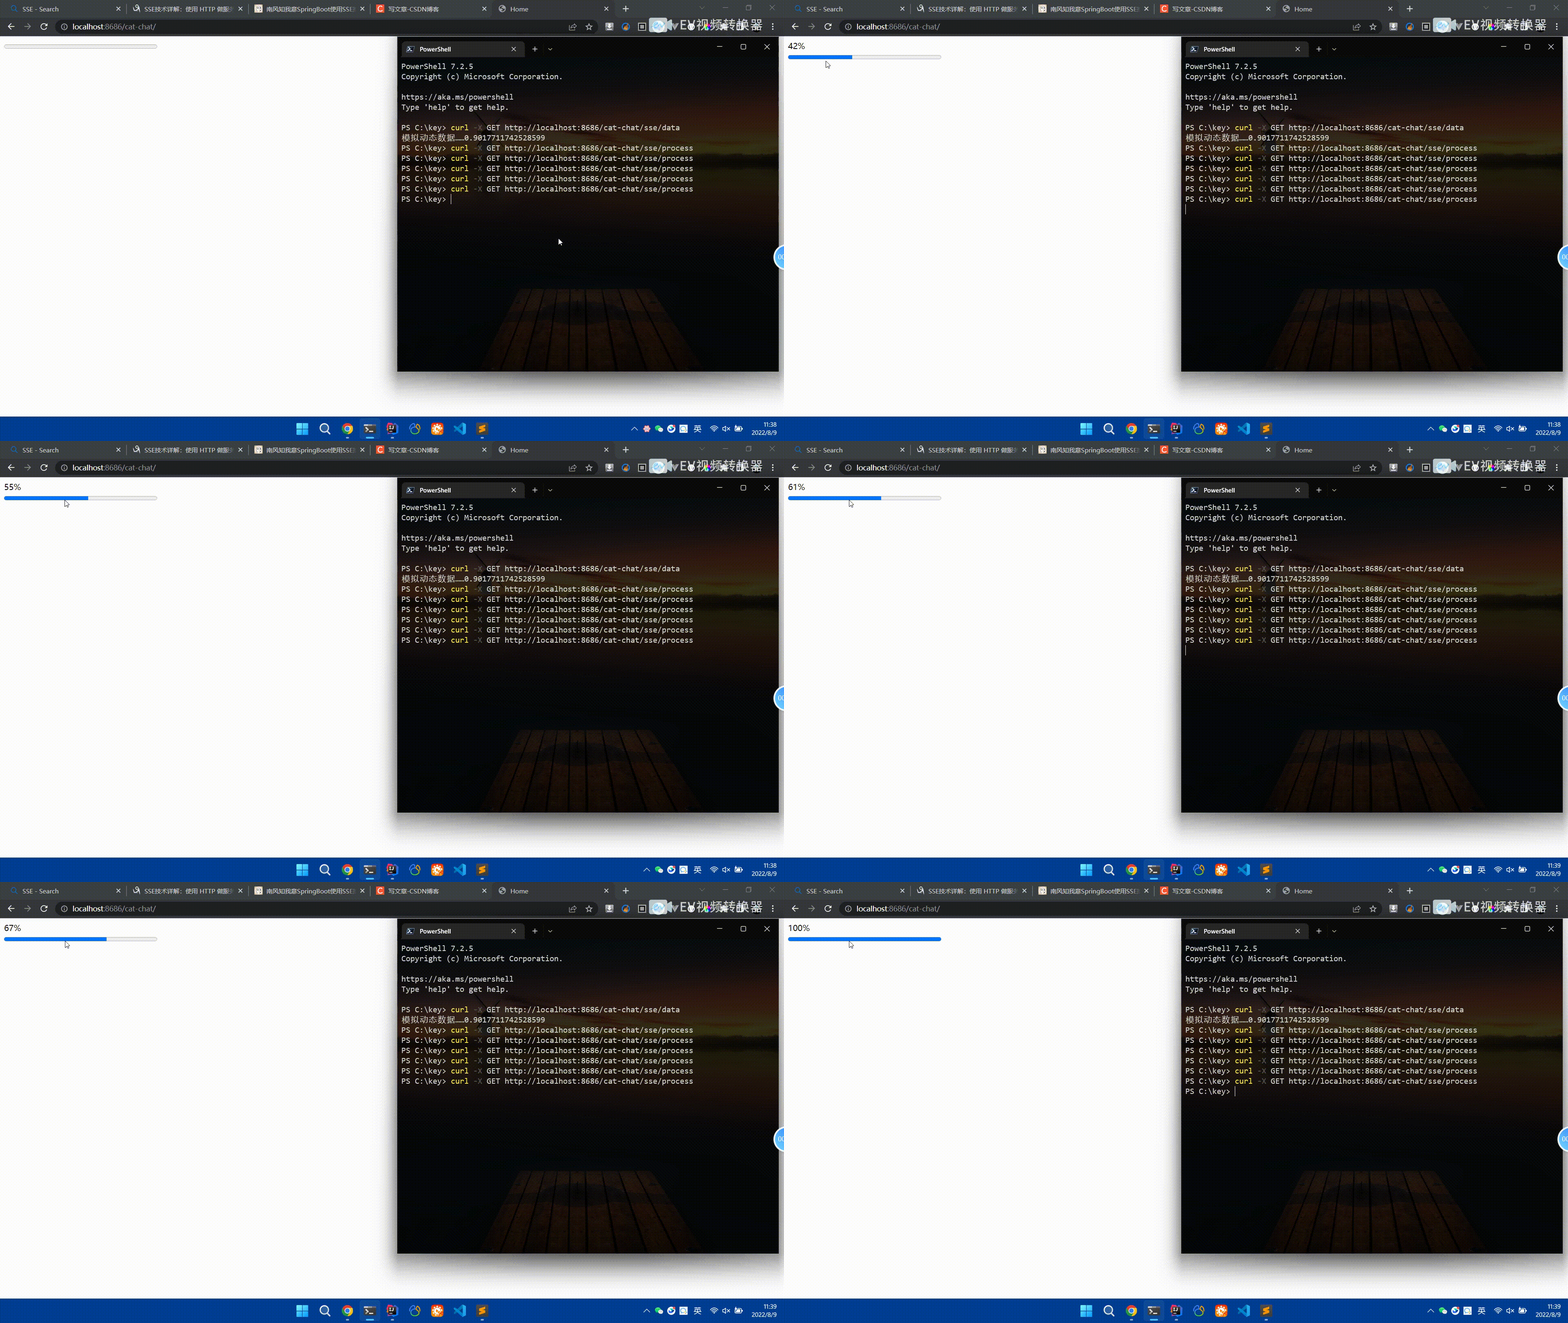
前言SSE简单的来说就是服务器主动向前端推送数据的一种技术,它是单向的,也就是说前端是不能向服务器发送数据的。SSE适用于消息推送,监控等只需要服务器推送数据的场景中,下面是使用SpringBoot来实现一个简单的模拟向前端推动进度数据,前端页面接受后展示进度条。服务端在SpringBoot中使用时需要注意,最好使用SpringWeb提供的SseEmitter这个类来进行操作,我在刚开始时使用网上说的将Content-Type设置为text-stream这种方式发现每次前端每次都会重新创建接。最
 SpringBoot怎么实现二维码扫码登录May 10, 2023 pm 08:25 PM
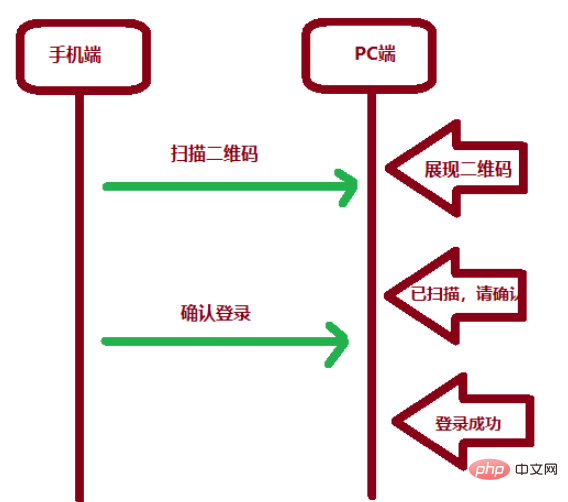
一、手机扫二维码登录的原理二维码扫码登录是一种基于OAuth3.0协议的授权登录方式。在这种方式下,应用程序不需要获取用户的用户名和密码,只需要获取用户的授权即可。二维码扫码登录主要有以下几个步骤:应用程序生成一个二维码,并将该二维码展示给用户。用户使用扫码工具扫描该二维码,并在授权页面中授权。用户授权后,应用程序会获取一个授权码。应用程序使用该授权码向授权服务器请求访问令牌。授权服务器返回一个访问令牌给应用程序。应用程序使用该访问令牌访问资源服务器。通过以上步骤,二维码扫码登录可以实现用户的快
 SpringBoot/Spring AOP默认动态代理方式是什么May 10, 2023 pm 03:52 PM
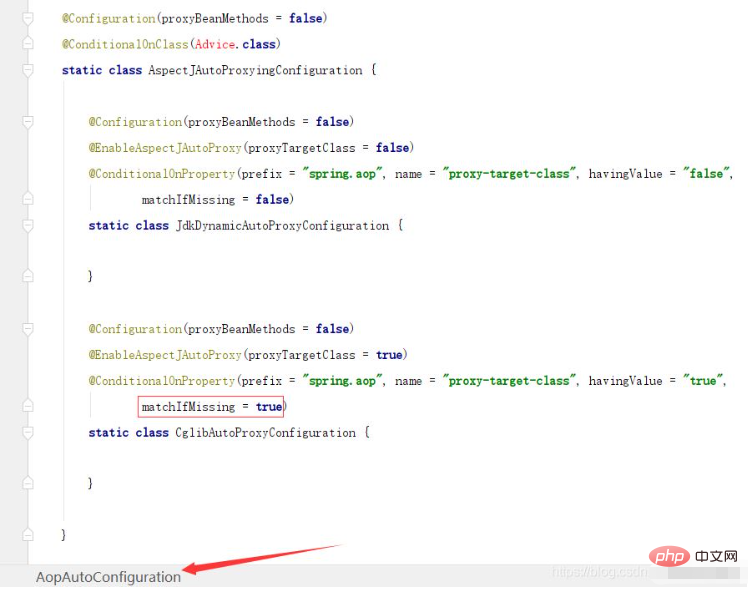
1.springboot2.x及以上版本在SpringBoot2.xAOP中会默认使用Cglib来实现,但是Spring5中默认还是使用jdk动态代理。SpringAOP默认使用JDK动态代理,如果对象没有实现接口,则使用CGLIB代理。当然,也可以强制使用CGLIB代理。在SpringBoot中,通过AopAutoConfiguration来自动装配AOP.2.Springboot1.xSpringboot1.xAOP默认还是使用JDK动态代理的3.SpringBoot2.x为何默认使用Cgl
 spring boot怎么对敏感信息进行加解密May 10, 2023 pm 02:46 PM
我们使用jasypt最新版本对敏感信息进行加解密。1.在项目pom文件中加入如下依赖:com.github.ulisesbocchiojasypt-spring-boot-starter3.0.32.创建加解密公用类:packagecom.myproject.common.utils;importorg.jasypt.encryption.pbe.PooledPBEStringEncryptor;importorg.jasypt.encryption.pbe.config.SimpleStrin
 使用Java SpringBoot集成POI实现Word文档导出Apr 21, 2023 pm 12:19 PM
知识准备需要理解ApachePOI遵循的标准(OfficeOpenXML(OOXML)标准和微软的OLE2复合文档格式(OLE2)),这将对应着API的依赖包。什么是POIApachePOI是用Java编写的免费开源的跨平台的JavaAPI,ApachePOI提供API给Java程序对MicrosoftOffice格式档案读和写的功能。POI为“PoorObfuscationImplementation”的首字母缩写,意为“简洁版的模糊实现”。ApachePOI是创建和维护操作各种符合Offic
 springboot怎么整合shiro实现多验证登录功能May 10, 2023 pm 04:19 PM
1.首先新建一个shiroConfigshiro的配置类,代码如下:@ConfigurationpublicclassSpringShiroConfig{/***@paramrealms这儿使用接口集合是为了实现多验证登录时使用的*@return*/@BeanpublicSecurityManagersecurityManager(Collectionrealms){DefaultWebSecurityManagersManager=newDefaultWebSecurityManager();
 SpringBoot项目打包发布到外部tomcat遇到的问题怎么解决May 10, 2023 pm 05:49 PM
先说遇到问题的情景:初次尝试使用springboot框架写了个小web项目,在IntellijIDEA中能正常启动运行。使用maven运行install,生成war包,发布到本机的tomcat下,出现异常,主要的异常信息是.......LifeCycleException。经各种搜索,找到答案。springboot因为内嵌tomcat容器,所以可以通过打包为jar包的方法将项目发布,但是如何将springboot项目打包成可发布到tomcat中的war包项目呢?1.既然需要打包成war包项目,首


Hot AI Tools

Undresser.AI Undress
AI-powered app for creating realistic nude photos

AI Clothes Remover
Online AI tool for removing clothes from photos.

Undress AI Tool
Undress images for free

Clothoff.io
AI clothes remover

AI Hentai Generator
Generate AI Hentai for free.

Hot Article

Hot Tools

EditPlus Chinese cracked version
Small size, syntax highlighting, does not support code prompt function

VSCode Windows 64-bit Download
A free and powerful IDE editor launched by Microsoft

ZendStudio 13.5.1 Mac
Powerful PHP integrated development environment

MantisBT
Mantis is an easy-to-deploy web-based defect tracking tool designed to aid in product defect tracking. It requires PHP, MySQL and a web server. Check out our demo and hosting services.

SublimeText3 Chinese version
Chinese version, very easy to use


