
Home >Java >javaTutorial >How to use WebSocket to implement point-to-point messaging in SpringBoot
How to use WebSocket to implement point-to-point messaging in SpringBoot

- 王林forward
- 2023-05-16 12:58:111161browse
1. Add dependencies and configure
to use users in Spring Security.
<dependency>
    <groupid>org.springframework.boot</groupid>
    <artifactid>spring-boot-starter-security</artifactid>
</dependency>
We now need to configure user information and permission configuration.
@Configuration
public class WebSecurityConfig extends WebSecurityConfigurerAdapter {
    // 指定密码的加密方式
    @SuppressWarnings("deprecation")
    @Bean
    PasswordEncoder passwordEncoder(){
        // 不对密码进行加密
        return NoOpPasswordEncoder.getInstance();
    }

    // 配置用户及其对应的角色
    @Override
    protected void configure(AuthenticationManagerBuilder auth) throws Exception {
        auth.inMemoryAuthentication()
                .withUser("admin").password("123").roles("ADMIN","USER")
                .and()
                .withUser("hangge").password("123").roles("USER");
    }

    // 配置 URL 访问权限
    @Override
    protected  void configure(HttpSecurity http) throws Exception {
        http.authorizeRequests() // 开启 HttpSecurity 配置
                .anyRequest().authenticated() // 用户访问所有地址都必须登录认证后访问
                .and().formLogin().permitAll(); // 开启表单登录
    }
}
2. Write WebSocket configuration
@Configuration
@EnableWebSocketMessageBroker
public class WebSocketConfig implements WebSocketMessageBrokerConfigurer {

    @Override
    public void configureMessageBroker(MessageBrokerRegistry config) {
        // 设置消息代理的前缀,如果消息的前缀为"/queue",就会将消息转发给消息代理(broker)
        // 再由消息代理广播给当前连接的客户端
        //也可设置多个 broker,如:config.enableSimpleBroker("/topic","/queue");
        config.enableSimpleBroker("/queue");
        // 下面方法可以配置一个或多个前缀,通过这些前缀过滤出需要被注解方法处理的消息。
        // 例如这里表示前缀为"/app"的destination可以通过@MessageMapping注解的方法处理
        // 而其他 destination(例如"/topic""/queue")将被直接交给 broker 处理
        config.setApplicationDestinationPrefixes("/app");
    }

    @Override
    public void registerStompEndpoints(StompEndpointRegistry registry) {
        // 定义一个前缀为"/chart"的endpoint,并开启 sockjs 支持。
        // sockjs 可以解决浏览器对WebSocket的兼容性问题,客户端将通过这里配置的URL建立WebSocket连接
        registry.addEndpoint("/chat").withSockJS();
    }

}
3. Write case code
1. Write entity
@Data
public class Chat {

    // 消息的目标用户
    private String to;

    // 消息的来源用户
    private String from;

    // 消息的主体内容
    private String content;

}
2. Write Controller
@Controller
public class DemoController {

    @Autowired
    SimpMessagingTemplate messagingTemplate;

    // 处理来自"/app/chat"路径的消息
    @MessageMapping("/chat")
    public void chat(Principal principal, Chat chat) {
        // 获取当前登录用户的用户名
        String from = principal.getName();
        // 将用户设置给chat对象的from属性
        chat.setFrom(from);
        // 再将消息发送出去,发送的目标用户就是 chat 对象的to属性值
        messagingTemplate.convertAndSendToUser(chat.getTo(),
                "/queue/chat", chat);
    }

}
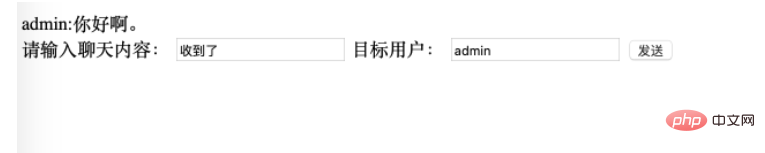
4. Write page
Create the chat2.html page in the resources/static directory as a peer-to-peer chat page.
After the connection is successful, the subscribed address is "/user/queue/chat", which has more "/user" prefix than the address configured on the server. This is because the path prefix is automatically added to the SimpMessagingTemplate class. .
nbsp;html>
<meta>
<title>单聊</title>
<script></script>
<script></script>
<script></script>
<script>
var stompClient = null;
// 建立一个WebSocket连接
function connect() {
// 首先使用 SockJS 建立连接
var socket = new SockJS('/chat');
// 然后创建一个STOMP实例发起连接请求
stompClient = Stomp.over(socket);
// 连接成功回调
stompClient.connect({}, function (frame) {
// 订阅服务端发送回来的消息
stompClient.subscribe('/user/queue/chat', function (chat) {
// 将服务端发送回来的消息展示出来
showGreeting(JSON.parse(chat.body));
});
});
}
// 发送消息
function sendMsg() {
stompClient.send("/app/chat", {},
JSON.stringify({'content':$("#content").val(),
'to':$("#to").val()}));
}
// 将服务端发送回来的消息展示出来
function showGreeting(message) {
$("#chatsContent")
.append("<div>" + message.from+":"+message.content + "");
}
// 页面加载后进行初始化动作
$(function () {
// 页面加载完毕后自动连接
connect();
$( "#send" ).click(function() { sendMsg(); });
});
</script>
<div>
<div>
</div>
<div>
请输入聊天内容:
<input>
目标用户:
<input>
<button>发送</button>
</div>
</div>
5. Verification results
We used Spring Security and it will automatically jump to the default login page.
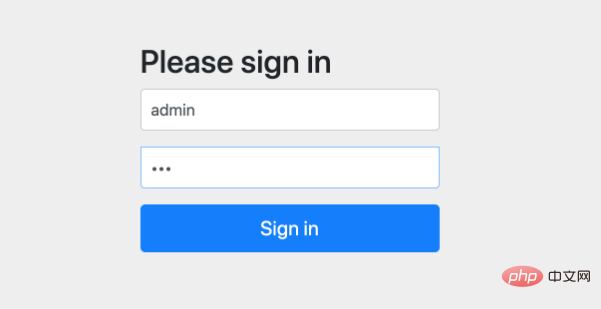
Here we configure two user information: admin/123, piao/123.

The above is the detailed content of How to use WebSocket to implement point-to-point messaging in SpringBoot. For more information, please follow other related articles on the PHP Chinese website!