
Home >Java >javaTutorial >How to quickly build a springboot project
How to quickly build a springboot project

- WBOYWBOYWBOYWBOYWBOYWBOYWBOYWBOYWBOYWBOYWBOYWBOYWBforward
- 2023-05-13 15:49:224438browse
1. Empty Project
Now most of the development process is based on the idea integrated development environment. The author was very stubborn before and always used eclipse. Later, the company needed to switch to idea. I have to say that idea is indeed It’s easy to use, friends who have never used it can try it. Here, idea is used as the demonstration environment.
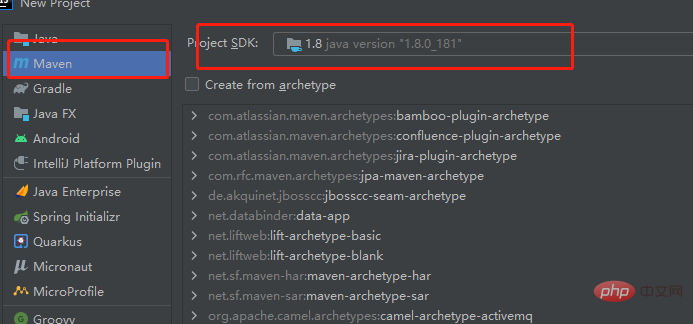
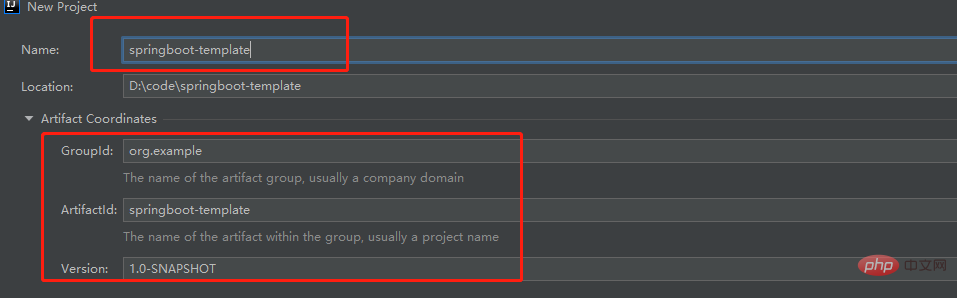
I usually start with an empty project, File-->New-->Project in idea, as shown on the left side of the picture below
<dependency>
<groupId>org.springframework.boot</groupId>
<artifactId>spring-boot-starter-web</artifactId>
<version>2.3.3.RELEASE</version>
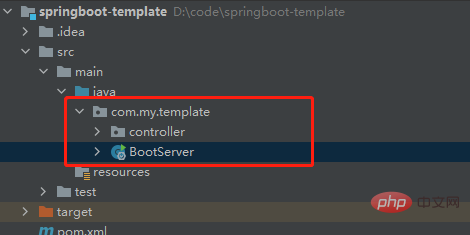
</dependency>That is, add the above dependencies to the pom. You also need a startup class before, package com.my.template;
import org.springframework.boot.SpringApplication;
import org.springframework.boot.autoconfigure.SpringBootApplication;
//springboot的启动注解
@SpringBootApplication
public class BootServer {
public static void main(String[] args) {
//启动
SpringApplication.run(BootServer.class);
}
}Pay attention to the location of the startup class, 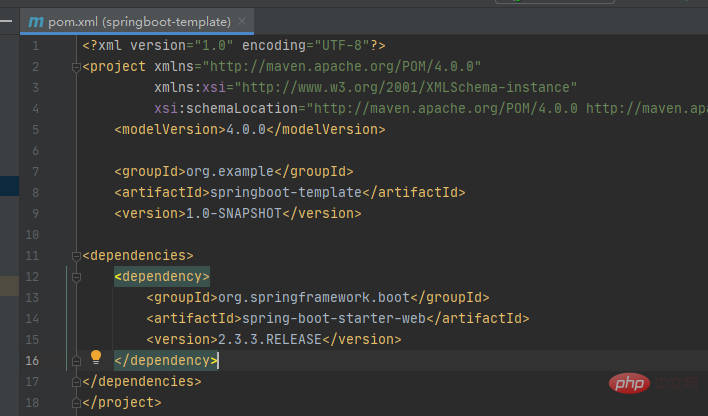
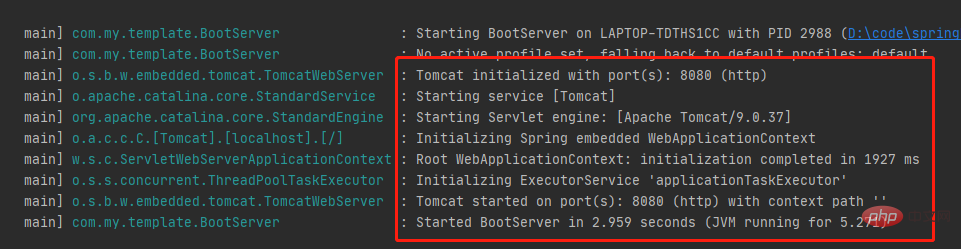
 ##The above log appears, indicating that the service has been started and the port is 8080. Let’s access it,
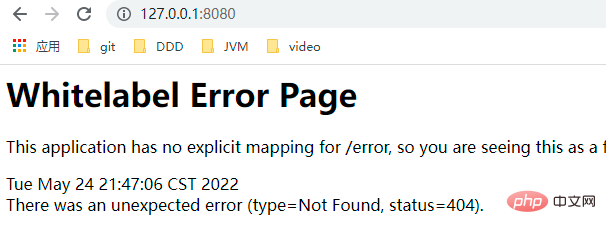
 This is because the root path 127.0.0.1:8080 has no content returned. Let’s write a test Controller to practice.
package com.my.template.controller;

import org.springframework.stereotype.Controller;
import org.springframework.web.bind.annotation.RequestMapping;
import org.springframework.web.bind.annotation.ResponseBody;

@Controller
public class TestServer {
    @ResponseBody
    @RequestMapping("test")
    public String test(){
        return "hello springboot";
    }
}
Access the address 127.0.0.1:8080/test. The results are as follows,
# successfully returned "hello springboot", proving that our service is normal.
The above is the detailed content of How to quickly build a springboot project. For more information, please follow other related articles on the PHP Chinese website!
Related articles
See more- How to set margins for buttons inside a LinearLayout programmatically?
- Why and How Should You Synchronize on String Objects in Java?
- How Can I Customize Input Tokenization in Java Using `Scanner.useDelimiter()`?
- How Can Java's Varargs Simplify Handling an Indeterminate Number of Arguments?
- How to implement breakpoint download server and client in Java