
Home >Java >javaTutorial >How SpringBoot implements common functions of WEB
How SpringBoot implements common functions of WEB

- 王林forward
- 2023-05-12 14:37:131361browse
SpringMVC integrated support
In order to realize and simplify Web development, Spring Boot provides integrated support for some commonly used Web development frameworks, such as Spring MVC, Spring WebFlux and other frameworks. When using Spring Boot for Web development, you only need to introduce the dependency starter corresponding to the Web development framework into the project.
Spring MVC automatic configuration
In the Spring Boot project, once the Web dependency starter spring-boot-starter-web is introduced, SpringBoot integrates some xxxAutoConfiguration automatic configuration implemented by default in the Spring MVC framework The class will automatically take effect, and Web development can be carried out almost without any additional configuration. In order to integrate the Spring MVC framework to implement Web development, Spring Boot mainly provides the following automated configuration features.
(1) Built-in two view resolvers: ContentNegotatingViewResolver and BeanNameViewReso
(2) Support static resources and WebJars.
(3) Converters and formatters are automatically registered.
(4) Support Http message converter.
(5)The message code parser is automatically registered.
(6) Support static project homepage index.html.
(7) Support customized application icon favicon.ico.
(8) Automatically initialize the Web data binder ConfigurableWebBindinglinitializer.
Spring Boot integrates Spring MVC to provide a lot of default configurations for Web development, and most of the time, using the default configurations can meet development needs. For example, when Spring Boot integrates Spring MVC for web development, there is no need to configure an external view resolver.
Spring MVC function extension implementation
Spring Boot integrates Spring MVC to provide a lot of automated configuration for web development, but in actual development, developers still need to extend and implement some functions. Below we use a specific case to explain how Spring Boot integrates the Spring MVC framework to realize the extended functions of web development.
Project basic environment construction
Use Spring Infiializr method to create a Spring Boot project named springboot02, and import Web dependencies and Thymeleaf dependencies.
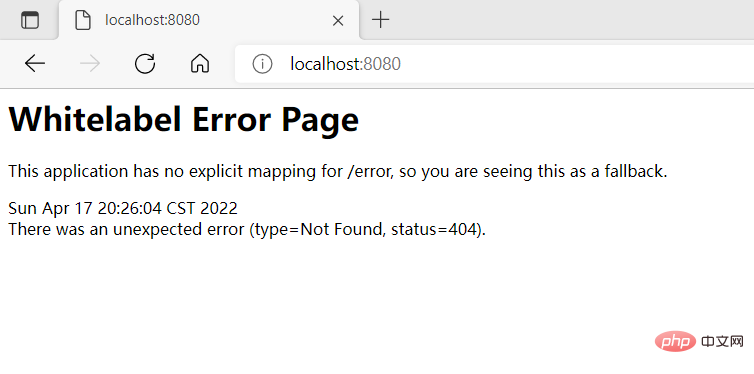
Let’s start the project and access http://localhost:8080/. If you see the following interface, it means that the access is successful, which also means that our project is successfully created.
We create a login interface login.html in the templates package under resources
<!DOCTYPE html>
<html>
<head>
    <title>login</title>

</head>
<body>
<form>
    <input type="text" name="username">
    <input type="password" name="password">
    <input type="submit" value="submit">
</form>
</body>
</html>
Finally, create the controller package under the com.hjk package and create LoginController Class
package com.hjk.controller;

import org.springframework.stereotype.Controller;
import org.springframework.ui.Model;
import org.springframework.web.bind.annotation.GetMapping;
import java.util.Calendar;
@Controller
public class LoginController {
    /**
     * 获取并封装当前年份跳转到登录页login.html
     */
    @GetMapping("/toLoginPage")
    public String toLoginPage(Model model){
        model.addAttribute("currentYear", Calendar.getInstance().get(Calendar.YEAR));
        return "login";
    }
}
Function extension implementation
Next, use Spring Boot to integrate Spring MVC for Web development to implement a simple page jump function. Here we will use the WebMvcConfigurer interface provided by Spring Boot to write custom Configuration and appropriate extension of Web functions. Here we demonstrate the implementation of view managers and interceptors respectively.
Register View Manager
Create the config package under com.hjk of the springboot project and create a configuration class MyMVCconfig that implements the WebMvcConfigurer interface to extend the MVC framework functions
package com.hjk.config;

import org.springframework.context.annotation.Configuration;
import org.springframework.web.servlet.config.annotation.InterceptorRegistry;
import org.springframework.web.servlet.config.annotation.ViewControllerRegistry;
import org.springframework.web.servlet.config.annotation.WebMvcConfigurer;
import javax.annotation.Resource;
@Configuration
public class MyMVCconfig implements WebMvcConfigurer {
    @Override
    public void addViewControllers(ViewControllerRegistry registry){
        registry.addViewController("/toLoginPage").setViewName("login");
        registry.addViewController("/login.html").setViewName("login");
    }
}
MMVCconig implements the addViewControllerse(ViewControllerRegistry registry) method of the interface WebMvcConigurer. Inside the addViewControllers() method, use the addviewController() method of ViewControllerRegistry to define the request controls of "tologinPage" and "login.html" respectively, and use the setViewName("login") method to map the path to the login.html page.
After customizing the view management function of MVC,
you can test the effect. In order to demonstrate this customization effect, restart the chapter05 project. The project starts successfully. You can access the login.html page by accessing http://localhost:8080/toLoginPage and http://localhost:8080/login.htm on the browser.
The user request control method defined using the WebMvcConfigurer interface also realizes the effect of user request control jump. Compared with the traditional request processing method, this method is more concise and intuitive. and convenience. It can also be seen that the data processed in the background cannot be obtained using this method. It should be noted that using the addViewControllers (ViewControllelRegistry registry) method in the WebMvcConfigurer interface to customize the view control is only suitable for relatively simple parameter-free view Get request. If there are parameters or jump requirements that require business processing, it is best to use the traditional method. ask.
Register a custom interceptor
The WebMvcConfigurer interface provides many MVC development related methods, add the interceptor method addInterceptors(), and add the formatter method addFormatters( ) We implement the interceptor method here.
We create a custom interceptor class MyInterceptor under the config package, the code is as follows.
package com.hjk.config;

import org.springframework.stereotype.Component;
import org.springframework.web.servlet.HandlerInterceptor;
import org.springframework.web.servlet.ModelAndView;
import javax.servlet.http.HttpServletRequest;
import javax.servlet.http.HttpServletResponse;
import java.io.IOException;
import java.util.Calendar;
@Component
public class MyInterceptor implements HandlerInterceptor {
    @Override
    public boolean preHandle(HttpServletRequest request, HttpServletResponse response, Object handler) throws Exception {
        String uri = request.getRequestURI();
        Object loginUser = request.getSession().getAttribute("loginUser");
        if (uri.startsWith("/admin")&& null==loginUser){
            try {
                response.sendRedirect("/toLoginPage");
            } catch (IOException e) {
                e.printStackTrace();
            }
            return false;
        }
        return true;
    }
    public void postHandle(HttpServletRequest request, HttpServletResponse response, Object handler, ModelAndView modelAndView) throws Exception {
       System.out.println("拦截器拦截");
    public void afterCompletion(HttpServletRequest request, HttpServletResponse response, Object handler, Exception ex) throws Exception {
}
The custom interceptor class Mylnterceptor implements the HandlerInterceptor interface. In the preHandle() method, if the user request starts with "/admin", that is, when accessing an address such as http://localhost:8080/admin, it will be determined whether the user is logged in. If not, the request will be redirected to "hoLoginPage" The corresponding login page.
In the postHandle() method, print the interceptor interception on the console.
然后在config包下自定义配置类MyMVCconfig中,重写addlnterceptors()方法注册自定义的拦截器。添加以下代码。
@Autowired
private MyInterceptor myInterceptor;
@Override
public void addInterceptors(InterceptorRegistry registry) {
    registry.addInterceptor(myInterceptor).addPathPatterns("/**").excludePathPatterns("/login.html");
}
先使用@Autowired注解引入自定义的 Mylnterceptor拦截器组件,然后重写其中的 addinterceptors()方法注册自定义的拦截器。在注册自定义拦截器时,使用addPathPatterns("/**)方法拦截所有路径请求,excludePathPatterns("/login.htm")方法对“login.html”路径的请求进行了放行处理。
测试:我们可以访问http://localhost:8080/admin 可以发现它重定向大toLoginPage界面了。
Spring整合Servlet三大组件
在这里我们使用组件注册方式对Servlet、Filter、Listener三大组件进行整合,我们只需要将自定义的组件通过ServletRegistrationBean、FilterRegistrationBean、ServletListenerRegistrationBean类注册到容器中即可。
使用注册方式整合
使用组件注册方式整合Servlet
我们在com.hjk包下创建servletComponent的包,在该包下创建MyServlet类并继承HttpServlet类。
package com.hjk.servletCompont;

import org.springframework.stereotype.Component;
import javax.servlet.ServletException;
import javax.servlet.http.HttpServlet;
import javax.servlet.http.HttpServletRequest;
import javax.servlet.http.HttpServletResponse;
import java.io.IOException;
@Component
public class MyServlet extends HttpServlet {
    @Override
    protected void doGet(HttpServletRequest req, HttpServletResponse resp) throws ServletException, IOException {
        super.doGet(req, resp);
    }
    protected void doPost(HttpServletRequest req, HttpServletResponse resp) throws ServletException, IOException {
        resp.getWriter().write("hello MyServlet");
}
@Component注解将MyServlet类作为组件注入Spring容器。MySeret类继承自HttpServlet,通过HttpServletResponse对象向页面输出“hello MyServlet”。
创建 Servlet组件配置类。在项目com.hjk.confg包下创建一个Servlet组件配置类servietConfig,用来对 Servlet相关组件进行注册,
package com.hjk.config;
import com.hjk.servletCompont.MyServlet;
import org.springframework.boot.web.servlet.ServletRegistrationBean;
import org.springframework.context.annotation.Bean;
import org.springframework.context.annotation.Configuration;
@Configuration
public class ServletConfig {
    @Bean
    public ServletRegistrationBean getServlet(MyServlet myServlet){
        ServletRegistrationBean registrationBean = new ServletRegistrationBean(myServlet, "/myServlet");
        return registrationBean;
    }
}
使用@Configuration 注解将ServletConfig标注为配置类,ServletConfig类内部的 getServlet()方法用于注册自定义的MyServlet,并返回 ServletRegistrationBean类型的Bean对象。
测试:项目启动成功后,在浏览器上访问“http://localhost:8080/myServlet"myServlet并正常显示数据,说明 Spring Boot成功整合Servlet组件。
使用组件注册方式整合Filter
在servletCompont包下创建一个MyFilter类并实现Filter接口,这个Filter的包别导错了
package com.hjk.servletCompont;

import org.springframework.stereotype.Component;
import javax.servlet.*;
import java.io.IOException;
@Component
public class MyFilter implements Filter {
    @Override
    public void init(FilterConfig filterConfig) throws ServletException {
    }
    public void doFilter(ServletRequest servletRequest, ServletResponse servletResponse, FilterChain filterChain) throws IOException, ServletException {
        System.out.println("hello MyFilter");
    public void destroy() {
}
在config包下的ServletConfig类中进行注册,即在该类中添加方法。
@Bean
public FilterRegistrationBean getFilter(MyFilter myFilter){
    FilterRegistrationBean filterRegistrationBean = new FilterRegistrationBean(myFilter);
    filterRegistrationBean.setUrlPatterns(Arrays.asList("/toLogin","/myFilter"));
    return filterRegistrationBean;
}
使用 setUrilPatterns(Arrays.asList("/toLoginPage",/myFilter')方法定义了过滤的请求路径
“/toLoginPage”和“/myFilter”,同时使用@Bean 注解将当前组装好的FilterRegistrationBea对象作为Bean组件返回。
测试:在浏览器上访问“http://localhost:8080/myFilter”查看控制台打印效果(由于没有编写对应路径的请求处理方法,所以浏览器会出现404 错误页面,这里重点关注控制台即可),浏览器访问“http://localhost:8080/
myFilter”时,控制台打印出了自定义 Filter中定义 图5-6 使用组件注册方式整合Filter的运行结果的输出语句“hello MyFilter”,这也就说明Spring Boot 整合自定义Filter 组件成功。
使用组件注册方式整合 Listener
(1)创建自定义Listener类。在com.itheima.senleiComponent包下创建一个类MyListener实现ServletContextListener接口
package com.hjk.servletCompont;

import org.springframework.stereotype.Component;
import javax.servlet.ServletContextEvent;
import javax.servlet.ServletContextListener;
@Component
public class MyListener implements ServletContextListener {
    @Override
    public void contextInitialized(ServletContextEvent sce) {
        System.out.println("contextnitialized...");
    }
    public void contextDestroyed(ServletContextEvent sce) {
        System.out.println("contextDestroyed...");
}
在servletConfig添加注册
@Bean
public ServletListenerRegistrationBean getServletListener(MyListener myListener){
    ServletListenerRegistrationBean servletListenerRegistrationBean = new ServletListenerRegistrationBean(myListener);
    return servletListenerRegistrationBean;
}
需要说明的是,Servlet 容器提供了很多 Listener 接口,例如 ServletRequestListener、ritpSessionListener、ServletContextListener等,我们在自定义Listener类时要根据自身需求选择实现对应接口即可。
测试:程序启动成功后,控制台会打印出自定义Listener组件中定义的输出语句“contextlnitialized..”。单击图中的【Exit】按钮关闭当前项目(注意,如果直接单击红色按钮会强制关闭程序,浏览器就无法打印关闭监听信息),再次查看控制台打印效果。
程序成功关闭后,控制台打印出了自定义Listener组件中定义的输出语句“contextDestroyed..”。通过效果演示,说明了Spring Boot整合自定义Listener组件成功。
文件上传与下载
开发web应用时,文件上传是很常见的一个需求,浏览器通过表单形式将文件以流的形式传递给服务器,服务器在对上传的数据解析处理。
文件上传
编写上传表单界面
这个表单界面名为upload.html,在templates文件夹下
<!DOCTYPE html>
<html lang="en">
<head>
    <meta charset="UTF-8">
    <title>文件上传</title>
</head>
<body>
<div >
    <form action="/uploadFile" method="post" enctype="multipart/form-data">
        上传:<input type="file" name="filename"/>
        <input type="submit" value="submit"/>
    </form>
</div>
</body>
</html>
我们通过表单上传文件,表单提交给uploadFile控制器,提交方式为post必须为这种方式,因为get上传比较少,必须包含enctype="multipart/form-data".
我们通过提交的地址也应该清楚,我们肯定会写一个uploadFile的控制器。
添加文件上传的相关配置
我们在application.properties文件中添加配置,上传文件的大小限制。
## 文件最大限制为10mb,默认为1mb
spring.servlet.multipart.max-file-size=1MB
如果文件超过限制大小,会报错。
编写控制器
我们在com.hjk.controller包下船舰一个名为FileController的类,用于实现文件上传的控制器。
我们这个文件上传只是实现一个简单的文件上传,并没有考虑上传文件重名的情况,实际上重名的话会覆盖之前的文件。要实现文件上传,我们肯定要给它一个唯一名称这个可以使用uuid实现,这里也没考虑文件存放位置问题,都是我自己把地址写死了,这里我们就不实现了。
实现历程:写这个控制器的时候,我的代码是正确的,前端文件也能提交,但是后端获取的文件就是null,我也看了很多博客,有的说是没有注册multipartResolver这个Bean,有的说是版本问题等等,但是都没有解决。最后一个不经意的小细节导致了我这次的代码不能获取到文件。那就是我们有在(@RequestParam("filename") MultipartFile file)前面加@RequestParam这个注解。反正我的这个是加上之后就能用了,我的这个springboot版本是2.6.6.至于真正原因现在不想思考了,等以后遇到再改吧。
@RequestPara("filename")必须获取参数名为filename的file参数
@RequestParam()默认为必传属性,可以通过@RequestParam(required = false)设置为非必传。因为required值默认是true,所以默认必传
@RequestParam("filename")或者@RequestParam(value = "filename")指定参数名
@RequestParam(defaultValue = "0")指定参数默认值
package com.hjk.controller;
import org.springframework.stereotype.Controller;
import org.springframework.web.bind.annotation.*;
import org.springframework.web.multipart.MultipartFile;
import java.io.File;
import java.io.IOException;
@Controller
public class FileController {
@GetMapping("/toUpload")
public String toUpload(){
return "upload";
}
@RequestMapping(value = "/uploadFile",method = RequestMethod.POST)
public String uploadFile(@RequestParam("filename") MultipartFile file){
String filename = file.getOriginalFilename();
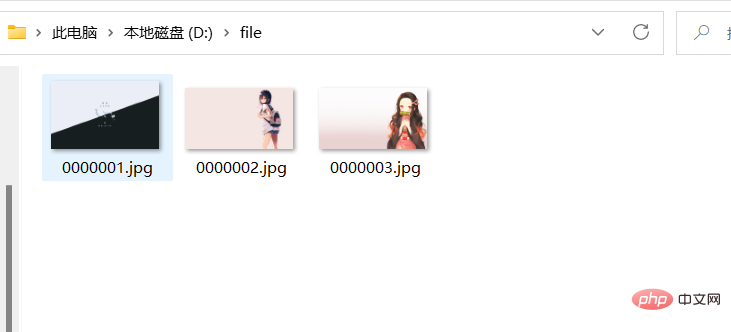
String dirPath = "D:/file/";
File filePath = new File(dirPath);
if (!filePath.exists()){
filePath.mkdir();
}
try {
file.transferTo(new File(dirPath+filename));
} catch (IOException e) {
e.printStackTrace();
}在这里我们提交三张图片用于下面的文件下载
文件下载
文件下载很多框架都没有进行封装处理,不同的浏览器解析处理不同,有可能出现乱码情况。
在添加完依赖之后我们创建一个名为filedownload.html的html,一会用于编写下载界面。
添加依赖
<dependency>
    <groupId>commons-io</groupId>
    <artifactId>commons-io</artifactId>
    <version>2.6</version>
</dependency>
下载处理控制器
我们还是再FileController类里添加下载处理方法。直接在里面添加就行。
@GetMapping("/toDownload")
public String toDownload(){
    return "filedownload";
}

@GetMapping("/download")
public ResponseEntity<byte[]> fileDownload(String filename){
    //指定下载地址文件路径
    String dirPath = "D:/file/";
    //创建文件下载对象
    File file = new File(dirPath + File.separator + filename);
    //设置响应头
    HttpHeaders httpHeaders = new HttpHeaders();
    //通知浏览器以下载方式打开
    httpHeaders.setContentDispositionFormData("attachment",filename);
    //定义以流的形式下载返回文件
    httpHeaders.setContentType(MediaType.APPLICATION_OCTET_STREAM);
    try {
        return new ResponseEntity<>(FileUtils.readFileToByteArray(file),httpHeaders, HttpStatus.OK);
    } catch (IOException e) {
        e.printStackTrace();
        return new ResponseEntity<byte[]>(e.getMessage().getBytes(), HttpStatus.EXPECTATION_FAILED);
    }
编写前端代码
<!DOCTYPE html>
<html lang="en" xmlns:th="http://www.thymeleaf.org">
<head>
<meta charset="UTF-8">
<title>文件下载</title>
</head>
<body>
<div >文件下载列表</div>
<table>
<tr>
<td>0000001.jpg</td>
<td><a th:href="@{/download(filename='0000001.jpg')}">下载文件</a> </td>
</tr>
<tr>
<td>0000002.jpg</td>
<td><a th:href="@{/download(filename='0000002.jpg')}">下载文件</a> </td>
</tr>
<tr>
<td>0000003.jpg</td>
<td><a th:href="@{/download(filename='0000003.jpg')}">下载文件</a> </td>
</tr>
</table>
</body>
</html>我们这次使用了thymeleaf写前端代码。
实际上我们可能会遇到下载中文文件的问题,那样可能会乱码。
我么在这里写一个解决中文乱码的例子。例如:我把0000001.jpg改为"你好jpg"再重新部署下载,会发现名字为_.jpg
下面我们直接在我们在fileController类的里面加一个getFileName方法,并修改fileDownload方法上做修改。
public String getFileName(HttpServletRequest request,String filename) throws Exception {
    String[] IEBrowserKeyWords = {"MSIE","Trident","Edge"};
    String userAgent = request.getHeader("User-Agent");
    for (String ieBrowserKeyWord : IEBrowserKeyWords) {
        if (userAgent.contains(ieBrowserKeyWord)){
            return URLEncoder.encode(filename,"UTF-8").replace("+"," ");
        }
    }
    return new String(filename.getBytes(StandardCharsets.UTF_8),"ISO-8859-1");
}

   @GetMapping("/download")
    public ResponseEntity<byte[]> fileDownload(HttpServletRequest request,String filename) throws Exception {
        //指定下载地址文件路径
        String dirPath = "D:/file/";
        //创建文件下载对象
        File file = new File(dirPath + File.separator + filename);
        //设置响应头
        HttpHeaders httpHeaders = new HttpHeaders();
        //通知浏览器下载七千及性能转码
        filename = getFileName(request,filename);
        //通知浏览器以下载方式打开
        httpHeaders.setContentDispositionFormData("attachment",filename);
        //定义以流的形式下载返回文件
        httpHeaders.setContentType(MediaType.APPLICATION_OCTET_STREAM);
        try {
            return new ResponseEntity<>(FileUtils.readFileToByteArray(file),httpHeaders, HttpStatus.OK);
        } catch (IOException e) {
            e.printStackTrace();
            return new ResponseEntity<byte[]>(e.getMessage().getBytes(), HttpStatus.EXPECTATION_FAILED);
SpringBoot的打包部署
springboot使用的嵌入式Servlet容器,所以默认是以jar包打包的。也可以进行war包打包,但是需要进行一些配置。
jar包形式打包
我们在创建springboot项目是默认会给我们导入maven的打包插件,如果没有我们手动加上即可。
<build>
<plugins>
<plugin>
<groupId>org.springframework.boot</groupId>
<artifactId>spring-boot-maven-plugin</artifactId>
</plugin>
</plugins>
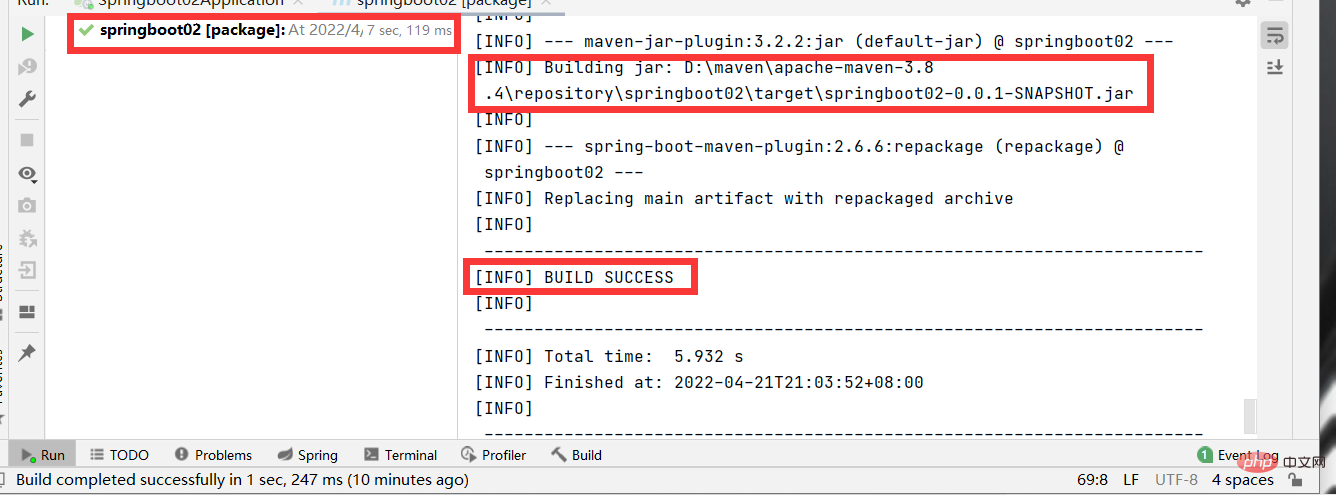
</build>双击package等待即可
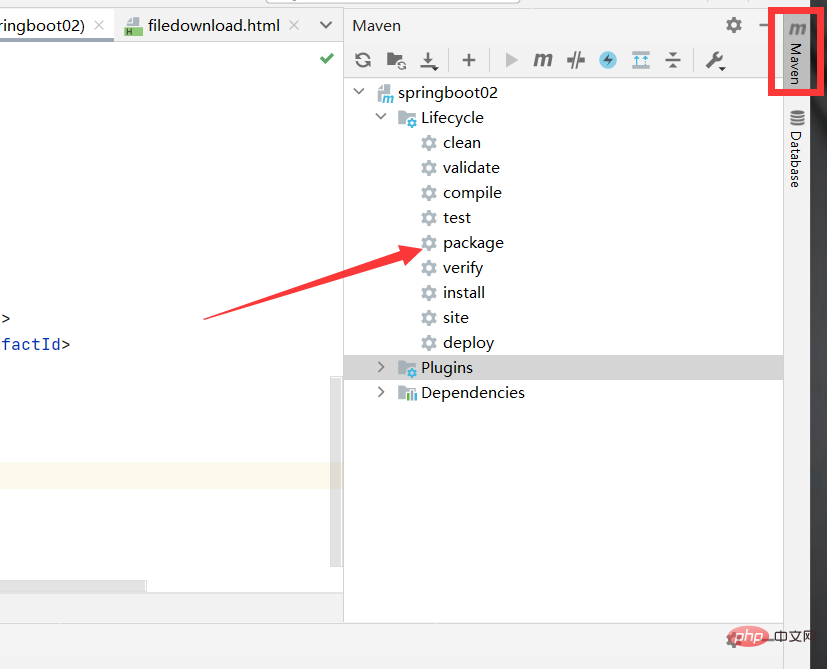
等待完成,可以看到打包时间,存放jar包位置等信息。我们也可以在target包下查看打成的jar包。
启动jar包
我们可以在关闭已启动的springboot项目后,在idea控制台输入命令启动。
java -jar target\springboot02-0.0.1-SNAPSHOT.jar
我们也可以在系统自带的终端窗口启动
war包形式打包
我们首先要把默认打包方式修改为war包
<name>springboot02</name>
<description>Demo project for Spring Boot</description>
<packaging>war</packaging>
<properties>
    <java.version>1.8</java.version>
</properties>
导入外部Tomcat服务器
<dependency>
    <groupId>org.springframework.boot</groupId>
    <artifactId>spring-boot-starter-tomcat</artifactId>
    <scope>provided</scope>
</dependency>
打开启动类,继承springbootServletInitializer类
package com.hjk;
import org.springframework.boot.SpringApplication;
import org.springframework.boot.autoconfigure.SpringBootApplication;
import org.springframework.boot.builder.SpringApplicationBuilder;
import org.springframework.boot.web.servlet.ServletComponentScan;
import org.springframework.boot.web.servlet.support.SpringBootServletInitializer;
@ServletComponentScan
@SpringBootApplication
public class Springboot02Application extends SpringBootServletInitializer {
    public static void main(String[] args) {
        SpringApplication.run(Springboot02Application.class, args);
    }
    @Override
    protected SpringApplicationBuilder configure(SpringApplicationBuilder builder) {
        return builder.sources(Springboot02Application.class);
    }
}
然后就和jar包方式一样了,双击package,等待打包完成。
war包的部署
war包的部署相比于jar包比较麻烦,我们需要外部的服务器,我们需要把war包复制到tomcat安装目录下的webapps目录中,执行目录里的startup.bat命令启动war包,这样我们就完成了。
The above is the detailed content of How SpringBoot implements common functions of WEB. For more information, please follow other related articles on the PHP Chinese website!