Discover concurrent container issues


Conduct a 6000-thread stress test on a single interface, with each thread requesting 5 times. The thread was created within 5 seconds. Halfway through, the request response time was too long and the error rate reached 43%. This concurrent capacity is relatively weak for servers with better configurations.
Go deep into the underlying layers of SpringBoot to understand the reasons
The configuration of metadata is mentioned in the official SpringBoot documentation

You can see that about us The default configuration of the ports of the most commonly used setting items is among them.
Default embedded Tomcat configuration
1. server.tomcat.accept-count: waiting queue length. When the number of allocable threads is used up, subsequent requests will enter the waiting queue to wait. , reject processing after waiting for the queue to be full, default 100.
2. server.tomcat.max-connections: the maximum number of connections, the default is 10000
3. server.tomcat.max-threads: the maximum number of working threads, the default is 200,
4. server.tomcat.min-spare-threads: the minimum number of working threads, the number of initial allocation threads, the default is 10
Under the default configuration, the connection will be refused after the number of connections exceeds 10,000
Under the default configuration, the triggered requests exceed 200 and are rejected after 100 requests (the maximum number of worker threads waiting for the queue length)
These metadata Spring of course provides external configuration functions
#更改内嵌tomcat参数
server.port=8080
## 等待队列长度,默认100。
server.tomcat.accept-count=1000
## 最大工作线程数,默认200。(4核8g内存,线程数经验值800,操作系统做线程之间的切换调度是有系统开销的,所以不是越多越好。)
server.tomcat.max-threads=800
## 最小工作空闲线程数,默认10。(适当增大一些,以便应对突然增长的访问量)
server.tomcat.min-spare-threads=100
SpringBoot has built-in Tomcat. In the default settings, the maximum number of threads of Tomcat is 200 and the maximum number of connections is 10,000. The amount of concurrency supported refers to the number of connections. How can 200 threads handle 10,000 connections?
Currently Tomcat has three modes for processing connections. One is BIO, where one thread only handles one connection, and the other is NIO, where one thread handles multiple connections. Since HTTP requests do not take too long, and multiple connections generally do not receive messages at the same time, there is no big problem in processing multiple connections with one thread.
There is also the apr mode. These three modes of tomcat will be introduced in detail later, and will not be discussed in depth here.
When Tomcat starts, you can see which operating mode the Connector is using through the log:
Starting ProtocolHandler ["http-bio-8080"]
Starting ProtocolHandler ["http-nio-8080"]
Starting ProtocolHandler ["http-apr-8080"]
The default value can be in spring-boot-autoconfigure-version number.jar (for example: spring-boot-autoconfigure-2.1.0.RELEASE) package, unzip and decompile the /web/ServerProperties.class file to see the default configuration.

Customized embedded Tomcat development

About KeepAlive
Http request using Jmeter The default is to enable KeepAlive
Http's KeepAlive request is when our client sends an Http request to our server, if the KeepAlive request header is included, it means that our Http client wants to follow A KeepAlive connection is established between the servers. The purpose of this connection is that after sending the corresponding response to our server, our server should not disconnect immediately, but wait to try to reuse the connection.
This solution is used to solve the time-consuming problem caused by a response of Http, which is stateless and requires disconnecting and creating a new connection every time.
But if we maintain a long connection with the server after each web page request is opened, then the number of connections on our server will soon be used up, so there was no such thing in the earliest Http1.0 The KeepAlive request was designed, but the current Http1.1 plus KeepAlive request is designed to support more and more mobile devices, and even some very complex web page interactions, which require frequent requests to the server during the user's browsing process. Send a request. Therefore, establishing a KeepAlive connection is not for the purpose of stress testing, but it actually has some performance benefits in application scenarios. Whether it is the client or the server, when doing some network communication interactions, There is no need to create a new connection every time, disconnect the connection, and waste the time of Tcp/Ip connection establishment, but only need to send data.
But such a design will also bring some problems. If our server does not impose any restrictions on the operation of KeepAlive 1. The connection does not perform any operations or respond, then this connection will have a negative impact on the service. 2. Some attackers maliciously use the KeepAlive connection to send DDOS attacks to our server. The corresponding connection on the server will only become a backdoor for the attacker to attack. Therefore, for security, we need to customize Tomcat development
Configuration
1. KeepAliveTimeOut: After the number of milliseconds after which the client does not respond, KeepAlive will be disconnected
2. maxKeepAliveRequests: After the number of requests, KeepAlive will be disconnected and invalid
在SpringBoot官方文档中提到了对内嵌容器的配置

//当spring容器内没有TomcatEmbeddedServletContainerFactory这个bean时,会把bean加载进spring容器
@Configuration
public class WebServerConfiguration implements WebServerFactoryCustomizer<configurablewebserverfactory> {
@Override
public void customize(ConfigurableWebServerFactory factory) {
  //使用对应工厂类提供给我们的接口定制化我们的tomcat connector
  ((TomcatServletWebServerFactory)factory).addConnectorCustomizers(new TomcatConnectorCustomizer() {
    @Override
    public void customize(Connector connector) {
      Http11NioProtocol protocol= (Http11NioProtocol) connector.getProtocolHandler();
      //定制KeepAliveTimeout,设置30秒内没有请求则服务器自动断开keepalive连接
      protocol.setKeepAliveTimeout(30000);
      //当客户端发送超过10000个请求则自动断开keepalive连接
      protocol.setMaxKeepAliveRequests(10000);
    }
  });
}
}</configurablewebserverfactory>
The above is the detailed content of How to embed Tomcat concurrency capacity in SpringBoot. For more information, please follow other related articles on the PHP Chinese website!
 怎么使用SpringBoot+Canal实现数据库实时监控May 10, 2023 pm 06:25 PM
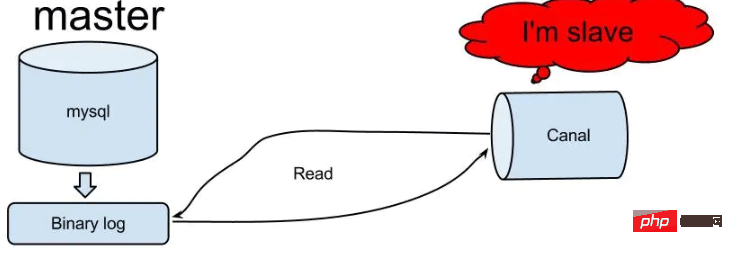
Canal工作原理Canal模拟MySQLslave的交互协议,伪装自己为MySQLslave,向MySQLmaster发送dump协议MySQLmaster收到dump请求,开始推送binarylog给slave(也就是Canal)Canal解析binarylog对象(原始为byte流)MySQL打开binlog模式在MySQL配置文件my.cnf设置如下信息:[mysqld]#打开binloglog-bin=mysql-bin#选择ROW(行)模式binlog-format=ROW#配置My
 Spring Boot怎么使用SSE方式向前端推送数据May 10, 2023 pm 05:31 PM
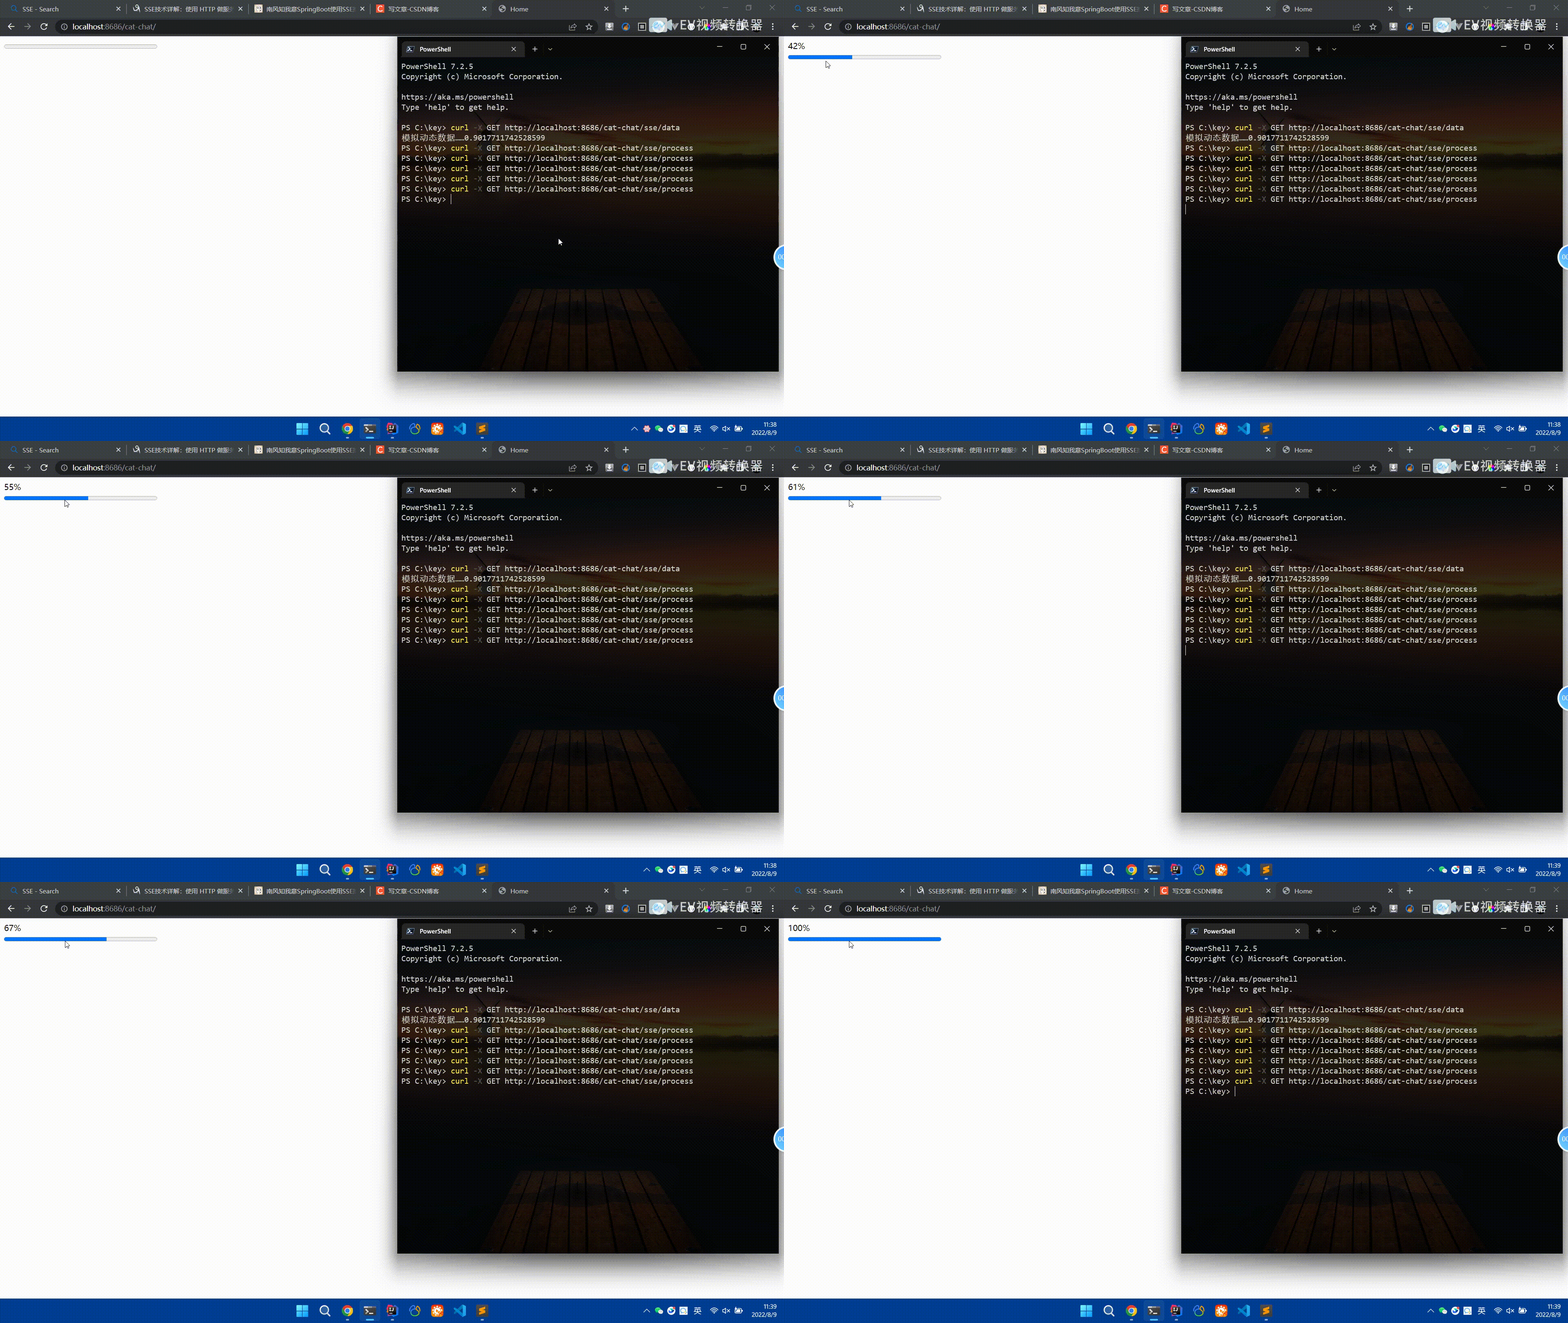
前言SSE简单的来说就是服务器主动向前端推送数据的一种技术,它是单向的,也就是说前端是不能向服务器发送数据的。SSE适用于消息推送,监控等只需要服务器推送数据的场景中,下面是使用SpringBoot来实现一个简单的模拟向前端推动进度数据,前端页面接受后展示进度条。服务端在SpringBoot中使用时需要注意,最好使用SpringWeb提供的SseEmitter这个类来进行操作,我在刚开始时使用网上说的将Content-Type设置为text-stream这种方式发现每次前端每次都会重新创建接。最
 SpringBoot怎么实现二维码扫码登录May 10, 2023 pm 08:25 PM
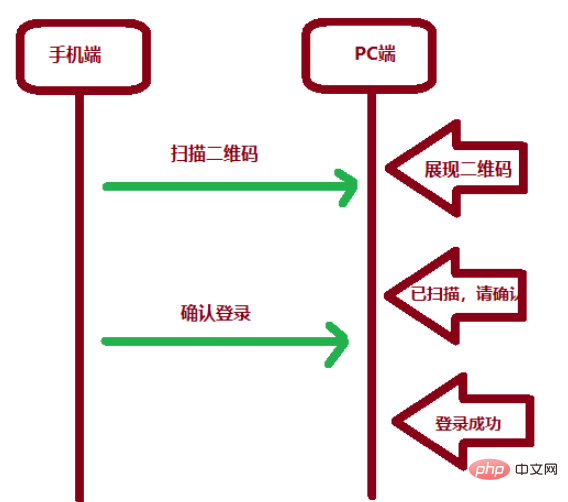
一、手机扫二维码登录的原理二维码扫码登录是一种基于OAuth3.0协议的授权登录方式。在这种方式下,应用程序不需要获取用户的用户名和密码,只需要获取用户的授权即可。二维码扫码登录主要有以下几个步骤:应用程序生成一个二维码,并将该二维码展示给用户。用户使用扫码工具扫描该二维码,并在授权页面中授权。用户授权后,应用程序会获取一个授权码。应用程序使用该授权码向授权服务器请求访问令牌。授权服务器返回一个访问令牌给应用程序。应用程序使用该访问令牌访问资源服务器。通过以上步骤,二维码扫码登录可以实现用户的快
 SpringBoot/Spring AOP默认动态代理方式是什么May 10, 2023 pm 03:52 PM
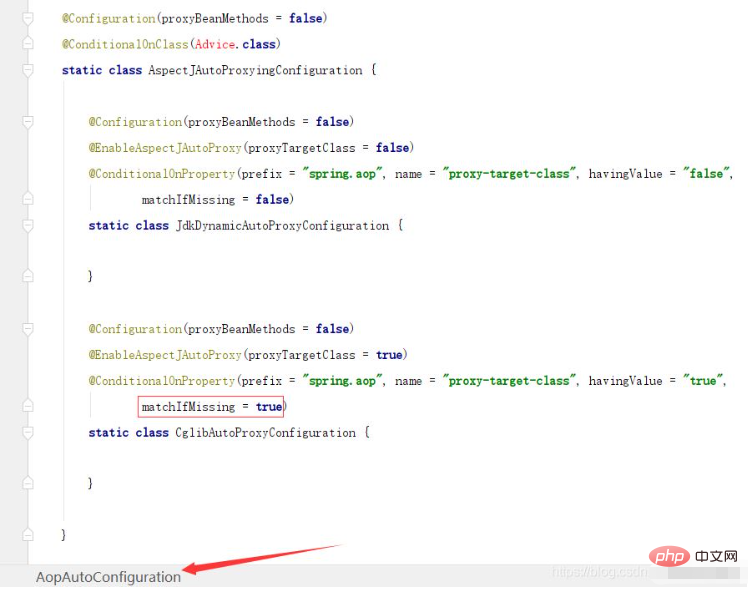
1.springboot2.x及以上版本在SpringBoot2.xAOP中会默认使用Cglib来实现,但是Spring5中默认还是使用jdk动态代理。SpringAOP默认使用JDK动态代理,如果对象没有实现接口,则使用CGLIB代理。当然,也可以强制使用CGLIB代理。在SpringBoot中,通过AopAutoConfiguration来自动装配AOP.2.Springboot1.xSpringboot1.xAOP默认还是使用JDK动态代理的3.SpringBoot2.x为何默认使用Cgl
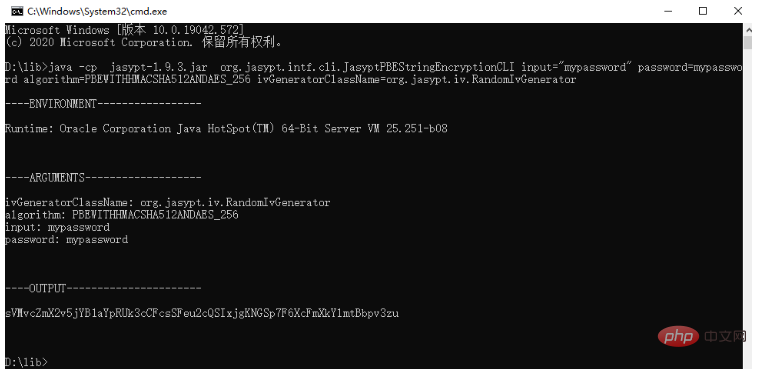 spring boot怎么对敏感信息进行加解密May 10, 2023 pm 02:46 PM
我们使用jasypt最新版本对敏感信息进行加解密。1.在项目pom文件中加入如下依赖:com.github.ulisesbocchiojasypt-spring-boot-starter3.0.32.创建加解密公用类:packagecom.myproject.common.utils;importorg.jasypt.encryption.pbe.PooledPBEStringEncryptor;importorg.jasypt.encryption.pbe.config.SimpleStrin
 使用Java SpringBoot集成POI实现Word文档导出Apr 21, 2023 pm 12:19 PM
知识准备需要理解ApachePOI遵循的标准(OfficeOpenXML(OOXML)标准和微软的OLE2复合文档格式(OLE2)),这将对应着API的依赖包。什么是POIApachePOI是用Java编写的免费开源的跨平台的JavaAPI,ApachePOI提供API给Java程序对MicrosoftOffice格式档案读和写的功能。POI为“PoorObfuscationImplementation”的首字母缩写,意为“简洁版的模糊实现”。ApachePOI是创建和维护操作各种符合Offic
 springboot怎么整合shiro实现多验证登录功能May 10, 2023 pm 04:19 PM
1.首先新建一个shiroConfigshiro的配置类,代码如下:@ConfigurationpublicclassSpringShiroConfig{/***@paramrealms这儿使用接口集合是为了实现多验证登录时使用的*@return*/@BeanpublicSecurityManagersecurityManager(Collectionrealms){DefaultWebSecurityManagersManager=newDefaultWebSecurityManager();
 Springboot如何实现视频上传及压缩功能May 10, 2023 pm 05:16 PM
一、定义视频上传请求接口publicAjaxResultvideoUploadFile(MultipartFilefile){try{if(null==file||file.isEmpty()){returnAjaxResult.error("文件为空");}StringossFilePrefix=StringUtils.genUUID();StringfileName=ossFilePrefix+"-"+file.getOriginalFilename(


Hot AI Tools

Undresser.AI Undress
AI-powered app for creating realistic nude photos

AI Clothes Remover
Online AI tool for removing clothes from photos.

Undress AI Tool
Undress images for free

Clothoff.io
AI clothes remover

AI Hentai Generator
Generate AI Hentai for free.

Hot Article

Hot Tools

DVWA
Damn Vulnerable Web App (DVWA) is a PHP/MySQL web application that is very vulnerable. Its main goals are to be an aid for security professionals to test their skills and tools in a legal environment, to help web developers better understand the process of securing web applications, and to help teachers/students teach/learn in a classroom environment Web application security. The goal of DVWA is to practice some of the most common web vulnerabilities through a simple and straightforward interface, with varying degrees of difficulty. Please note that this software

SublimeText3 Mac version
God-level code editing software (SublimeText3)

PhpStorm Mac version
The latest (2018.2.1) professional PHP integrated development tool

Safe Exam Browser
Safe Exam Browser is a secure browser environment for taking online exams securely. This software turns any computer into a secure workstation. It controls access to any utility and prevents students from using unauthorized resources.

Zend Studio 13.0.1
Powerful PHP integrated development environment


