How to disable font smoothing on MacOS Monterey and Big Sur
Since the feature is still available at the system level, it can be accessed using the Terminal application and the default write command. Just follow the steps below to get started.
- Click the Finder icon located in the Mac Dock.

- This will open a Finder window on your screen. Now, click on Applications in the left pane and go to the Utilities folder to continue.

- In the Utilities folder you will find the Terminal application. Click it to launch Terminal on your Mac. Alternatively, you can open Terminal using Spotlight search by pressing Command+Spacebar.

- Now, enter the following command and press Return or Enter:
defaults -currentHost write -g AppleFontSmoothing -int 0
- Exit Terminal and click the Apple logo in the upper left corner of the screen. Select Restart from the drop-down menu and restart your Mac.

That’s all. Once your Mac boots up, you should notice that text is sharper and clearer. This may be a noticeable difference, especially on non-Retina displays, but for users on Retina Macs, they may not notice much of a difference, or the difference may be unwelcome.
How to Change Font Smoothing Level in MacOS Monterey and Big Sur
The command we mentioned above disables smoothing completely, but if the text is still blurry, you can adjust the font by slightly adjusting the command Smoothing level. See the integer value at the end of the command? If you want to use light smoothing, then change the value to "1", if you want to use medium smoothing, change the value to "2", and finally "3" for strong font smoothing. So in the terminal you would use a command like this:
light:defaults -currentHost write -g AppleFontSmoothing -int 1
medium:defaults -currentHost write -g AppleFontSmoothing -int 2
Strong: defaults -currentHost write -g AppleFontSmoothing -int 3
Leave: defaults -currentHost write -g AppleFontSmoothing -int 0
We’ve had numerous complaints about blurry text in different versions of MacOS, including Mojave and Yosemite. I ran into a similar issue when discussing changing font smoothing settings on Mac, but it's certainly worth a reminder with modern MacOS versions, especially now that individual system preference options are unavailable.
The above is the detailed content of How to change or remove font smoothing on MacOS Monterey and Big Sur. For more information, please follow other related articles on the PHP Chinese website!
 ip与mac绑定什么意思Mar 09, 2023 pm 04:44 PM
ip与mac绑定是指将特定的IP地址与特定的MAC地址关联起来,使得只有使用该MAC地址的设备才能够使用该IP地址进行网络通信。ip与mac绑定可以防止被绑定的主机的IP地址不被假冒,前提条件:1、MAC地址是唯一的,并且不可假冒;只能绑定与路由器直接相连的网络上的主机(也就是主机的网关在路由器上)。
 mac版下载是什么意思Mar 06, 2023 am 09:52 AM
mac版下载的意思是当软件在选择安装时,选择MAC版下载;Windows版和MAC版是两个不同的操作系统,所以大多数软件在选择安装的同时需要选择Windows版还是MAC版。
 mac鼠标滚轮相反怎么办Mar 16, 2023 pm 05:44 PM
mac鼠标滚轮相反的解决办法:1、打开mac电脑,点击屏幕的苹果标志,然后选择“系统偏好设置”;2、在“系统偏好设置”窗口中,选择“鼠标”;3、在“鼠标”窗口中,将“滚动方向:自然”前面的勾去掉即可。
 修复文件共享在 MacOS Ventura 中不起作用Apr 13, 2023 am 11:34 AM
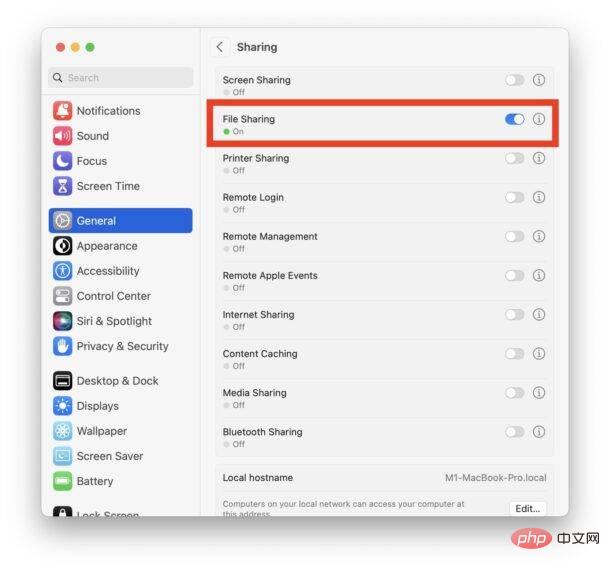
修复 SMB 文件共享在 MacOS Ventura 中不起作用的问题从 Apple 菜单打开 Mac 上的“系统设置”应用程序转到“常规”,然后转到“共享”找到“文件共享”的开关并将其关闭通过转到 Apple 菜单并选择重新启动来重新启动 Mac重新启动后,返回共享系统设置面板并将“文件共享”重新设置为打开位置像往常一样恢复文件共享,它应该按预期工作如果 MacOS Ventura Mac 与另一台 Mac 或设备之间的文件共享突然再次停止工作,您可能需要在几天后或随机重复此过程。
 如何防止 Mac 在显示器关闭时进入睡眠状态 (MacOS Ventura)Apr 13, 2023 pm 12:31 PM
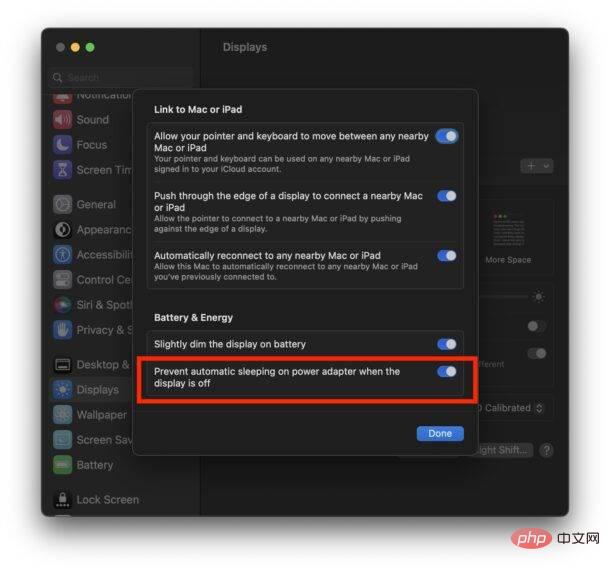
显示器关闭时如何防止 Mac 休眠如果您希望 Mac 显示器能够在整个计算机不进入睡眠状态的情况下关闭,请在此处进行适当的设置调整:下拉 Apple 菜单并转到“系统设置”转到“显示”点击“高级...”切换“防止显示器关闭时电源适配器自动休眠”的开关现在 Mac 显示屏可以关闭,同时防止 Mac 本身进入睡眠状态。这可能主要与 Mac 笔记本电脑用户相关,但即使是那些没有 MacBook 的用户也可能会发现该功能很有用。
 mac克隆是什么意思Jan 31, 2023 am 10:33 AM
mac克隆全称mac地址克隆,是固化在网卡上串行EEPROM中的物理地址,通常有48位长。mac克隆一般应用在路由器上,用户在用电脑直接拨号上网,后来又加了个路由器,通过路由器来实现多台电脑同时上网,这时要用到mac地址克隆了,就是把当前的电脑的mac地址克隆到路由器中去,因为运营商是把你的电脑mac地址绑定你的账号的,所以得克隆以后才能用。
 mac的shift键是哪个键Mar 13, 2023 pm 02:20 PM
mac的shift键是fn键上方、caps lock键下方的一个键,该键在键盘最左侧,由右下往上数第2个键;shift键是键盘中的上档转换键,可以通过“Ctrl+Shift”组合键来切换输入法。
 mac解压rar用什么软件Mar 03, 2023 pm 04:18 PM
mac解压rar的软件:1、The Unarchiver,是一款完全免费、小巧,而且非常易于使用的压缩、解压缩小工具;2、Keka,是一款免费、实用的压缩、解压缩工具,支持解压缩RAR格式的压缩包;3、360压缩大师,是一款免费的压缩、解压缩软件,完全支持RAR文件解压;4、MacZip,支持包括RAR在内的超过20种压缩格式的解压;5、BetterZip;6、FastZip。

Hot AI Tools

Undresser.AI Undress
AI-powered app for creating realistic nude photos

AI Clothes Remover
Online AI tool for removing clothes from photos.

Undress AI Tool
Undress images for free

Clothoff.io
AI clothes remover

AI Hentai Generator
Generate AI Hentai for free.

Hot Article

Hot Tools

Safe Exam Browser
Safe Exam Browser is a secure browser environment for taking online exams securely. This software turns any computer into a secure workstation. It controls access to any utility and prevents students from using unauthorized resources.

SublimeText3 Linux new version
SublimeText3 Linux latest version

SublimeText3 Chinese version
Chinese version, very easy to use

Notepad++7.3.1
Easy-to-use and free code editor

SublimeText3 Mac version
God-level code editing software (SublimeText3)


