


While installing Java on some Windows machines, some users complained about the error message "Error 1721: There is a problem with this Windows Installer package. " on their respective forums. This issue occurs while installing Java and can occur anytime while installing/running Java based applications. After further research, we discovered that there are multiple reasons behind this issue. Just follow these solutions and you will be able to install Java on your computer.
Solution ——
1. You can restart the computer. After restarting the system, run the installer. Test if this works.
2. Run the installer as administrator. Just, go to the location of the installer file, right-click on it, and click "Run as administrator" to run it as administrator.

Complete the installation process.
Fix 1 – Restart the Windows Installer service and install visual files
Step 1
The Windows Installer service is an important part of the installation process.
1. First, press the Win key and R key at the same time.
2. Then, type this command and click OK.
服务.msc

#3. The Service Utility page will pop up on your screen. Now, browse the complete list of services and look for the " Windows Installer " service.
4. Then, right-click on it and click "Properties".

5. Enter the Windows Installer properties page and view the "Service Status:" condition.
6. If "Running" is displayed, please click "Stop" to terminate the service immediately.

Just wait for Windows to stop the service.
7. Then, click "Start" to start the service.
If you notice that "Service Status:" displays "Stopped", you can click "Start" to start the service.

Minimize the service window. Then, launch the installer and complete the installation process.
Step 2
Download and install the Visual C Redistributable service pack on your computer.
1. Go to Microsoft Visual C 2005 Service Pack 1 Redistributable package.
2. Once you are there, click "Download".

3. Now, Check the " vcredist_x64.exe" package file.
4. Then, click "Next".

After downloading the package, minimize or close the browser.
5. Go to the download location.
6. Then, double-click the installation package to start the installation.

Just follow the on-screen instructions to complete the installation. After the installation is complete, restart your computer.
After restarting the system, follow the steps below to install the Visual C 2008 Redistributable package.
1. Download the Visual C 2008 package.
2. Now, go to the location where you downloaded the file. Then, double-click" subinacl".

#3. Follow the steps that appear and select the drive in which you want to install the package files.
4. Then, enter the last step and click "Install Now" to install the package.

After installation, restart the computer just like before.
After restarting the system, try running the installer again.
You will not encounter "Error code 1721" on your computer.
Fix 2 – Try installing it in compatibility mode
If you are running an older version of the installer, you can run it in compatibility mode for older versions of Windows.
1. Open File Explorer and go to the location of the installer.
2.到达那里后,右键点击安装程序并单击“属性”。

3. 在安装程序属性页面中,导航到“兼容性”部分。
4.接下来,勾选 “以兼容模式运行此程序: ”框并从下拉列表中将其设置为“ Windows Vista ”。

5. 之后,点击“应用”和“确定”选项保存更改。

现在,一旦您应用了新的兼容性更改,您就可以运行安装程序。
测试这是否有效,否则,运行安装和卸载故障排除程序的程序。
修复 3 – 暂停杀毒软件
Java 安装问题中的防病毒程序可能会导致此问题。
1. 关闭错误消息,如果您还没有这样做的话。
2. 现在,查看任务栏,您可以在那里看到一个箭头图标。只是,点击它。
3. 单击图标后,您可以在系统托盘上看到最小化的防病毒软件。
4.接下来,右键单击防病毒软件并点击“暂停保护”以短暂暂停防病毒活动。

暂停防病毒程序后,运行安装程序并完成 Java 应用程序的安装。
检查这是否有效。
修复 4 – 运行特定的疑难解答
有一个程序安装和卸载疑难解答程序可以帮助您识别和解决问题。
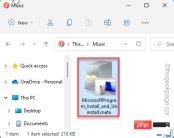
1. 首先,访问MicrosoftProgram_Install_and_Uninstall.meta。
2.接下来,点击“下载”将工具下载到您的计算机上。

3. 下载工具后,关闭浏览器。
4. 然后,双击“ MicrosoftProgram_Install_and_Uninstall.meta ”安装程序在您的计算机上运行疑难解答。
4. 当程序安装程序和卸载程序页面打开时,点击“下一步”进入下一页。

5. 一旦你被问到,“你在安装或卸载程序时遇到问题吗?”,选择“安装”选项进行故障排除。

让 Windows 检查注册表是否存在与补丁相关的问题。
6. 现在,您可以在那里看到应用程序列表。
7.只需选择您遇到此问题的应用程序。
如果您在其中看不到该应用程序,请选择“未列出”并单击“下一步”。

让 Windows 有一点时间来检测并针对该问题制定修复方案。
修复 5 – 取消注册并注册 MSI
您应该注销并重新注册 MSI 可执行文件。
1. 首先按下键盘上的Win 键并在搜索框中输入“ powershell ”。
2. 一旦你可以看到“ Windows Powershell ”已经出现在搜索结果中。只需右键单击它并点击“以管理员身份运行”以管理员身份打开终端。

3. 来到 PowerShell 主屏幕,一一编写此代码,然后按 Enter。
msiexec / unregmsiexec /regserver

这样,您已注销并重新注册了 Windows Installer 服务。
现在,尝试启动安装程序并进行测试。
修复 6 – 降低 UAC 设置
尝试降低用户帐户控制并再次尝试安装 Java 应用程序。
1. Simply press the Windows key and search for "User Account Control".
2. Then, click "Change User Account Control Settings" to access the settings.

#3. This will open the User Account Control settings pane.
4. Set the slider all the way to "Never notify".
5. Then, click "OK" to save the changes.

That way, when you do this, the User Account Control interference is eliminated. After that, run the installer again.
The installation will not be interrupted by the "Error code 1721" message.
The above is the detailed content of How to Fix Java Error 1721 in Windows 11/10. For more information, please follow other related articles on the PHP Chinese website!

Hot AI Tools

Undresser.AI Undress
AI-powered app for creating realistic nude photos

AI Clothes Remover
Online AI tool for removing clothes from photos.

Undress AI Tool
Undress images for free

Clothoff.io
AI clothes remover

AI Hentai Generator
Generate AI Hentai for free.

Hot Article
Hot Tools

Zend Studio 13.0.1
Powerful PHP integrated development environment

DVWA
Damn Vulnerable Web App (DVWA) is a PHP/MySQL web application that is very vulnerable. Its main goals are to be an aid for security professionals to test their skills and tools in a legal environment, to help web developers better understand the process of securing web applications, and to help teachers/students teach/learn in a classroom environment Web application security. The goal of DVWA is to practice some of the most common web vulnerabilities through a simple and straightforward interface, with varying degrees of difficulty. Please note that this software

EditPlus Chinese cracked version
Small size, syntax highlighting, does not support code prompt function

SublimeText3 Mac version
God-level code editing software (SublimeText3)

Safe Exam Browser
Safe Exam Browser is a secure browser environment for taking online exams securely. This software turns any computer into a secure workstation. It controls access to any utility and prevents students from using unauthorized resources.

