Home >Common Problem >8 Ways to Stop Your Mouse from Auto-Scrolling in Windows 11
8 Ways to Stop Your Mouse from Auto-Scrolling in Windows 11
- 王林forward
- 2023-05-02 19:58:058765browse
Over the years, Windows has gone through many upgrades and improvements. Since Microsoft has implemented advanced implementations in recent Windows devices, people can interact with their computers more easily without stress.
However, implementing these features may cause some problems with computer productivity. In addition, Windows 11’s automatic mouse scrolling is also one of the issues complained by users.
Mouse autoscrolling in Windows 11 works without user intervention. However, it can be annoying to see your computer doing things you didn't allow it to do in the first place. Therefore, it may cause Windows 10/11 to automatically scroll down and Windows will automatically scroll to the most important issues.
Many things can cause this problem. However, the situation may vary on different Windows computers. Some are mouse connection issues, update or driver issues, and more.
Luckily, this article will discuss the causes of the mouse auto-scroll issue in Windows 11 and some of the fixes you can use to resolve it.
Why does my mouse scroll automatically?
- Mouse connection issues: If you have problems with your computer and mouse, many things can go wrong regardless of the connection mode. Some mice use a wireless connection, while others connect via a USB cable. However, there may be issues with the connection. Therefore, it affects the functionality of the mouse on the computer and may cause the mouse to scroll on its own Windows 11.
- Battery Problems of Wireless Mouse:When there is a problem with the battery, the wireless mouse is prone to problems and malfunctions. Sometimes, using a faulty battery to power your mouse can cause parts of the mouse to go out of range.
- Low Mouse Battery: If the mouse is not charged properly, users may encounter some issues. Likewise, not charging your wireless mouse properly before using it can affect battery life and cause premature damage.
- Outdated Windows: Most users ignore the number of difficulties that outdated Windows can cause on their computers. It affects how your computer components work and may cause your Windows 11 mouse to automatically scroll. Windows releases updates and patches to fix bugs that affected previous versions on your computer. Therefore, if the system is not up to date, it will lack necessary updates.
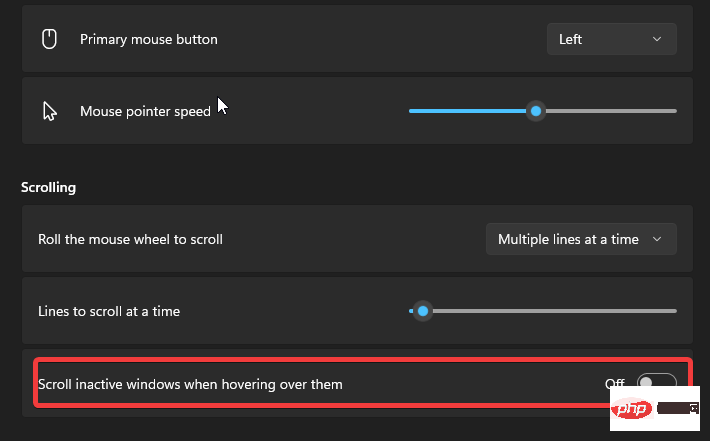
- Auto-scroll allowed in settings: Users may experience issues with mouse auto-scrolling in Windows 11 if certain features are turned on in the device's settings. Features like scrolling inactive windows when I hover over them automatically allow the mouse to perform actions without your intervention.
- Mouse problem: The mousemay have several problems that users are not aware of. However, when your mouse is dropped, it can damage its parts and cause some problems.
How to prevent the mouse from automatically scrolling?
1. Unplug and plug in the mouse
Unplugging the mouse from the connected USB port will help it refresh and rest. However, you can plug it back into a different USB port after a few seconds. It should help resolve any connection issues with your mouse.
2. Update the mouse driver
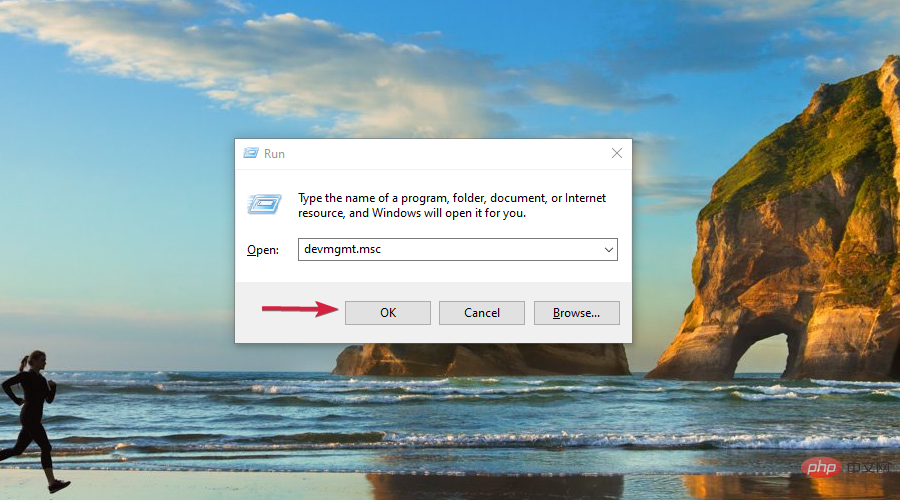
- First, press at the same time to open the run command window. WindowsR
- Then, in the window that opens, enter: devmgmt.msc and press OK.

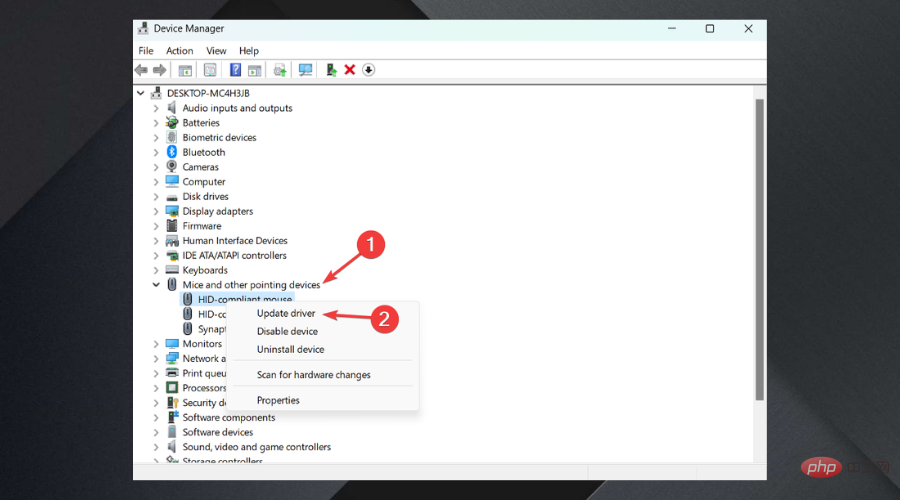
- Now find Mouses and other pointing devices, expand it, find your mouse, right click on it and click Update Driver.

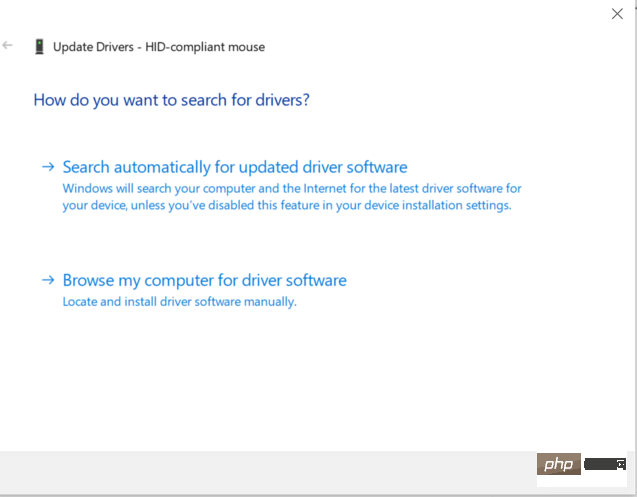
- Click Search automatically for updated driver software and let Windows do the rest for you.

Otherwise, you can use specialized software to save you time and get the job done on your behalf.
In most cases, the system does not properly update universal drivers for PC hardware and peripherals. There are key differences between generic drivers and manufacturer drivers. Searching for the correct driver version for each hardware component can become tedious. That's why Auto Assistant helps you find and update your system with the right drivers every time, and we highly recommend DriverFix. How to do it:
- Download and install DriverFix.
- Start the software.
- Waiting for all faulty drivers to be detected.
- DriverFix will now show you all the problematic drivers, you just need to select the one you want to fix.
- Wait for the application to download and install the latest drivers.
- RestartPC for the changes to take effect.
If you're having issues with the mouse itself and can't seem to update the driver, we highly recommend you also check out our tutorial on how to install a mouse driver without a mouse.
3. Disconnect and reconnect the mouse (for wireless connection)
- Click Start on your computer and select Settings from the drop-down list.
- Select Devices and click Bluetooth & other devices.

- Go to Paired Device and click on the mouse name.
- Click Forget Device and then OK.
- Close the settings window.
- Repeat steps 1 and 2.
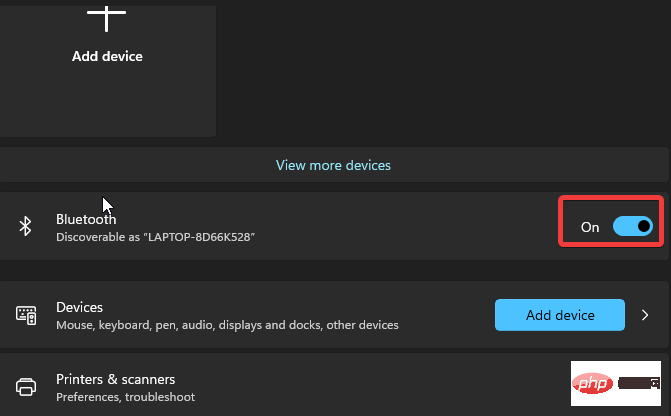
- Go to Bluetooth and switch it to On.

- Then click the button to add the device.
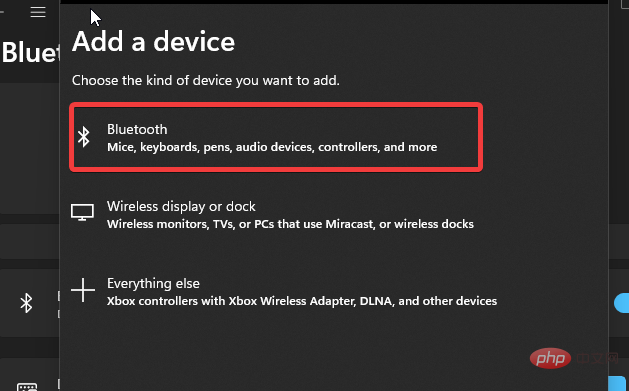
- SelectBluetooth in the add device window.

- Hold down the pairing button on your mouse.
- Select Mouse from the discovered devices and click Connect.
Disconnecting the mouse will help resolve wireless mouse connection issues.
4. Restart your computer
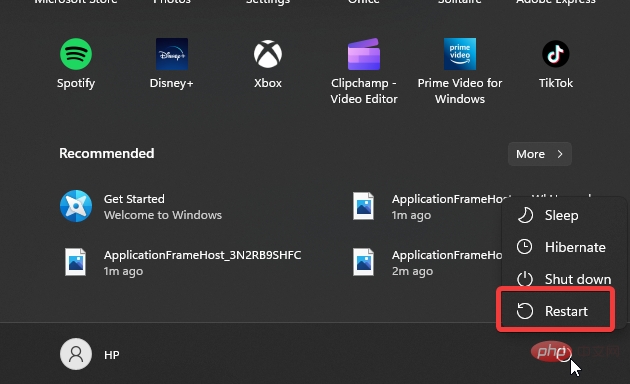
- Click to start.
- Select Power and click Restart.

- Click OK.
Restarting your computer will help resolve issues that may prompt the mouse not responding to clicks or the laptop automatically scrolling down.
5. Update Windows
- Click to start.
- Select Settings from the options.
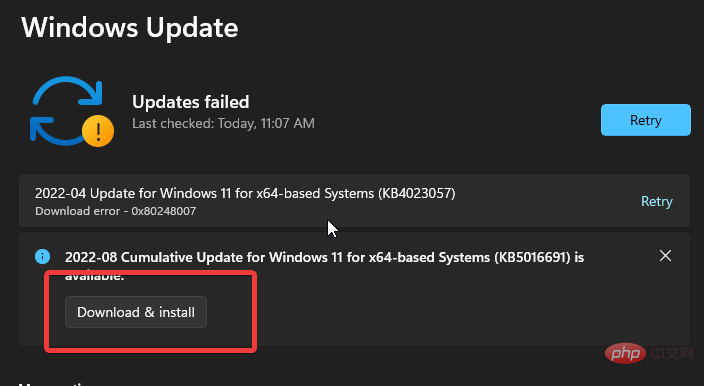
- Click Windows Update and select Check for updates.

If an update is available, Windows will automatically search for and download it.
6. Change the mouse settings on your computer
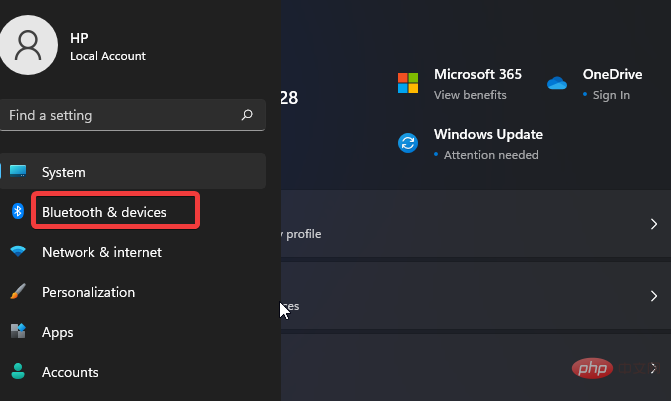
- Click Start on the screen and select Settings.
- Click Bluetooth and Devices and select your mouse on the left side of the screen.
-
Close scrolling inactive windows when I hover over them .

Restart your computer and see if the Windows 11 mouse auto-scrolling issue persists.
7. Switch to another mouse
Switching to another mouse can help you find exactly where the problem is. Get a mouse that works perfectly and connect it to your computer (wireless or plugged in).
If the laptop auto-scroll down/up issue does not persist, then you should replace your mouse. Again, if the problem persists, the problem is with your computer.
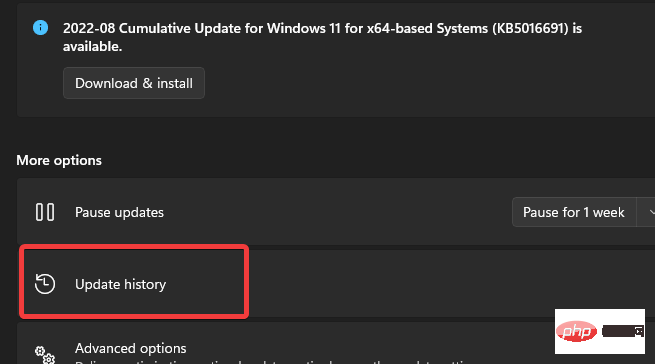
8. Uninstall recent updates
- Click Start on the screen, select Settings, or press Windows I .
- Click Windows Update and select Update History.

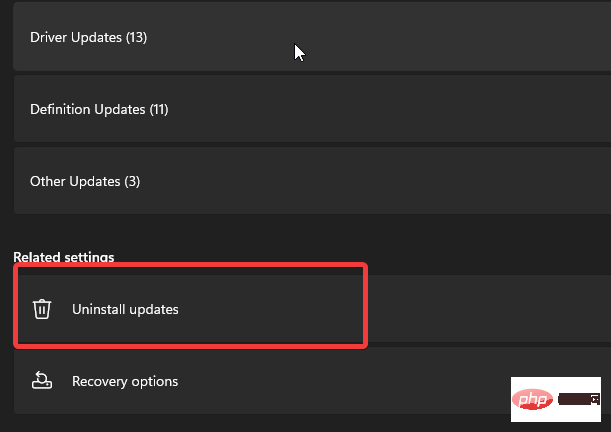
- Go to Related settings and select Uninstall updates.

- Right-click Update and select Uninstall.
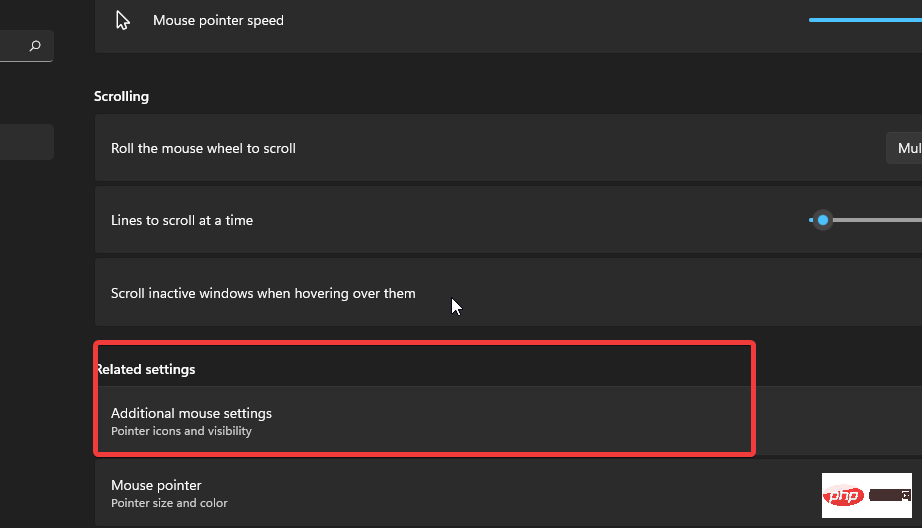
How to open mouse properties in Windows 11?
- Press Windows I to open Settings.
- Click on the device.
- Select Mouse from the left pane.
- Click Other Mouse Settings.

or
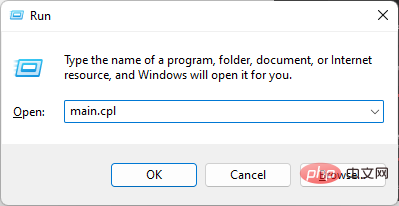
- Press Windows R key Prompt to run the window.
- Type main.cpl in the search box and press Enter.

It will open Properties.
However, you can read about other difficulties people have with using their mouse here, as well as tutorials for solving them. Mouse keeps clicking Windows 10/11 - this is one of the issues complained by users and our article should help.
Also, you can check out this article to effectively fix lagging mouse in Windows 10/11.
The above is the detailed content of 8 Ways to Stop Your Mouse from Auto-Scrolling in Windows 11. For more information, please follow other related articles on the PHP Chinese website!


