Home >Common Problem >How to check which application is currently using your webcam in Windows 11/10
How to check which application is currently using your webcam in Windows 11/10
- WBOYWBOYWBOYWBOYWBOYWBOYWBOYWBOYWBOYWBOYWBOYWBOYWBforward
- 2023-04-30 20:10:046015browse
We have recently observed many Windows users complaining that their webcams are not working properly, or to be more precise, their webcams are not working with a specific application. We thought about it a lot and found that for most users the webcam is not an issue and works fine, instead the webcam is used by other applications on the Windows system.
Once the user closes/ends the application on the system that is using the webcam, it releases the webcam device and then any other application can use it. But first, the user must know which app webcam is currently in use.
If you also want to check which application is currently your webcam, then we have provided 2 methods that can help users do it in this article.
Method 1 – Using the Settings App
Step 1: First, you should open "## by pressing the Windows I keys simultaneously on your keyboard ##Settings" application.
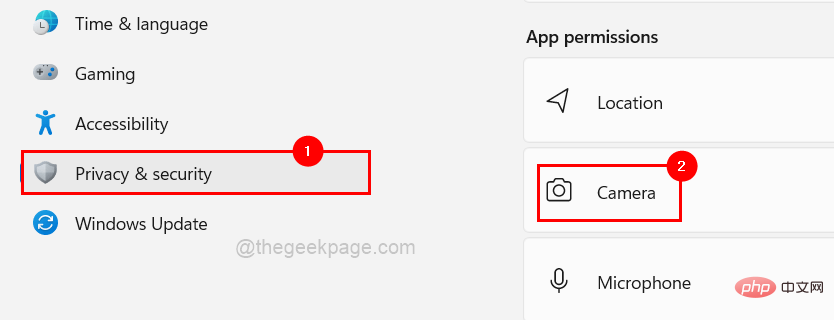
Step 2: Click the "Privacy & Security" option in the left menu of the Settings app.
Step 3: Then on the right side, scroll down the page and select theCamera option under the App permissions section at the bottom as shown in the screenshot below shown.
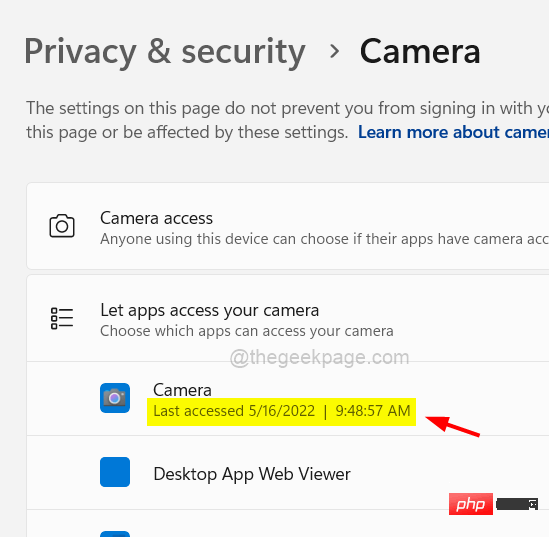
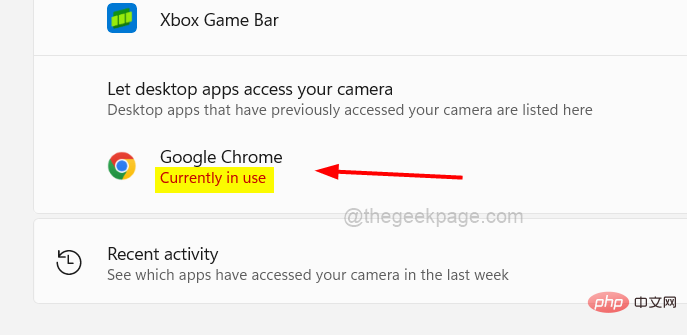
Let apps access your camera section you will see Last Accessed Camera time, as shown below.

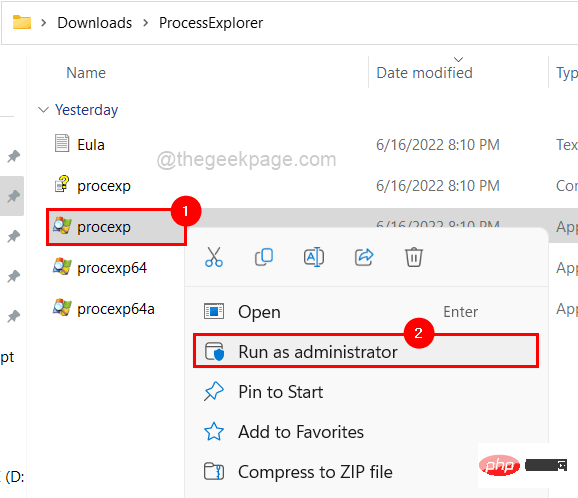
right-click on the procexpapp program and select Run as administrator from the context menu ,As follows.
Step 4: Continue to accept the on-screen UAC prompt by clicking Yes.
Step 5: Now the Process Explorer window opens. Step 6: To find out the process on the system that is using the webcam, we need to find the device name of the webcam. Step 7: To do this, first open theDevice Management by pressing the Windows X keys simultaneously window, and then press the M key on your keyboard. Step 8: Once the Device Manager window opens,
double-click theCamera option in the device list. Step 9: Then
double-click theIntegrated Camera to open its properties window.
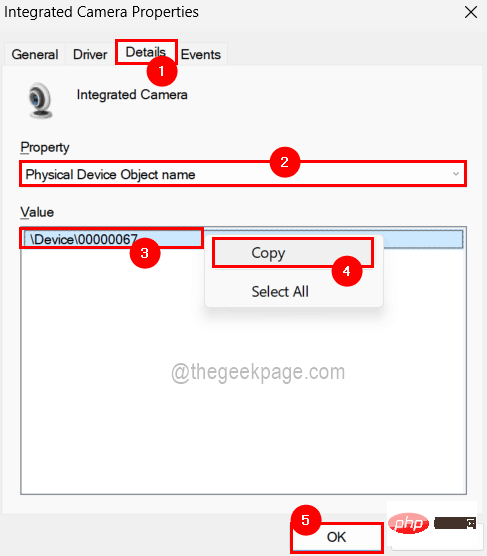
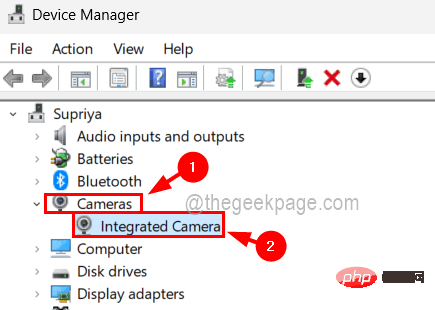 Step 10: Once the Properties window opens, you need to click on the
Properties drop-down menu Select the physical device object name. Step 11: Once you select an attribute, the value will populate in the "
Value" section below it.Step 12: Now
right clickon the value and click Copy from the context menu and save it to notepad or any other In the editor application, as shown below. Step 13: After that, click "
OK" or "Cancel" to close the "Properties" window and then close the "Device Manager" window.
 Step 14: Now return to the Process Explorer window.
Step 15: Now press the CTRL SHIFT F keys simultaneously on the keyboard.
Step 16: Copy the value of the physical device object name that we got from the device manager and paste it into the search box as shown below.
Step 17: After pasting, click on the Search button and start searching for processes using this device (webcam) on your system as shown below.
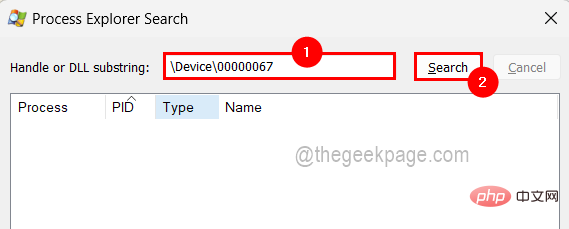
#Step 18: After the search is completed, the processes that are using the device are displayed.
Step 19: Just click on the process and it will lead you to the main Process Explorer window where the process is located.
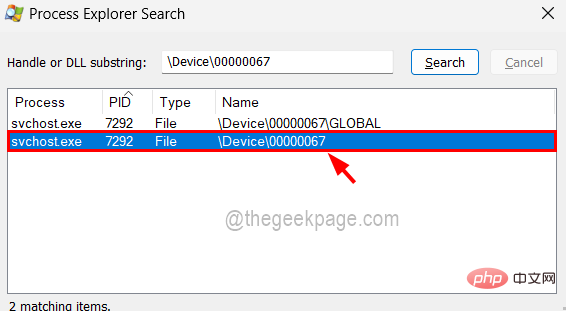
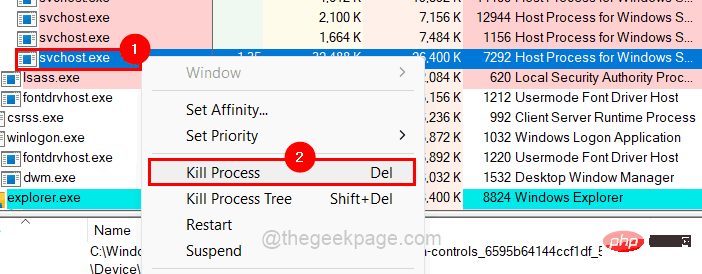
Step 20: If you want to terminate the process, right-click the process and select# from the context menu ##"Terminate process", as shown in the figure below.
The above is the detailed content of How to check which application is currently using your webcam in Windows 11/10. For more information, please follow other related articles on the PHP Chinese website!

