 Backend Development
 Python Tutorial
 How to use Python to connect to OpenAi API to implement intelligent QQ robot
TheseSDK can not only be used to develop robots, but can also be used to freely develop the effects you want. As you think, it is a toolkit , help you chuanchuan build a ChatGPT service and session.
Recently OpenAi has installed a CDN service of Cloudflare on him. This service will intercept non-real machine requests. It's now crackable.

Looking for a suitable reverse SDK

The original author used this.

There are not many files in the whole package. If you like Python, you can check it out. I don’t understand Java. .
Practice Begins - Practice Chapter 1
The revChatGPT used in the code relies on the source code library:
https://github.com/acheong08/ChatGPT
Our Python version requires >=3.8, and then pip directly upgrade to the latest version.
The purpose of the following code is to interact with the official interface of ChatGPT. Please pay attention to installing the dependencies used in it
chat-gpt-qbot.py:
import flask, json
from flask import request
from revChatGPT.revChatGPT import Chatbot
config = {
    "session_token": "换成你自己的token"
}
# 创建一个服务,把当前这个python文件当做一个服务
server = flask.Flask(__name__)
chatbot = Chatbot(config, conversation_id=None)
def chat(msg):
    message = chatbot.get_chat_response(msg)['message']
    print(message)
    return message
@server.route('/chat', methods=['post'])
def chatapi():
    requestJson = request.get_data()
    if requestJson is None or requestJson == "" or requestJson == {}:
        resu = {'code': 1, 'msg': '请求内容不能为空'}
        return json.dumps(resu, ensure_ascii=False)
    data = json.loads(requestJson)
    print(data)
    try:
        msg = chat(data['msg'])
    except Exception as error:
        print("接口报错")
        resu = {'code': 1, 'msg': '请求异常: ' + str(error)}
        return json.dumps(resu, ensure_ascii=False)
    else:
        resu = {'code': 0, 'data': msg}
        return json.dumps(resu, ensure_ascii=False)
if __name__ == '__main__':
server.run(port=7777, host='0.0.0.0') 
We import our reverse package.
from revChatGPT.revChatGPT import Chatbot

This is the source code in the reverse package, which is used to initialize a service. We just called this package in the class.

Then create an interface that throws this service so that it can be easily called.
We only need to run the above code to interact directly with ChatGPT on port 7777.
We use the interface tool to test it. The results are as shown below. You can see that the interface works normally and the conversation results are obtained from ChatGPT.

The message body:
{"msg": "你会数学吗"}The message body is our customized content. You can add fields by yourself to extend the function of the interface
This example The msg in is the content of our speech
and the interface returns:
{ "code": 0, "data": "是的,我会数学。我是一个大型语言模型,我可以回答各种问题,包括数学问题。你有什么数学问题需要我帮助你解决吗?"} This is also defined by ourselves. When code=0, it means ChatGPT The interaction is successful. At this time, data is the conversation content fed back to us by ChatGPT. When code=1, it means an error occurred. There is no data, but the error message is returned in msg.
At this point we have an interface that can interact with ChatGPT. Through this interface, we can have a conversation with ChatGPT
Since we have a conversation, we need With an input box and a button, you can make a web page to call this interface. This is very simple, so we won’t go into details here.
What we really want to do is a QQ robot. The principle is to let the QQ robot listen to the message, forward the message to ChatGPT through our interface, and then send the conversation content returned by ChatGPT to the QQ user. Such a robot that can talk is ready. The specific method will be explained below.
Practice continues - Practice Part 2
Above we implemented an interface and successfully obtained the ChatGPT conversation content using code. Next we will continue to improve the QQ robot related logic. Pay attention to the comments in the code.

In order to more conveniently compare the optimized code (connected to QQ robot) with the previous code, I opened a local comparison and The code that has not changed has been put away.


You may not understand the robot interaction implementation logic, because we are using a robot framework. In fact, we should not limit our thinking. We can try to modify and use other robot frameworks ourselves, such as Yunzai Robot. Implement the logic yourself.
We are using go-cqhttp.
go-cqhttp Help Center
So, you have to understand this change go-cqhttp before you can understand it, but we need to learn flexibly. We just need to understand the idea, and then go to the official documentation to find how to use it.
At this point, these codes already have the functions of processing friend requests, group requests, and replying to messages.
As you can see, compared to the previous article, we have added a lot of code and added comments
Of course, it doesn’t matter if you don’t understand these codes, you can follow mine Change the corresponding part of the article and use it directly.
Everyone come to the original author Q group to play, I am also in it: 206867743.
Practice continues - Practice Part 3
In the first two articles, we have solved the problem of communicating with ChatGPT and the problem of QQ processing messages. Now we need to deal with how to monitor QQ News.
In the updates and problems encountered, the original author and many authors of the reverse package have updated a lot of content. Let’s take a look at the update record of the original author:
2022-12-12 23:52 Add a Windows-specific version, which can only be used on Windows computers or servers, and can automatically obtain cloudflare Cookie 2022-12-12 12:38 Update contentAdd CloudFlare Configuration, update dependencies, account passwords are not supported for the time being. I don’t know how often the CloudFlare configuration needs to be changed. Now it seems that I have to circumvent the firewall 2022-12-10 17:42 Update content adds account password support, you can not use tokens , directly use the account password 2022-12-10 00:23 The updated content distinguishes each QQ private chat, and each person's private chat robot is an independent session. Differentiates each QQ group, and each QQ group is an independent session. Increase the word limit for replies. If the limit exceeds the limit, it will be converted into a picture reply (see configuration file). If you want to reset the session, send the robot: Reset session
Introduction
Listen to QQ messages and We don’t need to write code, because there are already many open source QQ robot frameworks on the market. Here we use go-cqhttp
Official documentation: go-cqhttp
If you are interested, you can read the official documentation , if you don’t want to read it, just read my article directly.
Prerequisites You need to prepare a QQ account. Do not use your own large account. You need to prepare an OpenAi account to obtain a Token server (optional, if you want the robot to be online 24/7, please Prepare one, 1 core and 1G is enough, external server is best)
Note: There are a bunch of videos on the registration method of OpenAi (ChatGPT) at Station B, just refer to any one.
If you don’t know how to register, you can also read the article on my blog: One article teaches you how to quickly register OpenAi (ChatGPT)
(old version) I also wrote a tutorial on how to build a robot: use OpenGPT (ChatGPT) builds QQ robot
But! Note, as mentioned before, the current ChatGPT is equipped with a CF's CDN, which will intercept human-computer interaction requests.

Now, in addition to getting the session-token of OpenAi, we also need to get cf_clearance .
At the same time, we also need to obtain user-agent.

Go to the network tab of the console and check it. If it is blank, just send a message.
Copy and write it into the configuration file, which is the py/config.js file.
Currently the original author has packaged two versions, one for Linux. The trouble is that the CDN interaction token of cf will expire within 2H , we need to obtain and update manually, which is troublesome.
The other is the window version, which has automatically obtained CloudflareCookie.
Configuration Guide

This version can only be used on Windows, any Windows computer or server will work.
Still only supports token.
The system will automatically open Google Chrome to obtain Cloufflare related cookies. Manual verification may be required when running for the first time, so please click carefully.
Note that the script can only open Google Chrome and does not configure other browsers.
Other description
In the author’s latest version of the code, some new functions have also been added.

Do your own research.
Then many reverse package authors are also thinking of a perfect solution, let’s wait slowly!

Then, please look at this sentence:

The above is the detailed content of How to use Python to connect to OpenAi API to implement intelligent QQ robot. For more information, please follow other related articles on the PHP Chinese website!
 得益于OpenAI技术,微软必应的搜索流量超过谷歌Mar 31, 2023 pm 10:38 PM
截至3月20日的数据显示,自微软2月7日推出其人工智能版本以来,必应搜索引擎的页面访问量增加了15.8%,而Alphabet旗下的谷歌搜索引擎则下降了近1%。 3月23日消息,外媒报道称,分析公司Similarweb的数据显示,在整合了OpenAI的技术后,微软旗下的必应在页面访问量方面实现了更多的增长。截至3月20日的数据显示,自微软2月7日推出其人工智能版本以来,必应搜索引擎的页面访问量增加了15.8%,而Alphabet旗下的谷歌搜索引擎则下降了近1%。这些数据是微软在与谷歌争夺生
 ChatGPT出现隐私漏洞,可能泄露用户和聊天机器人的对话标题Apr 07, 2023 pm 11:21 PM
Reddit和Twitter上的用户从3月20日开始报告了ChatGPT的一个漏洞,并发布了一些屏幕截图,显示他们的ChatGPT网页历史记录中包含他们不熟悉的对话标题。虽然以这种方式似乎无法访问共享聊天内容,但OpenAI公司在关闭该漏洞时完全删除了聊天历史记录。根据行业媒体的报道,ChatGPT在当天还出现了重大中断,那些可以访问的用户注意到提供了不一致的服务。OpenAI公司在其状态页面上记录了中断情况,并在最初报告的几个小时内恢复了服务。OpenAI公司的首席执行官 Sam Altman
 LLM之战,谷歌输了!越来越多顶尖研究员跳槽OpenAIApr 07, 2023 pm 05:48 PM
前几天,谷歌差点遭遇一场公关危机,Bert一作、已跳槽OpenAI的前员工Jacob Devlin曝出,Bard竟是用ChatGPT的数据训练的。随后,谷歌火速否认。而这场争议,也牵出了一场大讨论:为什么越来越多Google顶尖研究员跳槽OpenAI?这场LLM战役它还能打赢吗?知友回复莱斯大学博士、知友「一堆废纸」表示,其实谷歌和OpenAI的差距,是数据的差距。「OpenAI对LLM有强大的执念,这是Google这类公司完全比不上的。当然人的差距只是一个方面,数据的差距以及对待数据的态度才
 CIO分享:企业IT应谨慎使用生成式AI向前发展Apr 11, 2023 pm 03:49 PM
Vince Kellen是美国加州大学圣地亚哥分校(UCSD)的首席信息官,他深知ChatGPT、DALL-E和其他生成式AI技术有据可查的局限性:生成的答案可能并不真实,生成的图像也可能缺乏完整性,输出可能存在偏差。但无论如何他都在向前推进,他表示,员工们已经在使用ChatGPT来编写代码和工作内容描述了。OpenAI的文本生成技术ChatGPT以及图像生成技术DALL-E在一系列吸引了公众想象力的大型语言模型(也称为生成语言模型或者生成式AI)中是最突出的,这些模型响应书面请求以生成从文本文
 美媒担忧:ChatGPT们生成的摘要足够好,读者不来看新闻怎么办Apr 08, 2023 pm 11:31 PM
据报道,美国新闻行业正将AI聊天机器人视为一种新的生存威胁。他们担心人们会认为聊天机器人提供的文章摘要已经足够好,从而不再访问他们的网站,致使读者和广告商流失。然而,也有媒体高管认为,尽管存在潜在的威胁,但也有机会。他们正试图在行业变革中领先一步,以适应读者获取信息方式的演变。以下是翻译内容当你向微软Bing聊天机器人询问美国前总统唐纳德·特朗普(Donald Trump)是否被起诉时,它的回答会让传媒高管们感到害怕。机器人给出的三句摘要似乎很有用,它不仅提供了CNN、华盛顿邮报等新闻媒体的链
 ChatGPT技术国产化尝试Apr 08, 2023 am 11:31 AM
本次分享题目为 ChatGPT 技术、国产化尝试和开源模型。分享包含三大部分的内容,第一部分总体介绍 ChatGPT 相关的技术:ChatGPT 技术的演进、目前存在什么样的问题、ChatGPT 技术学习的三个阶段、数据组织和效果评估;第二部分分享我们在 ChatGPT 技术国产化方面进行的尝试,包含实验过程中我们遇到的问题、进行的思考以及模型的效果和应用;第三部分介绍我们已经发布的中文开源大模型,使用自有数据训练出本地模型如何进行操作,在实验过程中可能遇到的问题,和开源的先进模型相比存在的差距
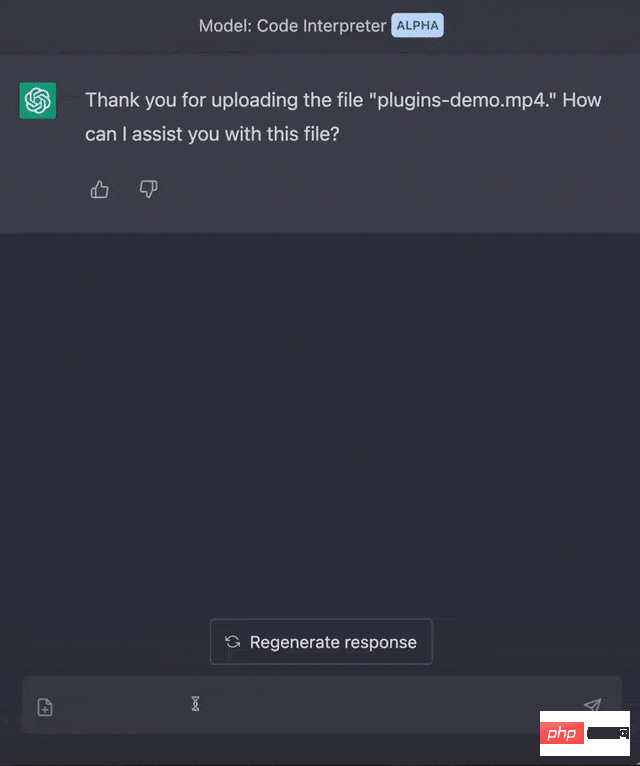
 用ChatGPT秒建大模型!OpenAI全新插件杀疯了,接入代码解释器一键getApr 04, 2023 am 11:30 AM
ChatGPT可以联网后,OpenAI还火速介绍了一款代码生成器,在这个插件的加持下,ChatGPT甚至可以自己生成机器学习模型了。 上周五,OpenAI刚刚宣布了惊爆的消息,ChatGPT可以联网,接入第三方插件了!而除了第三方插件,OpenAI也介绍了一款自家的插件「代码解释器」,并给出了几个特别的用例:解决定量和定性的数学问题;进行数据分析和可视化;快速转换文件格式。此外,Greg Brockman演示了ChatGPT还可以对上传视频文件进行处理。而一位叫Andrew Mayne的畅销作
 GPT-4掀起新一轮AI风暴,被围堵的文心一言能否一战?Apr 11, 2023 pm 05:43 PM
将文心一言发布时间定在3月16日的百度,没能预料到会遭到来自OpenAI、谷歌、微软的轮番轰炸:先是3月15日凌晨,OpenAI发布大型多模态Transformer模型GPT-4;紧接着,宣布开放大规模语言模型PaLM的API接口,并推出面向开发者的工具MakerSuite;文心一言发布之后,巨头们也并没有歇着,3月16日晚间,微软更是发布由AI驱动的办公神器Microsoft 365 Copilot,号称让Word、PPT、Excel、OutLook、协同办公软件的生产力都飙增。文心一言对标C


Hot AI Tools

Undresser.AI Undress
AI-powered app for creating realistic nude photos

AI Clothes Remover
Online AI tool for removing clothes from photos.

Undress AI Tool
Undress images for free

Clothoff.io
AI clothes remover

AI Hentai Generator
Generate AI Hentai for free.

Hot Article

Hot Tools

Dreamweaver CS6
Visual web development tools

ZendStudio 13.5.1 Mac
Powerful PHP integrated development environment

Atom editor mac version download
The most popular open source editor

SublimeText3 Mac version
God-level code editing software (SublimeText3)

Safe Exam Browser
Safe Exam Browser is a secure browser environment for taking online exams securely. This software turns any computer into a secure workstation. It controls access to any utility and prevents students from using unauthorized resources.


