Home >Common Problem >5 ways to teach you to disable OneDrive on Windows 11!
5 ways to teach you to disable OneDrive on Windows 11!
- WBOYWBOYWBOYWBOYWBOYWBOYWBOYWBOYWBOYWBOYWBOYWBOYWBforward
- 2023-04-23 08:58:067558browse
OneDrive is a cloud storage product from Microsoft that comes bundled with Windows 11 by default. Like Microsoft Edge, bundling OneDrive has been heavily criticized by users as many are looking for ways to remove it from their PCs. If you're in the same boat and want to delete OneDrive, here's everything you need to know.
What happens when you disable OneDrive?
Disabling OneDrive has its pros and cons. Here's what happens when OneDrive is disabled on your system.
- Your files will no longer sync to the cloud
- OneDrive will not back up your data regularly
- Manual backup rules etc. will be inactive
- If you have not uninstalled the OneDrive icon from your system, it may still appear in your File Explorer.
- When you disable OneDrive, your local files are not affected.
Can you delete OneDrive on Windows 11?
Yes, you can officially remove OneDrive from Windows 11 using the uninstall option (see Option 5 below). However, this will leave remnants of OneDrive on your PC so that it can be easily restored.
If you wish to delete OneDrive permanently, you must choose a more powerful solution, such as using .bat script, CMD command, third-party uninstaller, etc. to delete it. You'll find tutorials for all of these methods in option 5 below.
How to Disable OneDrive on Windows 11: Your 5 Options
Here are all the ways to disable OneDrive on Windows 11. Depending on your preference, follow any of the sections below to temporarily or permanently disable OneDrive on your system.
FYI, out of the following five options, options 1 to 4 are about disabling OneDrive on PC and option 5 is about uninstalling it.
Option 1: Pause OneDrive sync to disable it
If you wish to temporarily disable OneDrive sync, you can pause it first. This will pause all OneDrive activities and services running in the background. This is the recommended method if you want to get rid of OneDrive temporarily.
You will be able to choose the period of time during which OneDrive will be disabled on your device. Once completed, OneDrive will automatically start syncing on your device again.
Use the tutorial below to help you through the process.
Click the OneDrive icon in the taskbar.

Select the settings in the upper right corner of  .
.
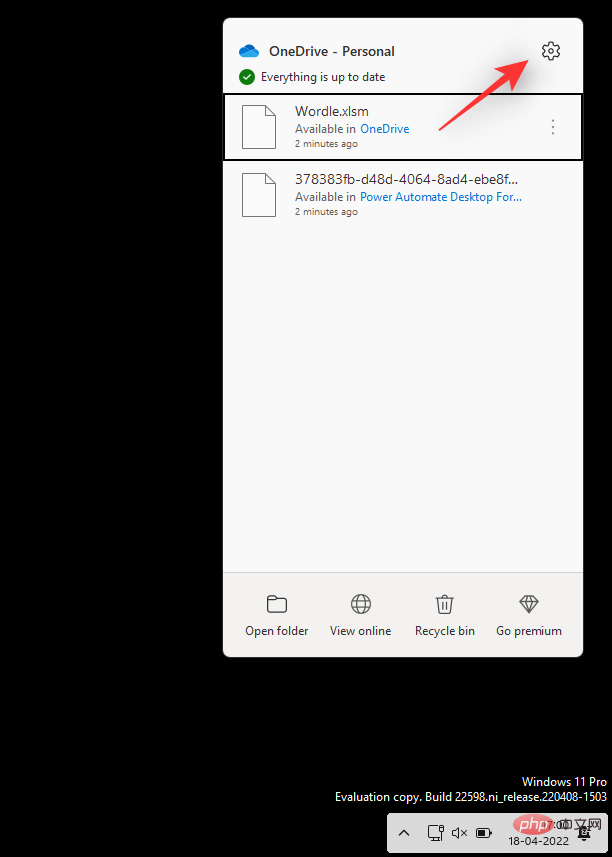
Now, click to pause synchronization.
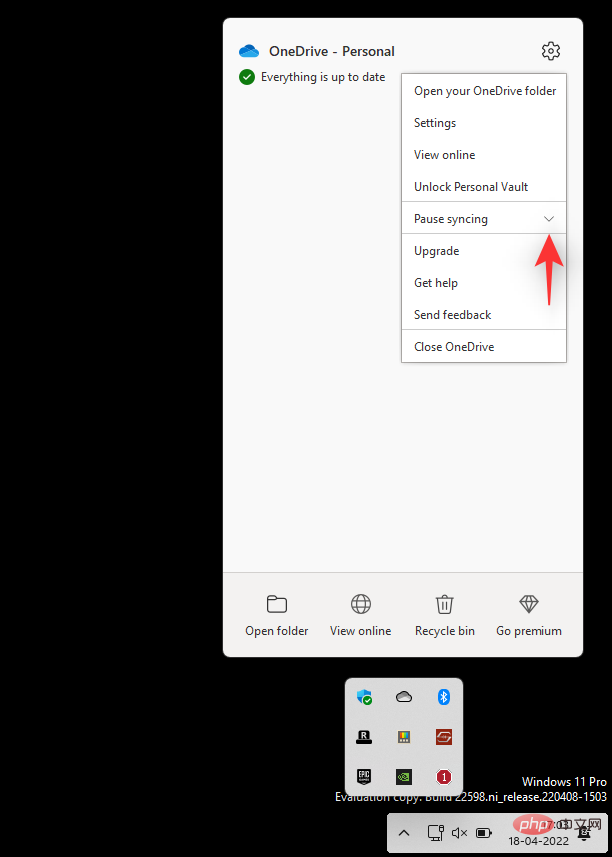
#Click the drop-down arrow and select one of the following options based on your preference.
- 2 hours
- 8 hours
- 24 hours
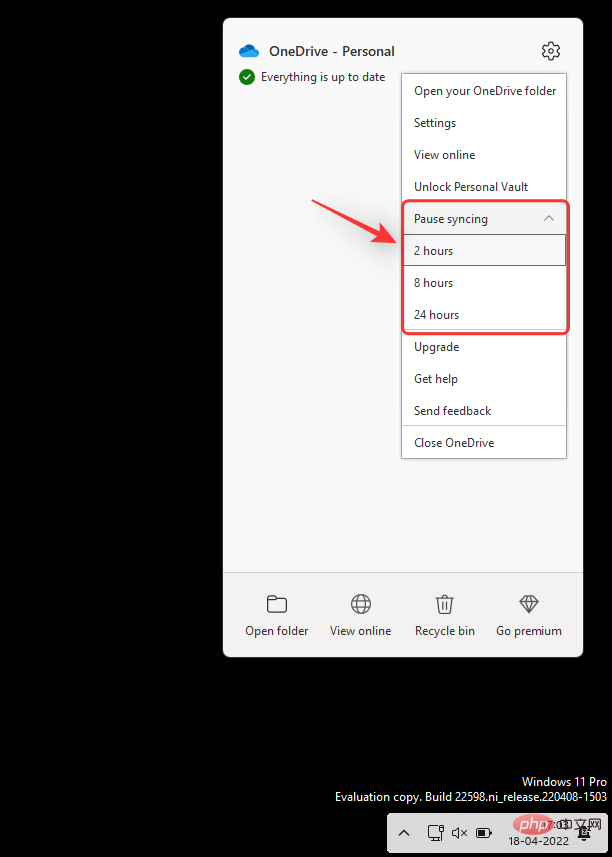
You will now be at Pause OneDrive sync on your device for the selected period of time.
Option 2: Unlink OneDrive to disable it
This option is for users who want to remove their OneDrive account from a specific PC while retaining local files. Your OneDrive account will be unlinked from your current PC, and your files will no longer sync to the cloud.
Only the OneDrive files will be deleted from your local storage, while other files will remain. Use the tutorial below to help you through the process.
Click the OneDrive icon in the taskbar.

Click the  icon in the upper right corner.

Select Settings.
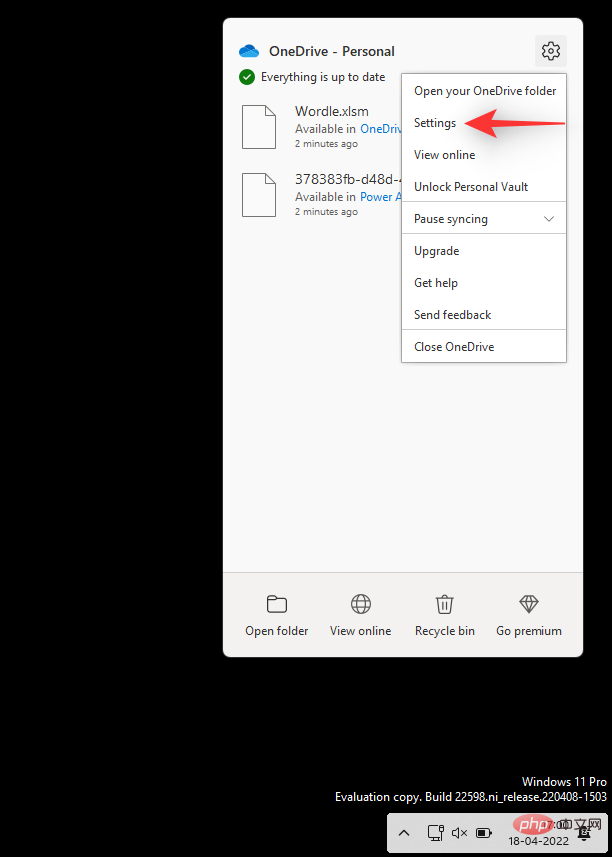
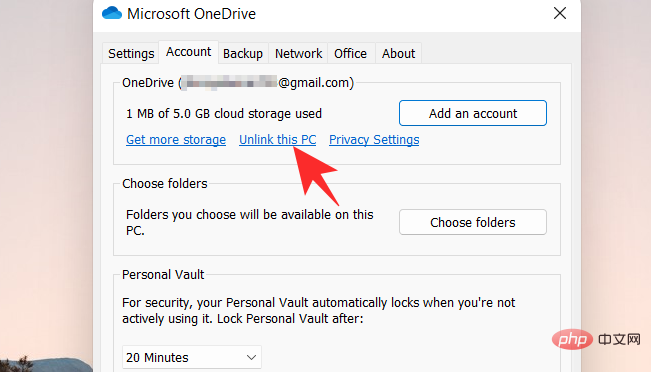
A small window will appear and by default the "Account" tab will be selected. Click under the same button to unlink this PC.
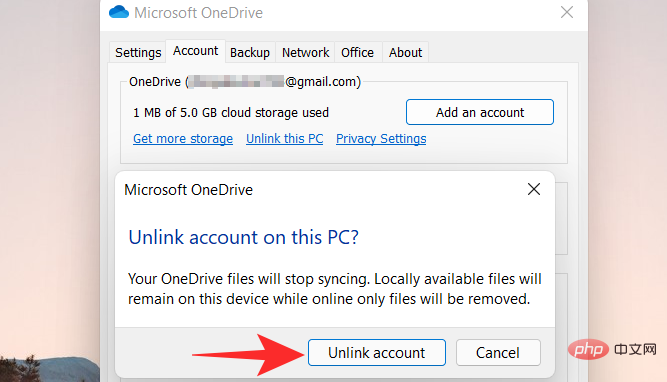
Click Unlink Account to confirm your choice.
Option 3: Prevent OneDrive from opening at startup
You can also prevent OneDrive from opening at startup to prevent it from starting automatically. This way, you can use the app only when your system needs it, without having to keep it running in the background.
This is the recommended solution if you use OneDrive occasionally and want to turn it off when not in use. Please follow the steps below to help you through the process.
Click the OneDrive cloud icon in the taskbar.

Click the  icon in the upper right corner.

Select Settings from the drop-down menu.

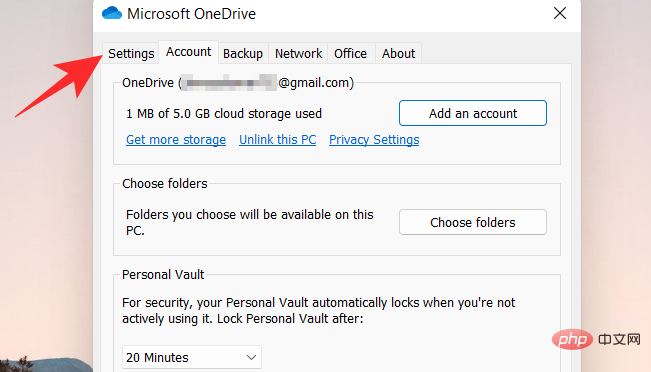
#Click and switch to the Settings tab.
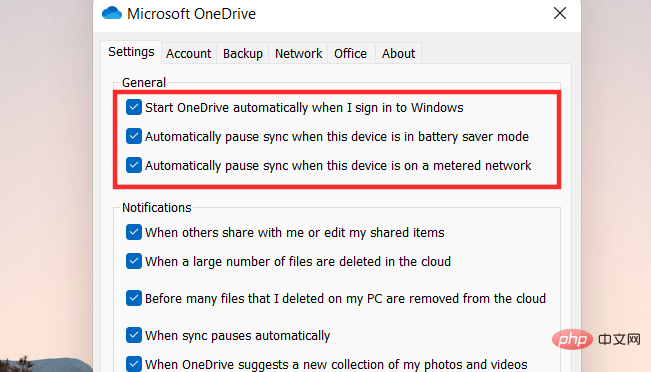
Uncheck all checkboxes under General.
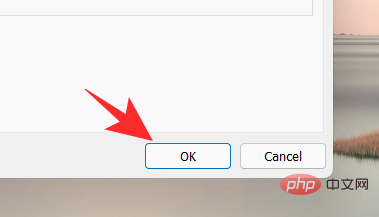
Click OK.
Option 4: Hide OneDrive on Windows 11
If you want to temporarily quit OneDrive, you can also hide it from your system. While this won't delete or disable OneDrive sync, it will remove the OneDrive list from File Explorer.
This is an ideal solution for users who want to keep their online files hidden from prying eyes while still being able to access them when needed. OneDrive will continue to work in the background as expected. Use the following steps to help you through the process.
Open File Explorer and right-click OneDrive.
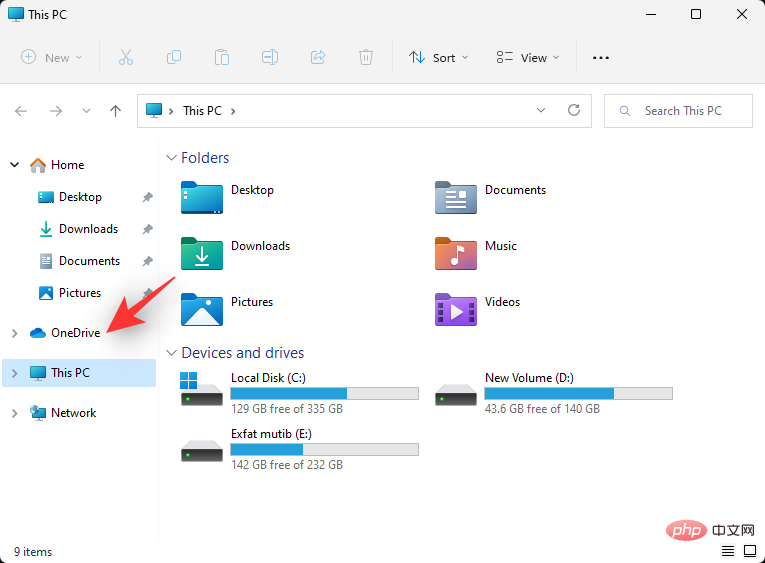
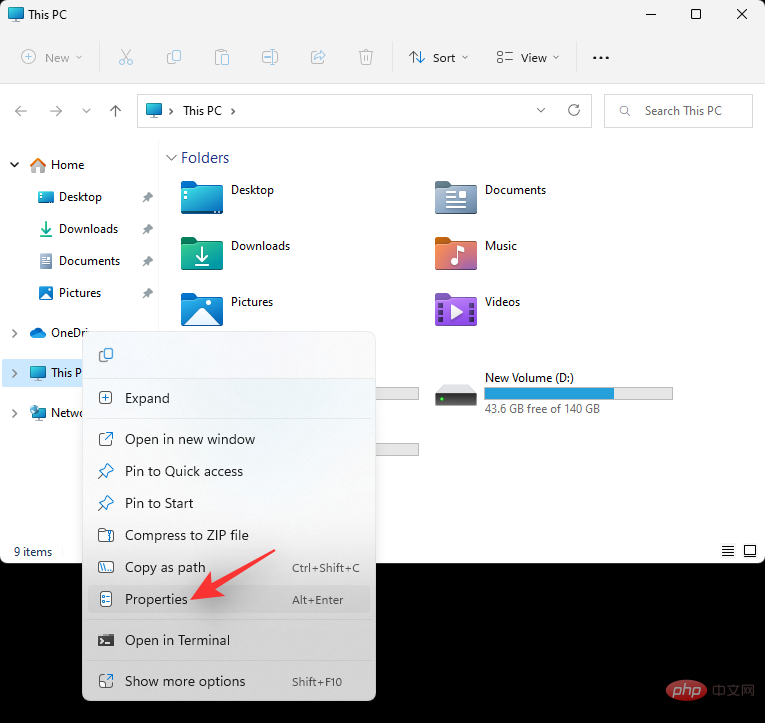
Select the attribute.
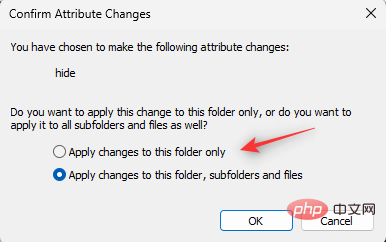
Select the hide box under properties .
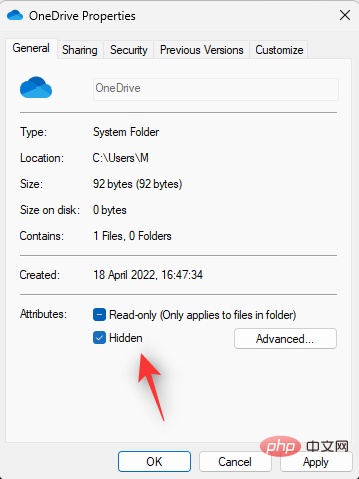
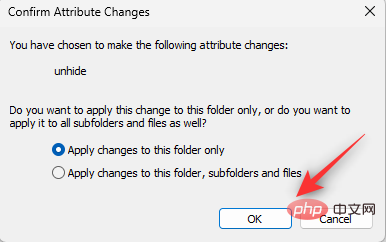
#This will hide OneDrive from File Explorer. Click OK after completion. Select to apply changes to this folder only.
Click OK.
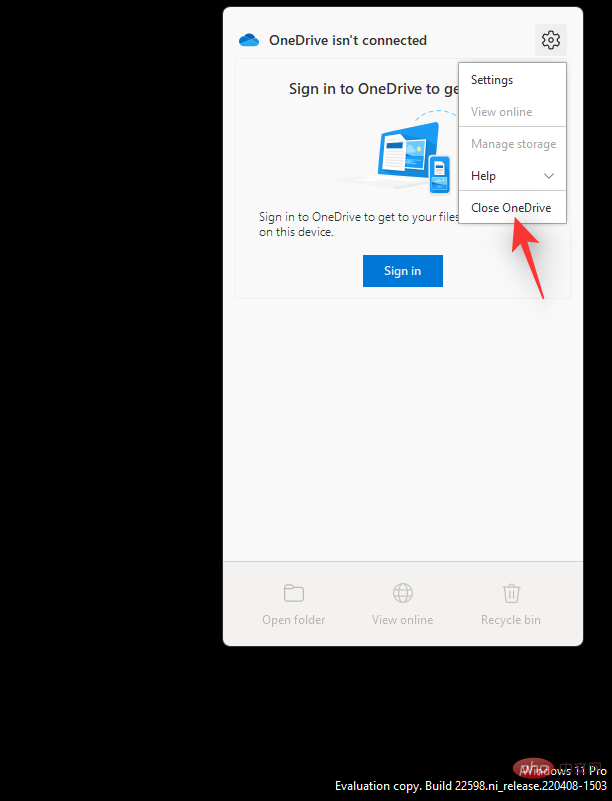
Click the OneDirve icon in the taskbar and select the  icon.
icon.

Click to close OneDrive.
# Confirm your choice by clicking on the same.
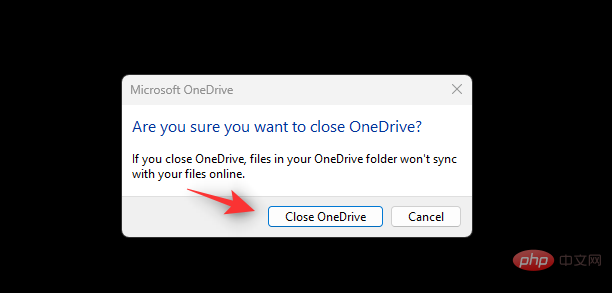
OneDrive will now exit and hide from your taskbar. We recommend you to temporarily disable it on your PC by following the tutorial above to prevent it from starting at startup.
Option 5: Uninstall OneDrive Permanently (6 Ways Explained)
If you are looking for a more permanent solution, then we recommend you to completely remove OneDrive from your system. If you want to keep some settings files and background services to make it easier to set up for other users, you can delete OneDrive using the Settings app.
However, if you wish to delete OneDrive permanently, we recommend you to use one of the other solutions mentioned below. Please follow the relevant sections below to help you through the process.
Method 1: Using the Settings app
Press Windows i Keyboard and select Apps & Features.
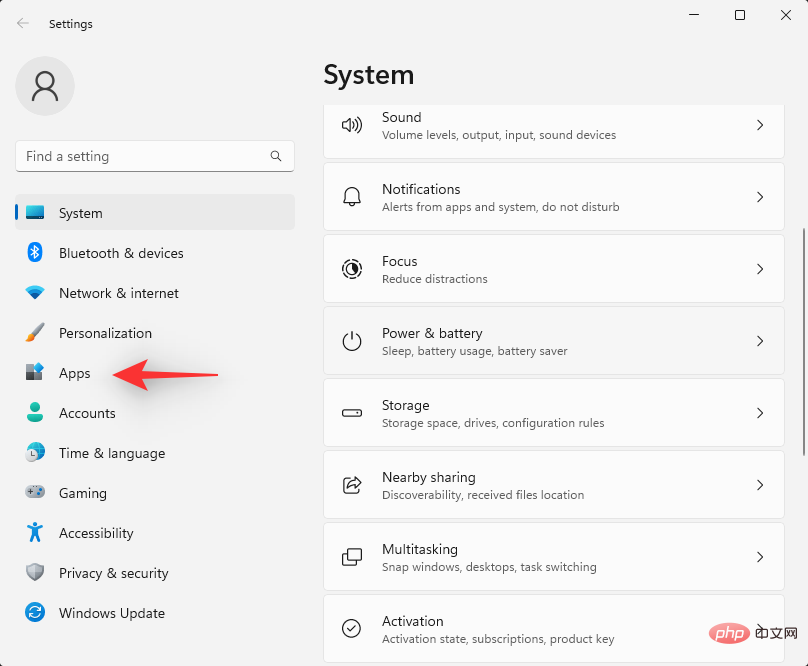
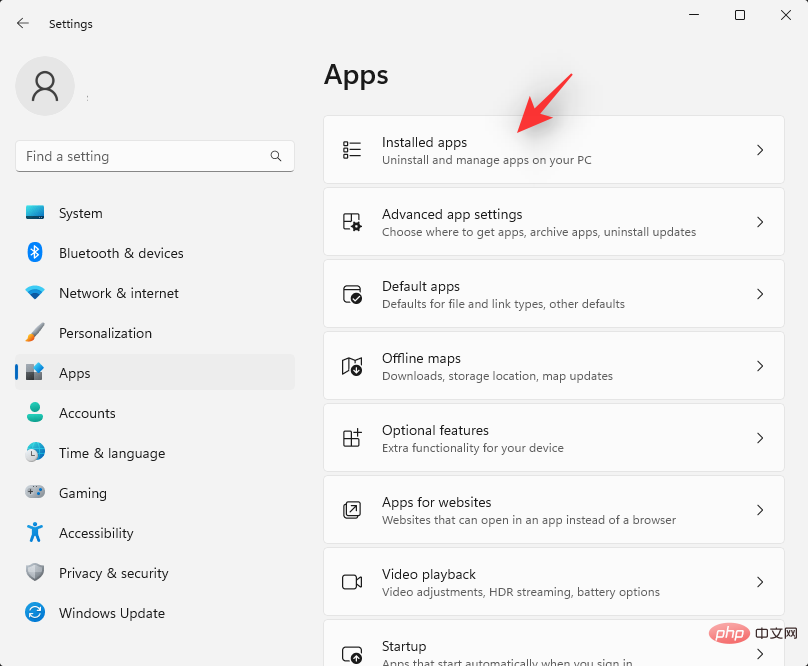
Click Installed Apps.
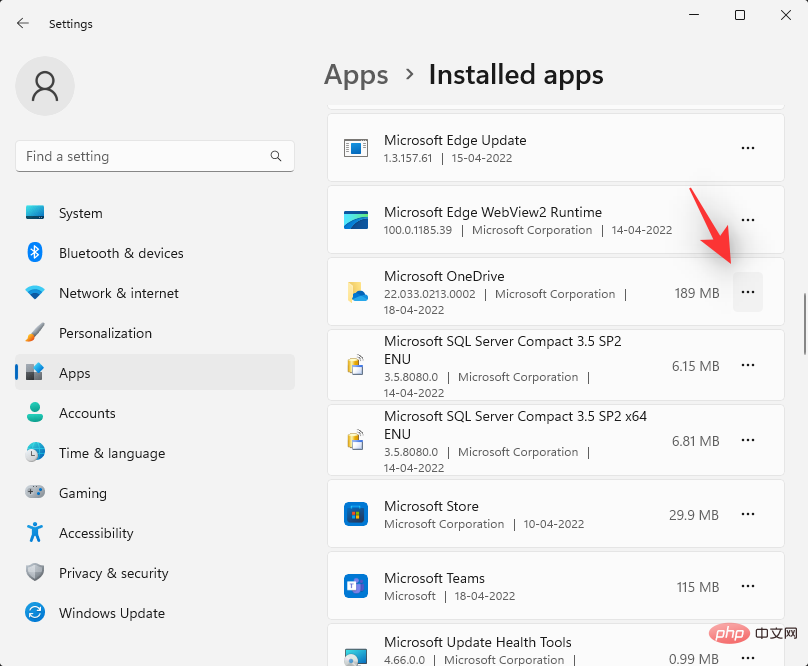
Find Microsoft OneDrive in the list and click the icon next to it.
Select Uninstall.
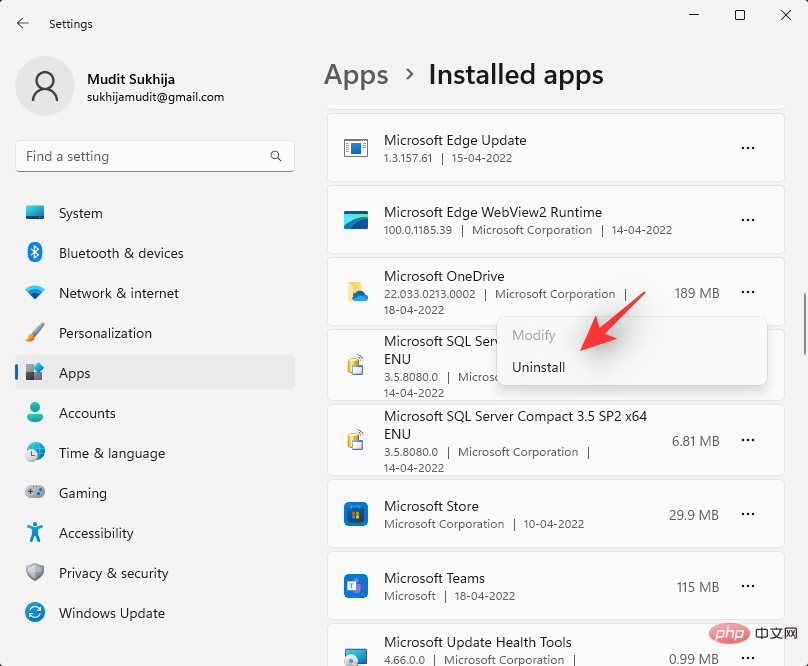
Click Uninstall again to confirm your choice.
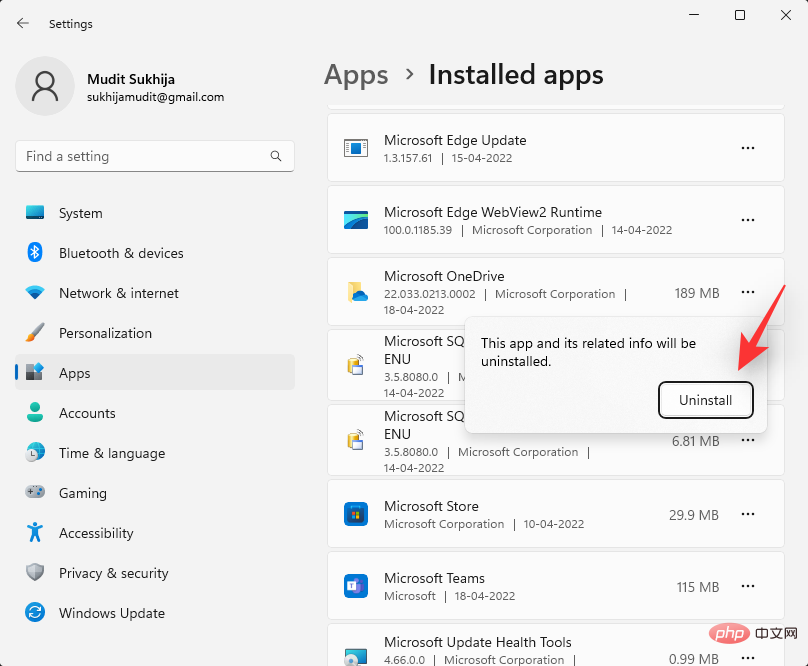
Follow the on-screen instructions to complete the process and OneDrive should now be removed from your system.
Method 2: Use Command Prompt
Command Prompt can help you delete Microsoft OneDrive more permanently. Please follow the steps below to help you through the process.
Press Windows R and enter the following. PressCtrl Shift Enterkeyboard when finished.
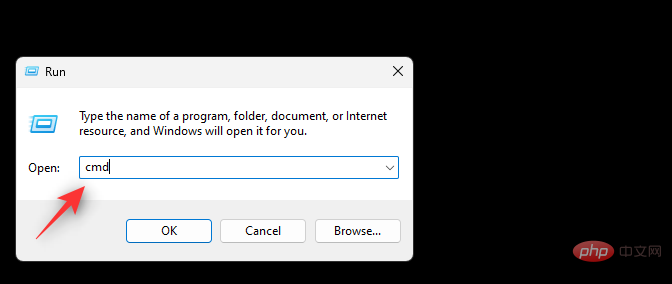
Confirm the UAC prompt and type the following commands one by one and press the Enter key on your keyboard to execute them.
For 64-bit users
%Systemroot%\SysWOW64\OneDriveSetup.exe /uninstall

For 32 User
%Systemroot%\System32\OneDriveSetup.exe /uninstall

Use the following command to close the command prompt.
exit

That’s it! You will now remove OneDrive from your PC.
Method 3: Using the Group Policy Editor
Press Windows R, enter the following, and then press Enter.
gpedit.msc
Use the left sidebar to navigate to the following path.
Computer Configuration > Administrative Templates > Windows Components > OneDrive
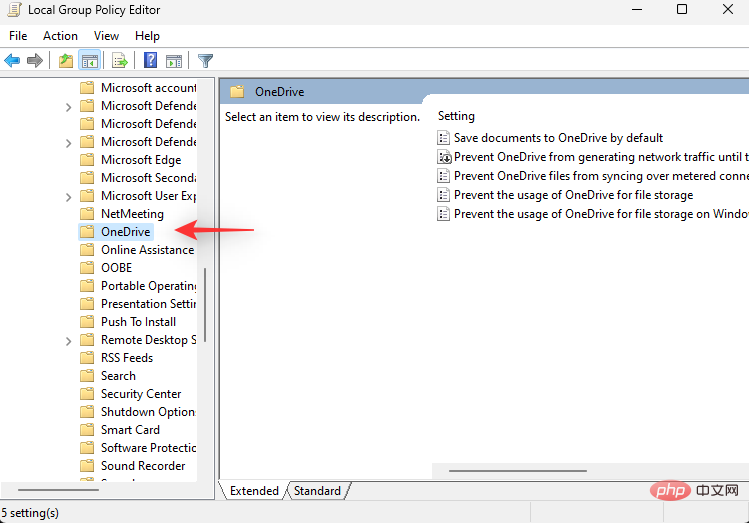
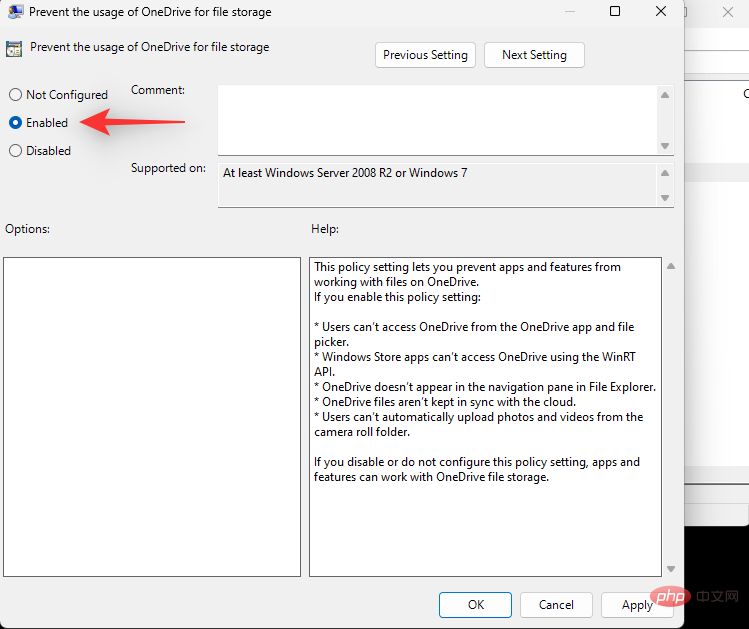
Double-click the on the right to prevent the use of OneDrive for file storage value.
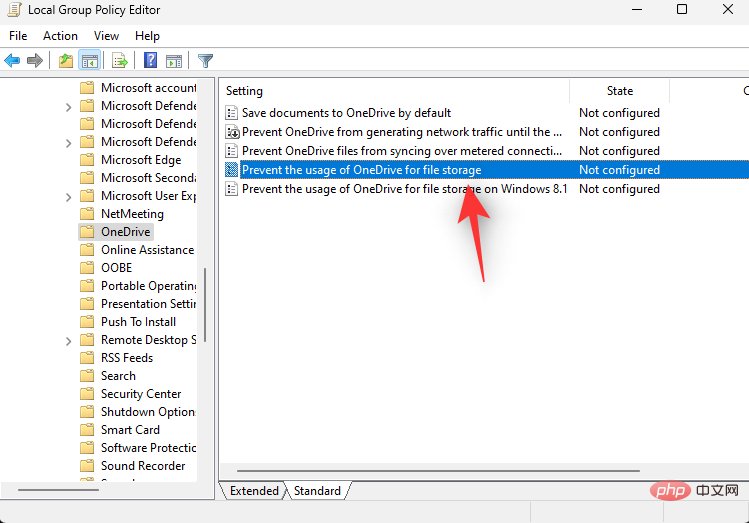
Select Enable.
Now click OK.
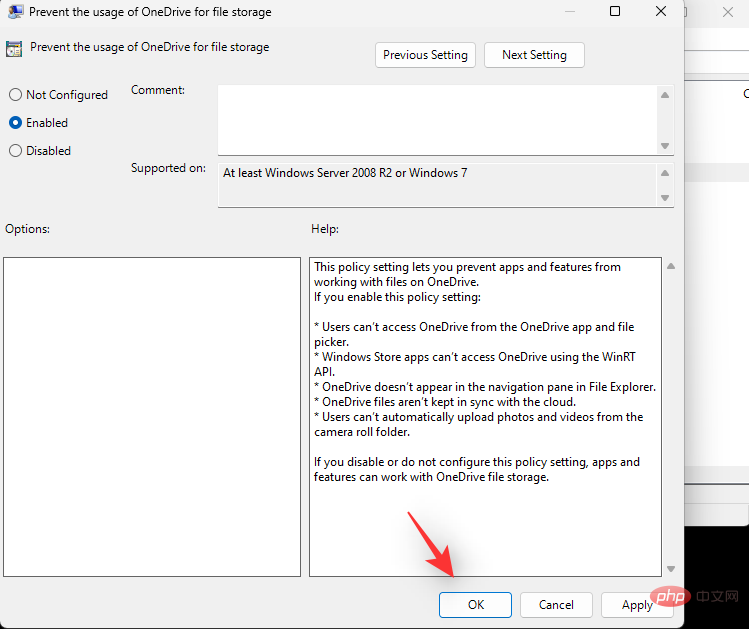
Restart your PC for good measure and OneDrive should now be disabled on your system.
Method 4: Using PowerShell
Press the Windows R keyboard and enter the following. Press the Ctrl Shift Enter keyboard.
powershell
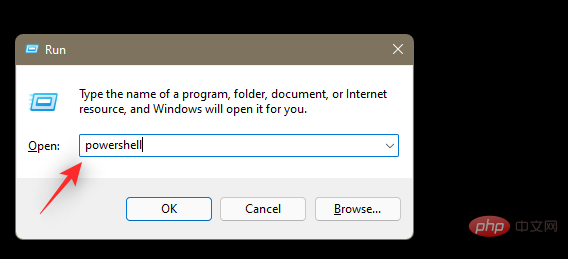
#Now type the following commands one by one and press the Enter key on your keyboard after each command.
taskkill /f /im OneDrive.exe<br>

- ## %SystemRoot%\SysWOW64\OneDriveSetup.exe /uninstall

- BC Uninstaller | Download Link
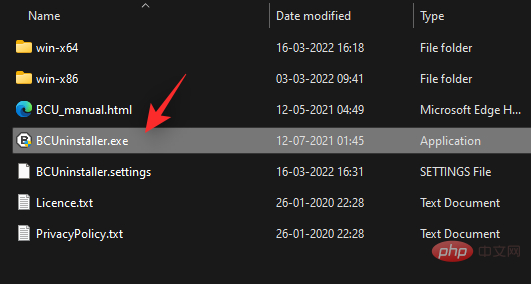
Microsoft OneDrive.
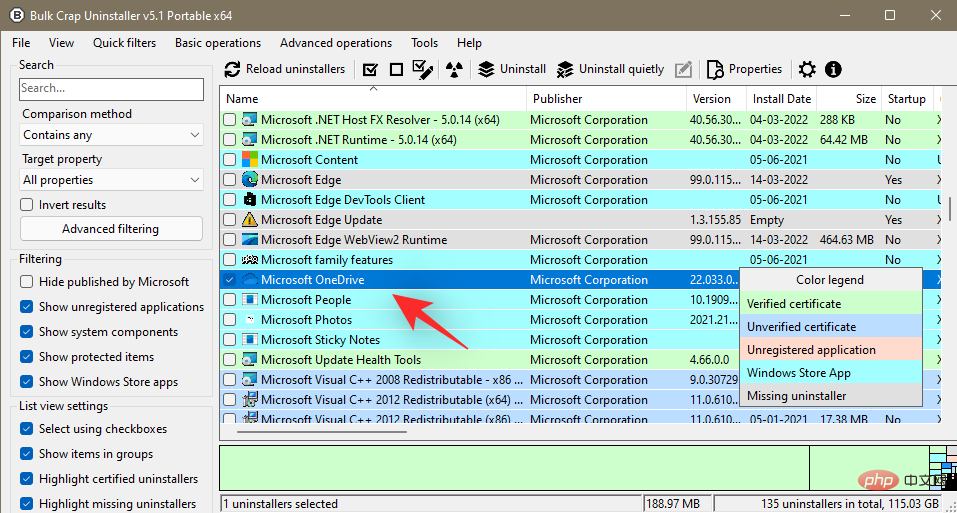
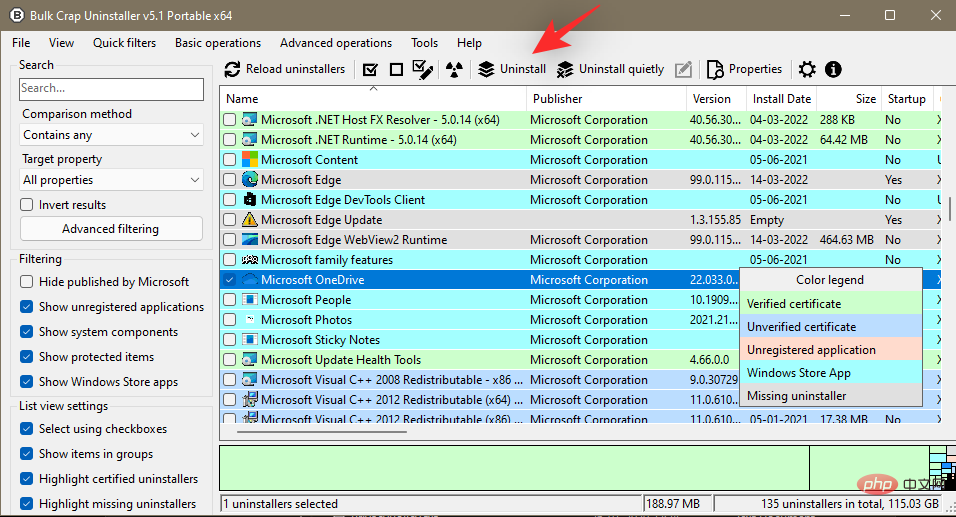
at the top to uninstall.
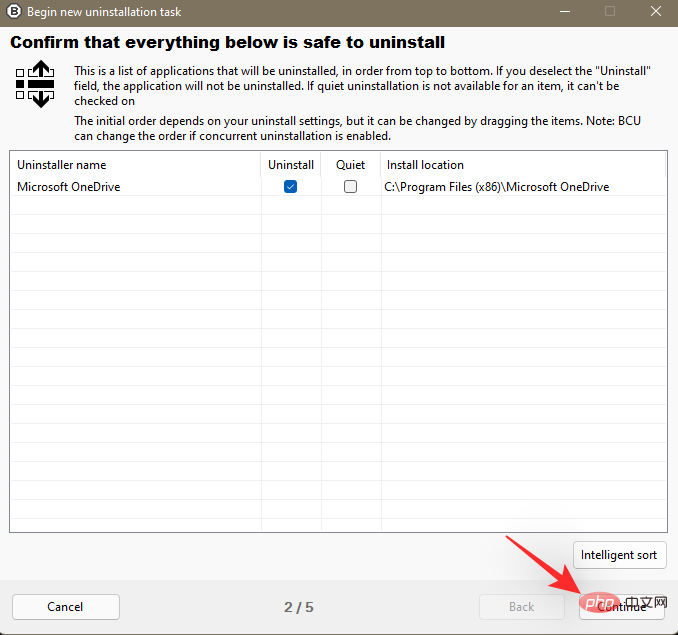
in the lower right corner of the screen to continue.
Continue again.
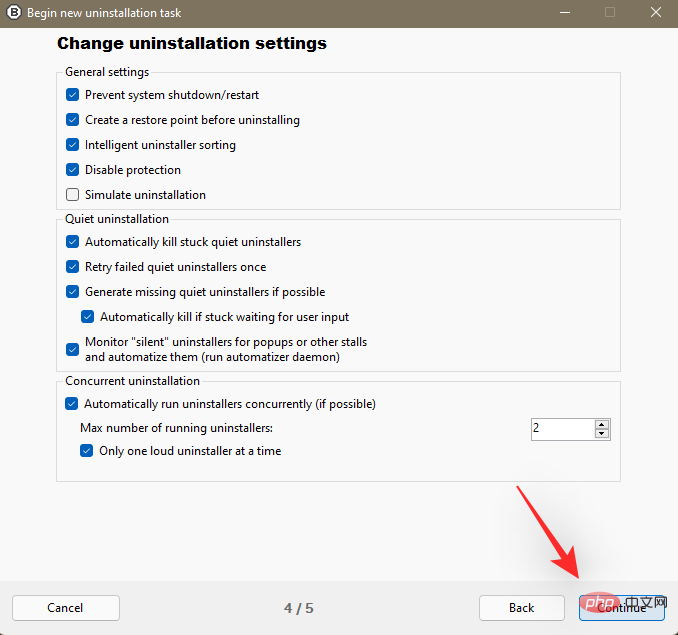
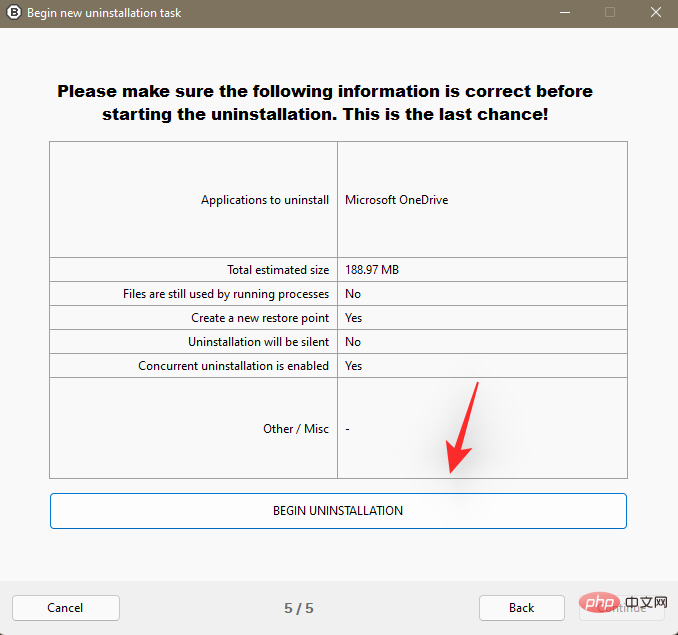
BEGIN UNINSTALLATION.
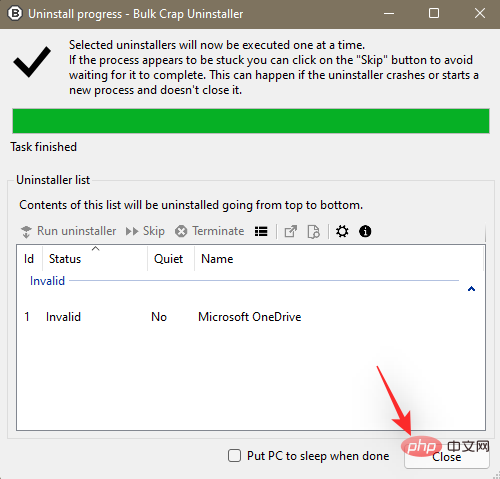
to close.
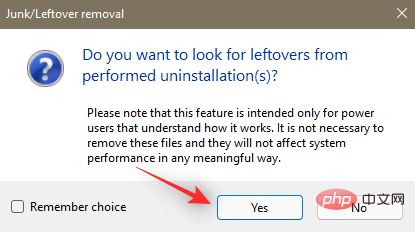
Yes.
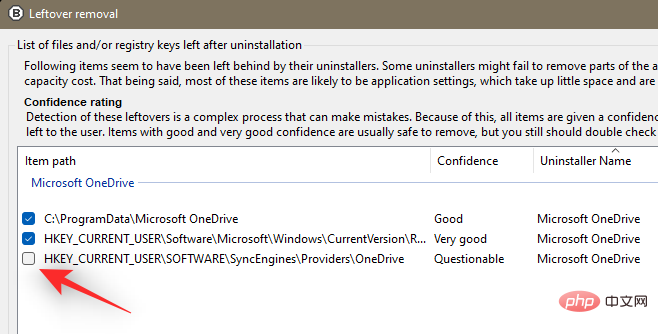
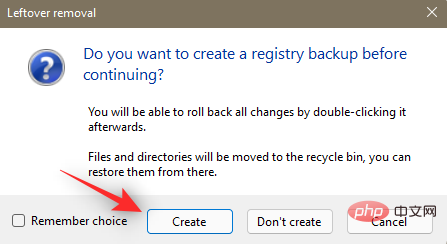
Delete Selection when finished.

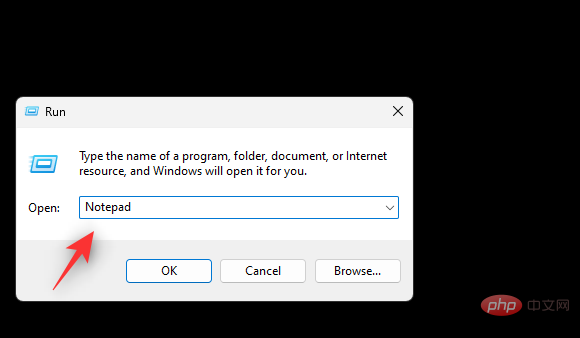
Windows R, type the following, and then press Enter.
Notepad
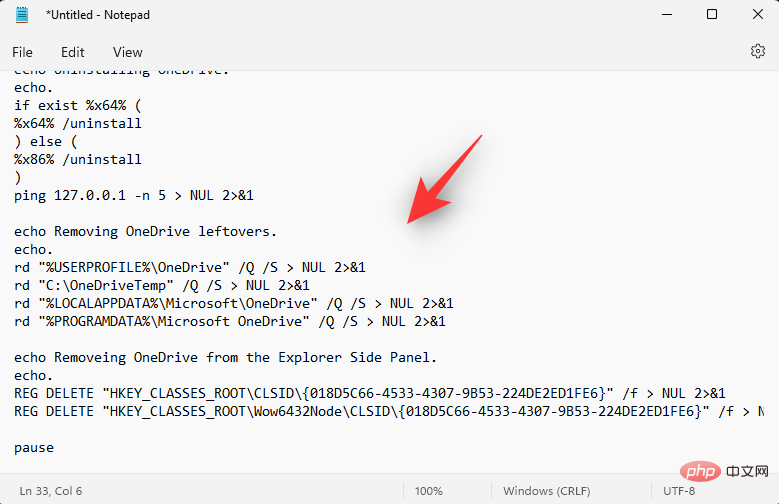
@echo off
cls
set x86="%SYSTEMROOT%\System32\OneDriveSetup.exe"set x64="%SYSTEMROOT%\SysWOW64\OneDriveSetup.exe"
echo Closing OneDrive process.echo.taskkill /f /im OneDrive.exe > NUL 2>&1ping 127.0.0.1 -n 5 > NUL 2>&1
echo Uninstalling OneDrive.echo.if exist %x64% (%x64% /uninstall) else (%x86% /uninstall)ping 127.0.0.1 -n 5 > NUL 2>&1
echo Removing OneDrive leftovers.echo.rd "%USERPROFILE%\OneDrive" /Q /S > NUL 2>&1rd "C:\OneDriveTemp" /Q /S > NUL 2>&1rd "%LOCALAPPDATA%\Microsoft\OneDrive" /Q /S > NUL 2>&1rd "%PROGRAMDATA%\Microsoft OneDrive" /Q /S > NUL 2>&1
echo Removeing OneDrive from the Explorer Side Panel.echo.REG DELETE "HKEY_CLASSES_ROOT\CLSID\{018D5C66-4533-4307-9B53-224DE2ED1FE6}" /f > NUL 2>&1REG DELETE "HKEY_CLASSES_ROOT\Wow6432Node\CLSID\{018D5C66-4533-4307-9B53-224DE2ED1FE6}" /f > NUL 2>&1
pause
按下Ctrl Shift S键盘。单击底部的下拉菜单,然后选择所有文件。
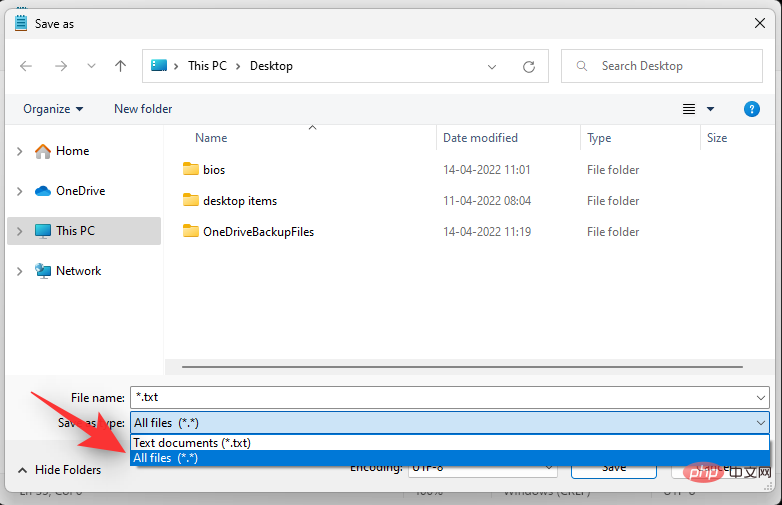
根据需要输入文件的名称,后跟 .bat扩展名。确保选择不带空格或特殊字符的名称。
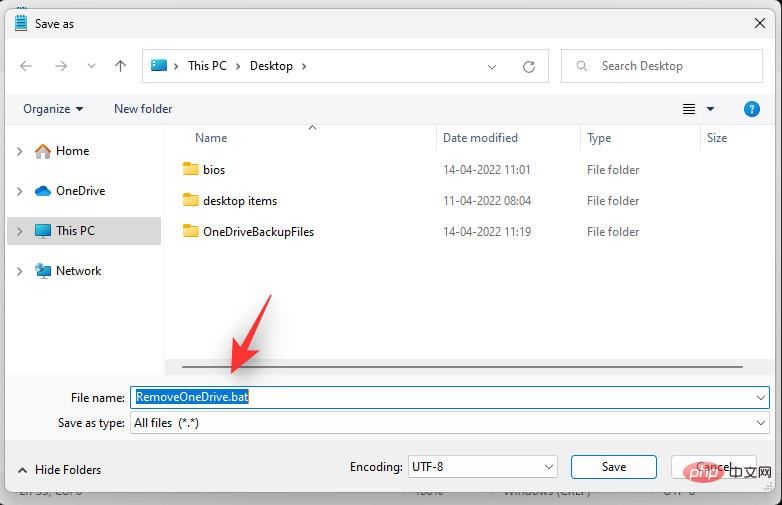
为您的.bat 文件选择一个位置, 然后单击 保存。
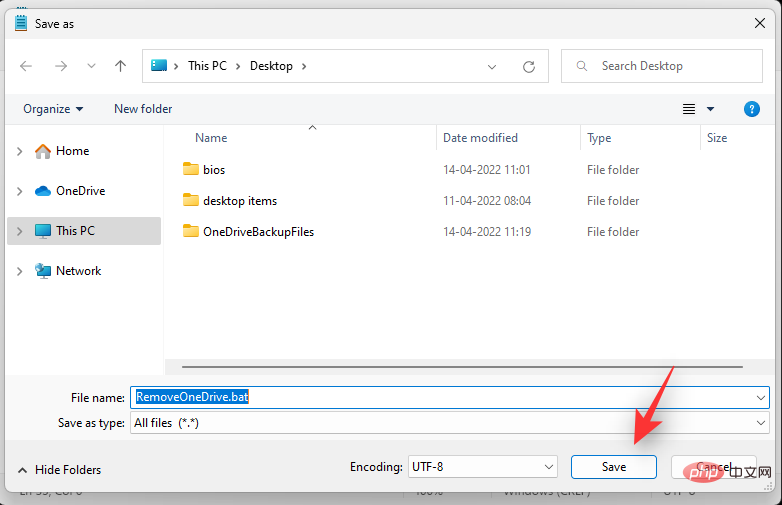
.bat文件现在将被创建并保存在选定的位置。 导航到相同的位置,双击并运行.bat文件。
OneDrive 现在将从您的系统中删除。
常见问题
以下是有关禁用 OneDrive 的一些常见问题,这些问题应该可以帮助您快速了解最新信息。
OneDrive 可以安全使用吗?
由于其庞大的用户群,Windows 系统吸引了全球黑客的大量关注。作为微软首选的云存储服务,OneDrive 也不得不忍受其公平的滥用份额。然而,尽管无数次成为目标,OneDrive 并没有被利用,迫使黑客空手而归。
OneDrive 通过与硬盘驱动器上的 BitLocker 同步来加密所有数据和文档。在传输过程中,Microsoft Cloud 负责处理加密,这本身就非常密封。
此外,Microsoft 的 OneDrive 按文件加密您的数据。因此,如果任何密钥被泄露,黑客将只能访问该特定文件,而不是该文件夹或驱动器中的所有文件。总而言之,Microsoft OneDrive 尽可能安全,为临时用户和专业人士提供足够的保护。
卸载 OneDrive 时会删除您的数据吗?
不会,卸载 OneDrive 时,您存储在云端或本地的数据不会受到影响。虽然通过 OneDrive 临时下载到本地存储的文件在卸载应用程序时会被删除。
为什么要禁用 OneDrive?
OneDrive 会自动启动并在后台运行,直到您禁用它,这可能会对资源不足的 PC 产生影响。因此,禁用 OneDrive 可能是减少一些 RAM 和 CPU 使用率的好选择。
Microsoft OneDrive 会影响 PC 性能吗?
Microsoft OneDrive 会定期检查新文件以进行同步,这通常不会对您的 PC 造成任何问题。但是,如果它开始处理太多文件,您的计算机很可能会变慢。在这种情况下,您可以停止 OneDrive 的同步过程并重新获得一些信心。
The above is the detailed content of 5 ways to teach you to disable OneDrive on Windows 11!. For more information, please follow other related articles on the PHP Chinese website!

